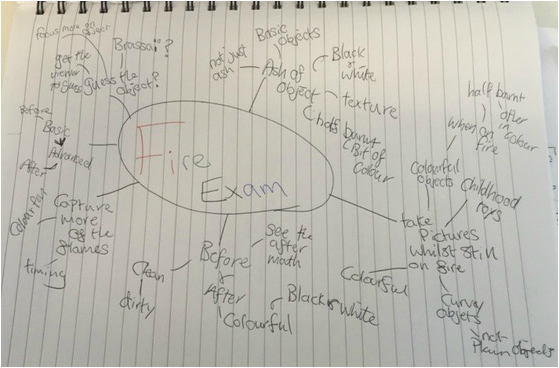
AO4-Altered States
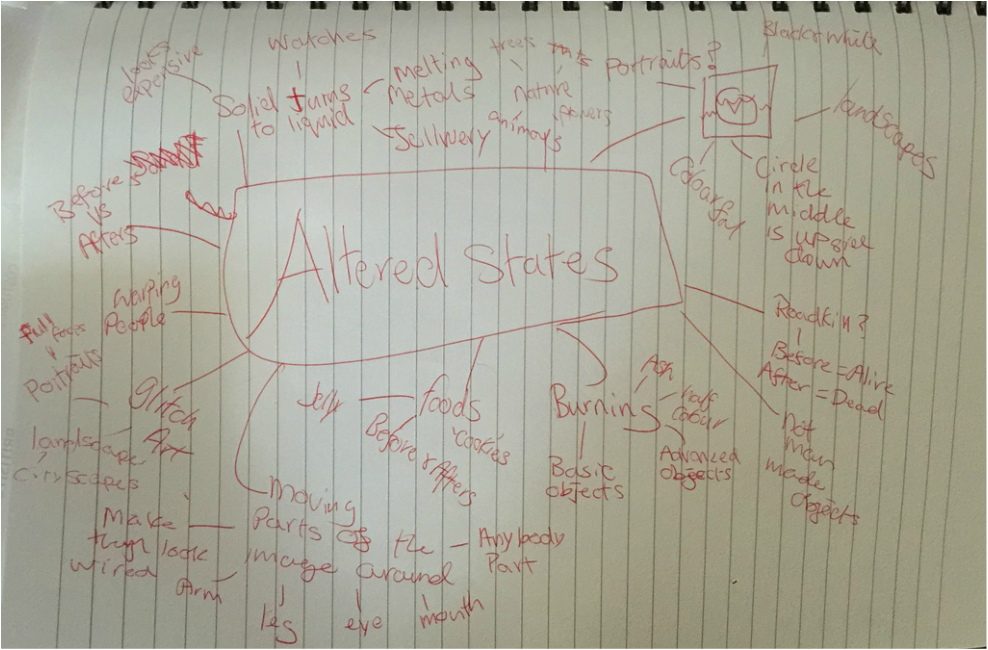
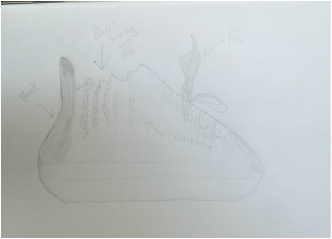
Brainstorm/Draft Sketch
|
|
Because of the unique nature of the idea I wasn't able to find any photographers that did a series of burning objects and taking pictures of the remains, So I found single images of object burning from different photographers.

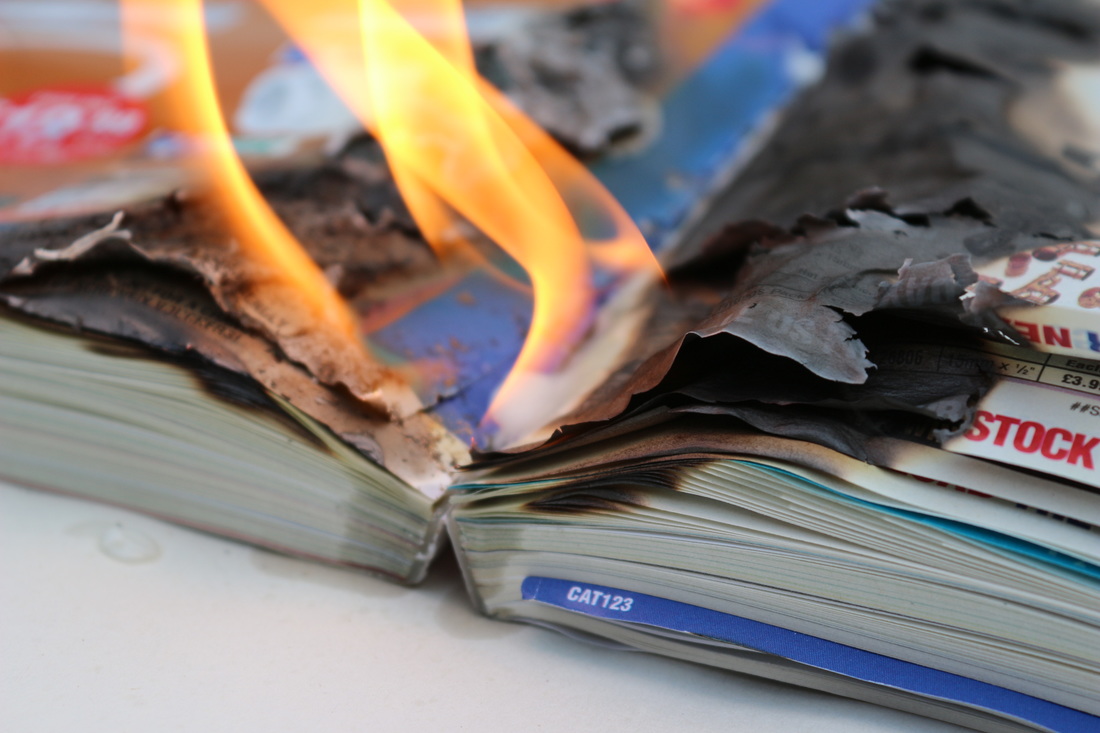
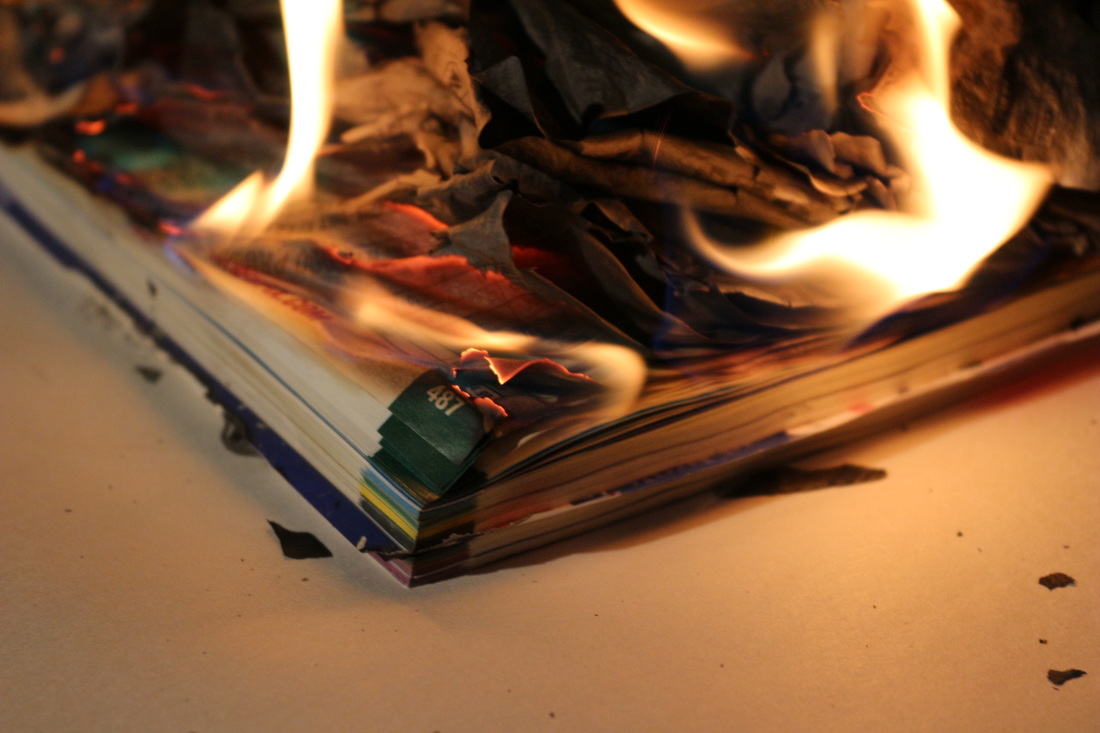
I think that this image of the book on fire with a pocket watch in the middle is a good photo because of the way and the timing of when it was captured, the book is open with some of the pages up and the fire is burning the book but not the whole book and the part that the fire started off with is now black and going to become ash and this image doesn’t look like it was photoshopped heavily which makes this image a good image because the photographer was able to capture all that was going on in the photo without have to photoshop any thing else into the photo. I also like how the background isn’t plain and boring but how it is the environment and you are able to see the green of the grass and the bottom is the table with a few pages out. The photographer was also able to capture the smoke coming from the book without it blurring the rest of the image.
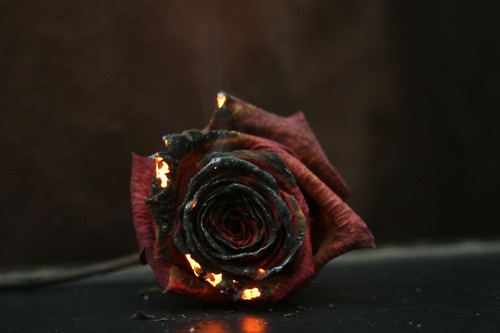
I like this image of the rose half burnt because of the way the photographer was able to capture the slow burning of the rose I also like how that the photographer also didn’t have to heavily edit this photo and how that there isn’t a lot going on in background of the photo witch makes the viewer focus on the rose and how that you are still able to see the colour in the rose and see that the rose is still on fire, Also how the photographer was able to capture all the detail in the rose and you are able to see the lines going though the rose and still be able to capture the fire and have it all in focus. I also like how the background isn’t one plain colour and how it is a dark colour so the burning rose stands out more.
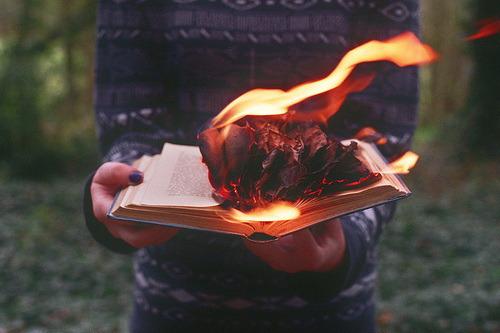
I also like this photo of the book burning because of the way the photographer got a person to hold the book whilst the book is on fire and how you can tell that the book isn’t slowly burning but how it is catching more pages on fire and in this photo the main focus is on the fire and the burnt pages. I like how the photographer got the person to hold the book and how the background behind them is a forest but the photographer was able to keep the person and the background blurred and still keep the viewers main focus on the book on fire.
Photoshop Tutorial

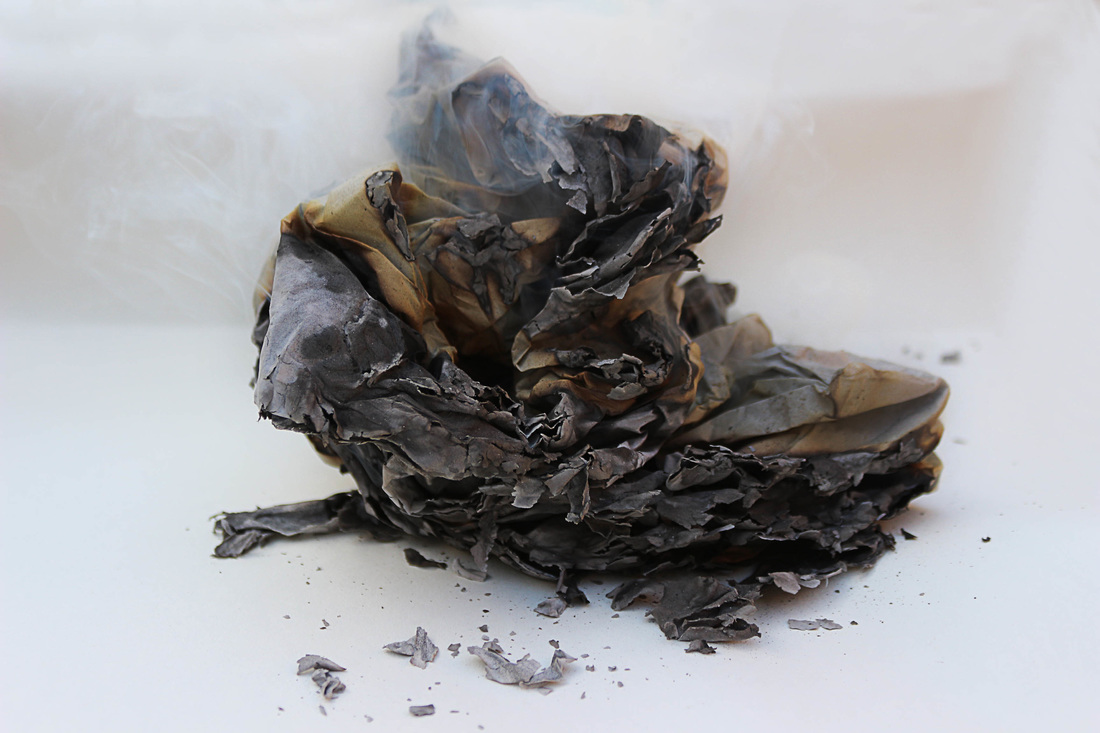
This is the image that I will be editing to make look more clean and give the burnt object more detail by using the tools that adobe photoshoot provides.
|

The "Clone Stamp Tool" is the first editing tool that I will be using to extend the edge of the image so that you are not able to see the brown cardboard in the background.
|

This is what it looks like when the "Clone Stamp Tool" is used to extend or replace certain parts of the image I also used it on the top side of the image so that the white background is the only thing that can be seen from behind the object.
|

Then I duplicate the layer so that I am able to proceed to my next step and so that I don't ruin the first layer and start from the beginning.
|

I use the "High Pass" filter to make the image more sharp and so that some parts of the image stand out more than others.
|

This is where you get to choose how sharp you want the image to be and if the number is too high then the image will look grainy or too sharp.
|

Then I use the "Overlay" layer setting so that the image is merged together and I can start to edit the image some more without have too many layers and so that when Im editing the actions are done to both layers.
|

Then I merge the two layers together so that when I start to edit the image the actions applied to both parts of the image the “High Pass” filter layer and the normal layer and so that there isn’t a lot of layers so that I don’t get confused with what layer is what. |
|

This is the final out come of the editing process and how the image isn't heavily photoshopped and how the editing process was able to bring out more detail in the burnt object and how we are able to remove the background.
|


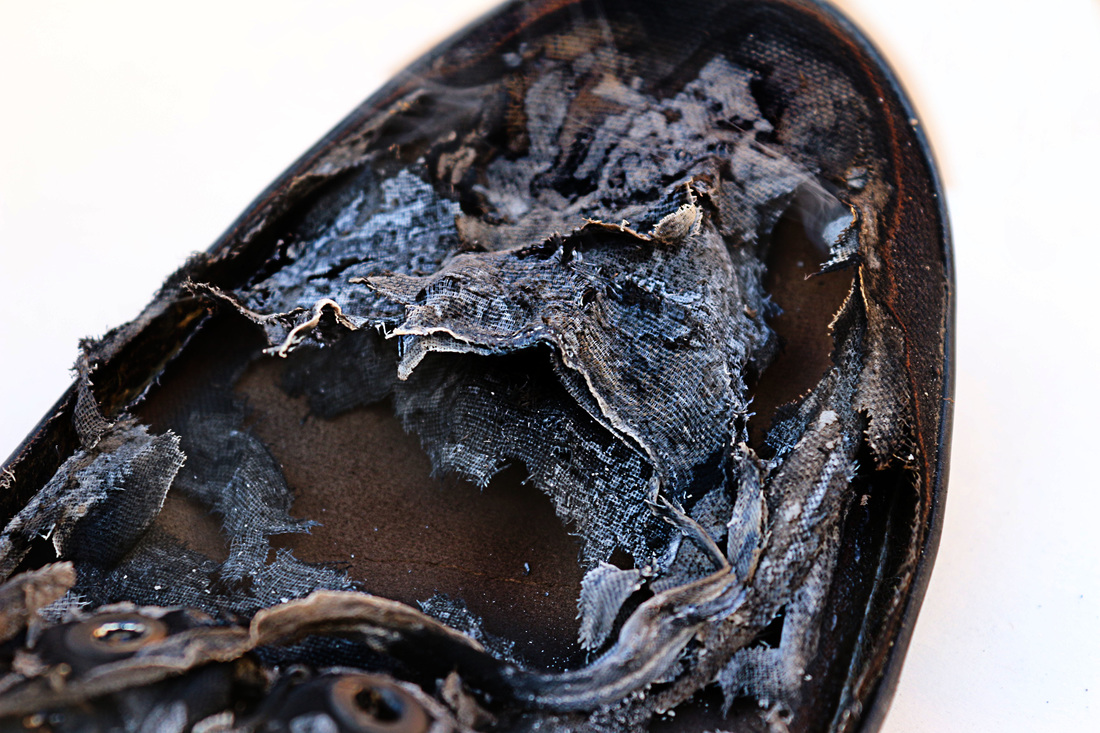
Photoshoot 1
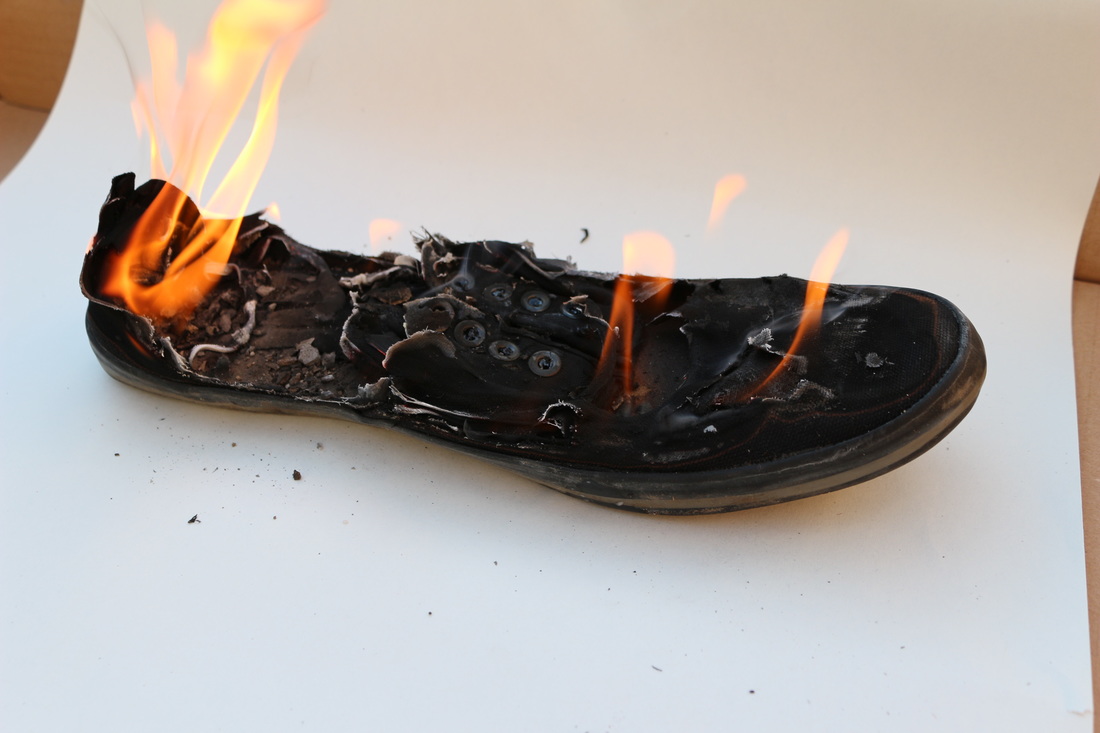
This photoshoot was ok because I was able to burn the shoe and get the brunt/ashy effect on the shoe and what didn't go so well was that when I was taking the photos the smoke from the shoe would make the photo blurry and makes the image look like it is out of focus and having to auto focus was hard because the camera was trying to focus on the smoke and not on the shoe and trying to manual focus was hard because I had to take the photo fast so that I could capture on the shoe there was a orange ring going around because of the fire but trying to manual focus would take a long time.
Three Strongest Photos
|
|
|
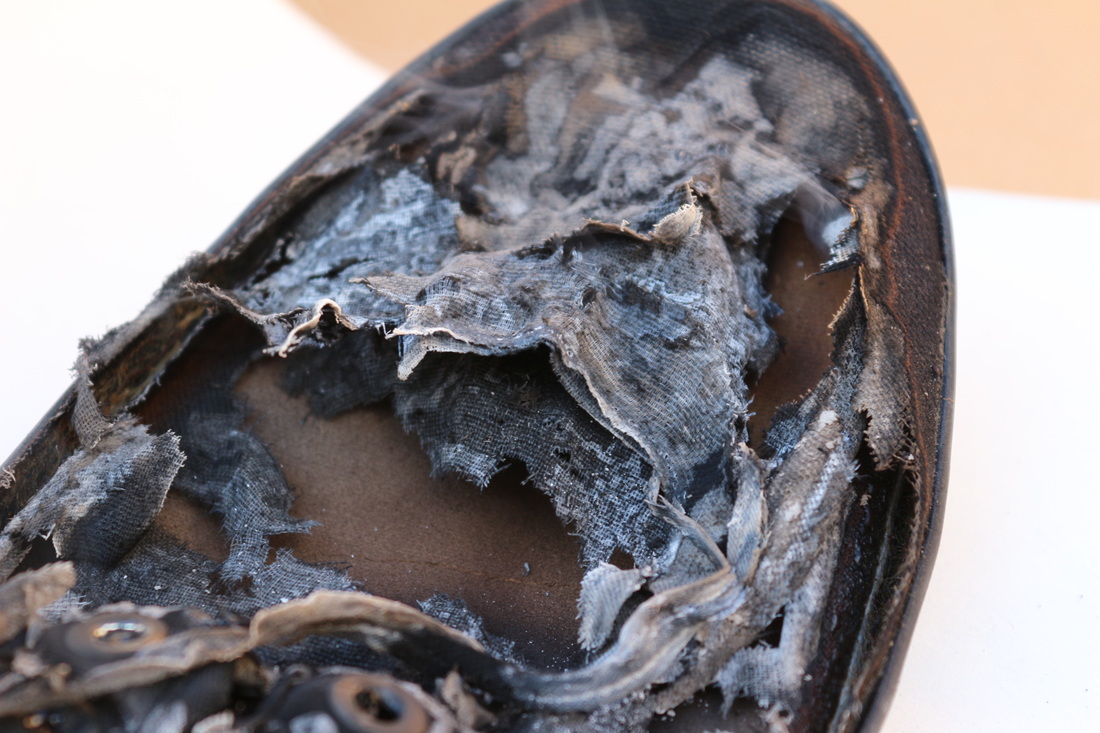
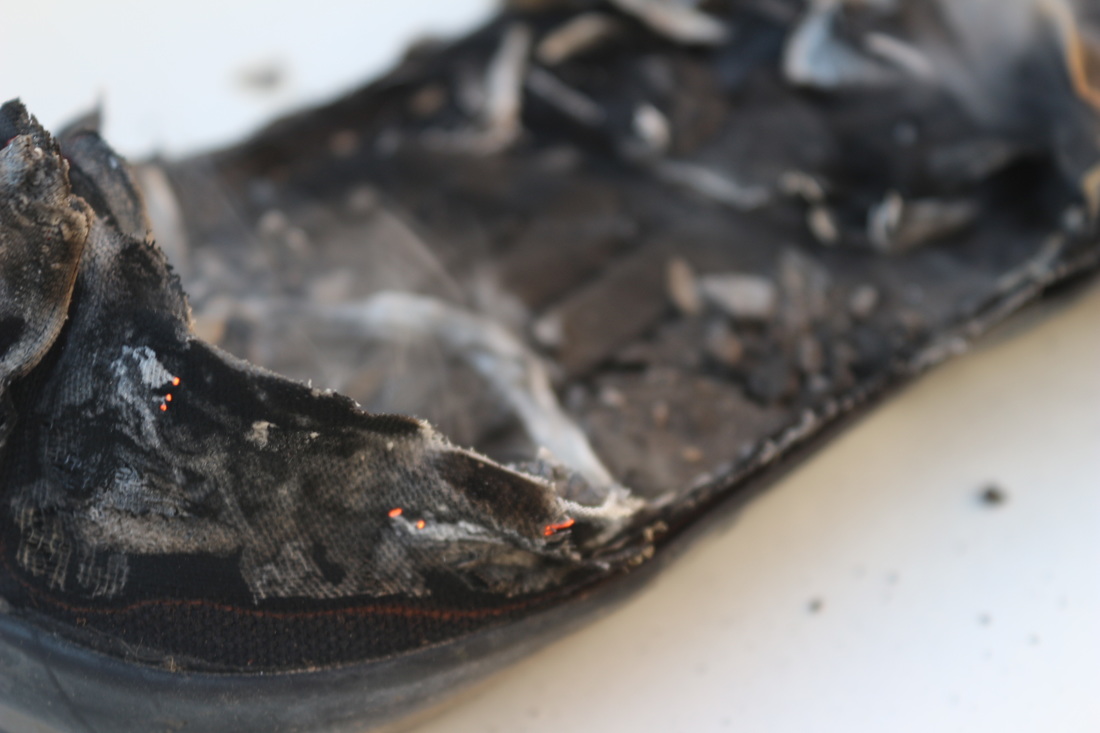
These photos are good because I was able to capture the fire as it was burning the shoe and the other two photos they are in focus and I was able to capture the ashy and burnt parts of the shoe and you are able to see parts of the shoe hasn't been burnt more than other parts you are able to still see the ashes in the shoe and how the inside of the shoe is.
Edited
This edited image is good because I was able to use the "Burn" tool to make more parts of the image more darker and able to see more detail. You are able to see the orange ring around the front of the shoe where it is still burning and you are able to see the ashy part of the shoe and you are able to see the detail in ash.
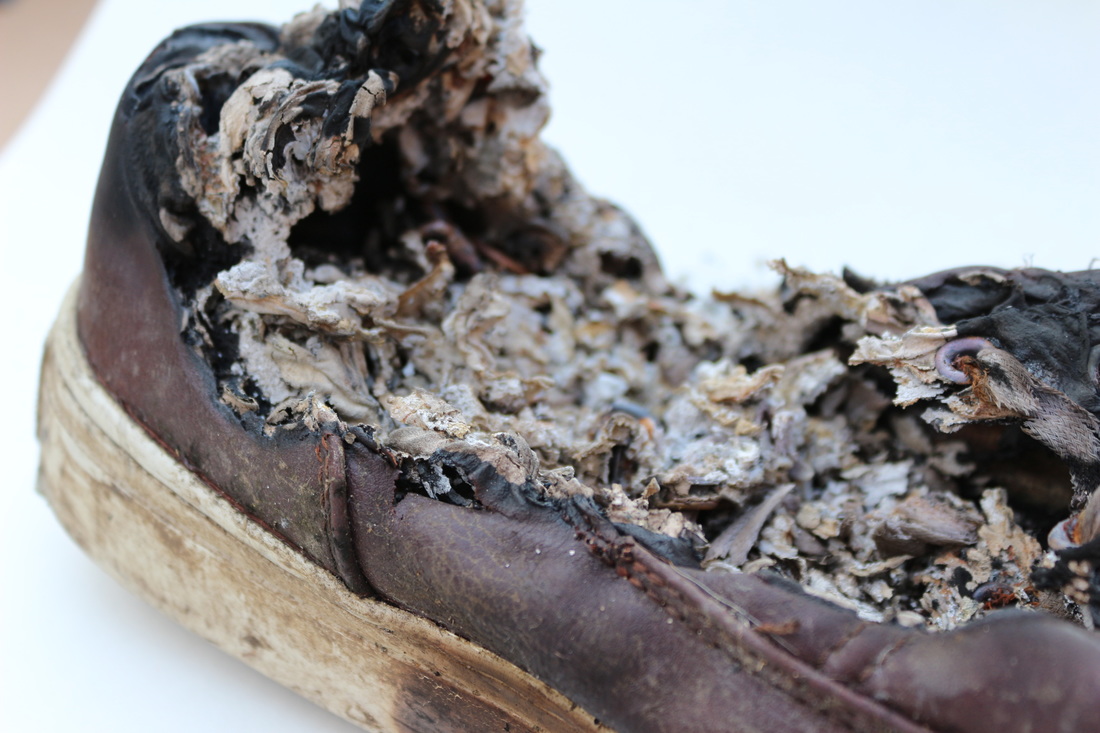
This photoshoot went well because I was able to take my time taking these photos because the shoe wasn't on fire and there wasn't any smoke coming out of the shoe because I let the shoe be on fire for longer and let the smoke go away before I toke the photo but I tried to use auto focus again and it would focus on the front of the shoe and not on the ashy and burnt up part of the shoe but as I was taking the photos the shoe caught on fire again and the smoke started again and made the photos blurry.
Three Strongest Photos
|

|
|
These images are the strongest because I was able to capture the burnt and ashy parts of the shoe and the images are in focus on the right part of the shoe and these images show the parts of the shoe that has been burnt and show the ashes still in the shoe and you are able to see which parts of the shoe have been burnt more than others.
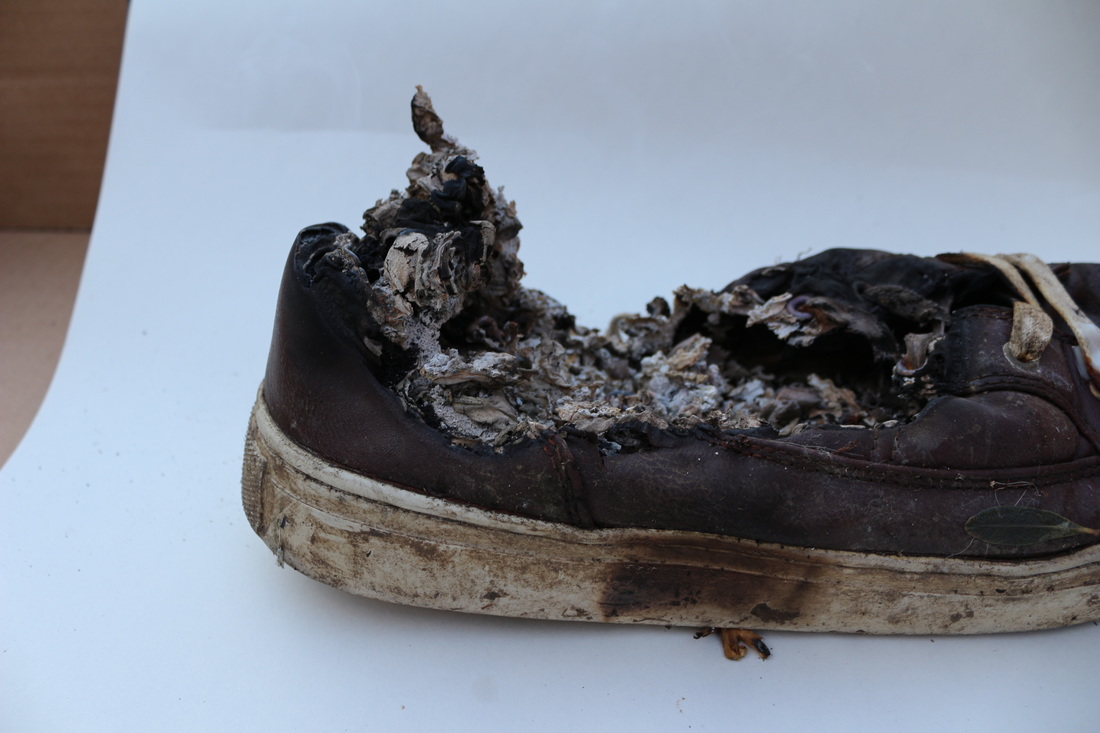
Edited
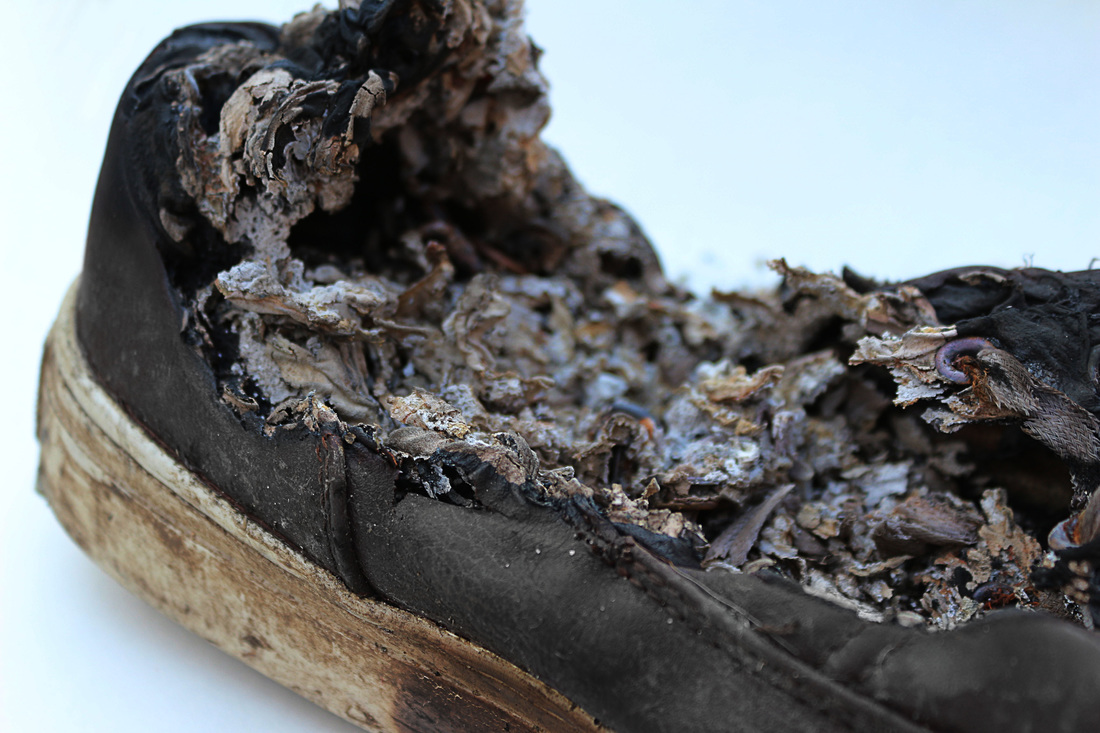
This edited photo was good because you are able to see all the ash and be able to see all the detail in the shoe after it was burnt and because there was still colour in the shoe where it didn't get burnt I was able to use the "Sponge" tool to remove the colour of the shoes leather and I was able to make it a grey colour so it looks like it has been burnt and it has been though a lot.
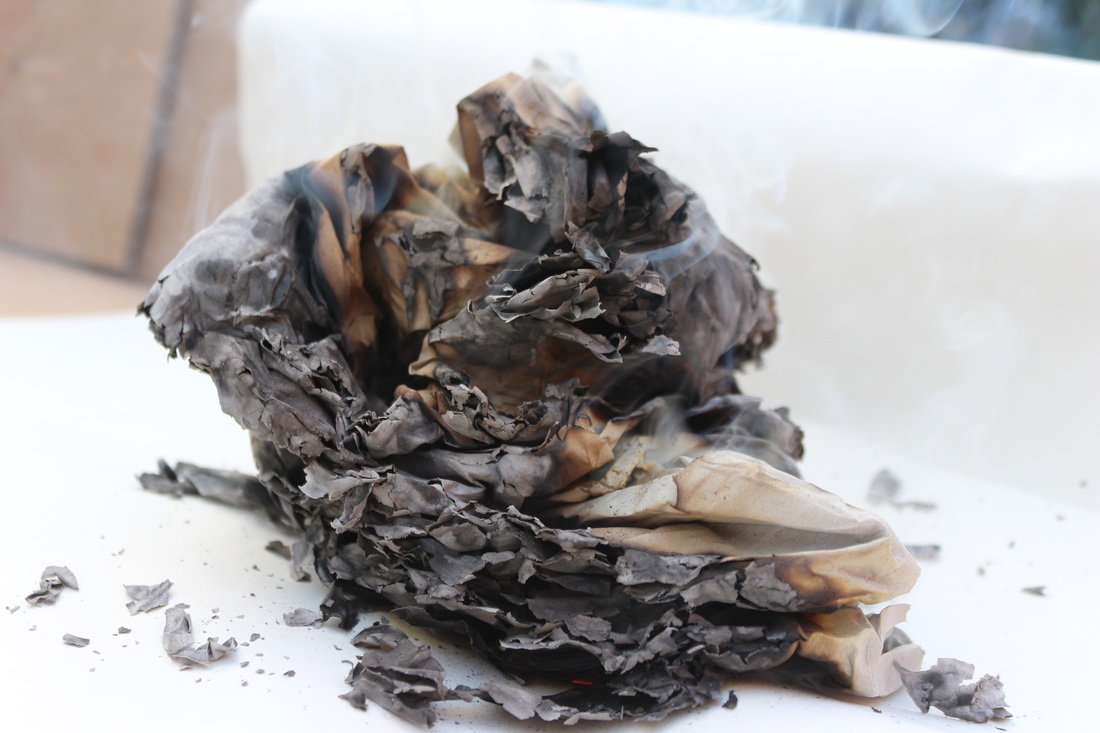
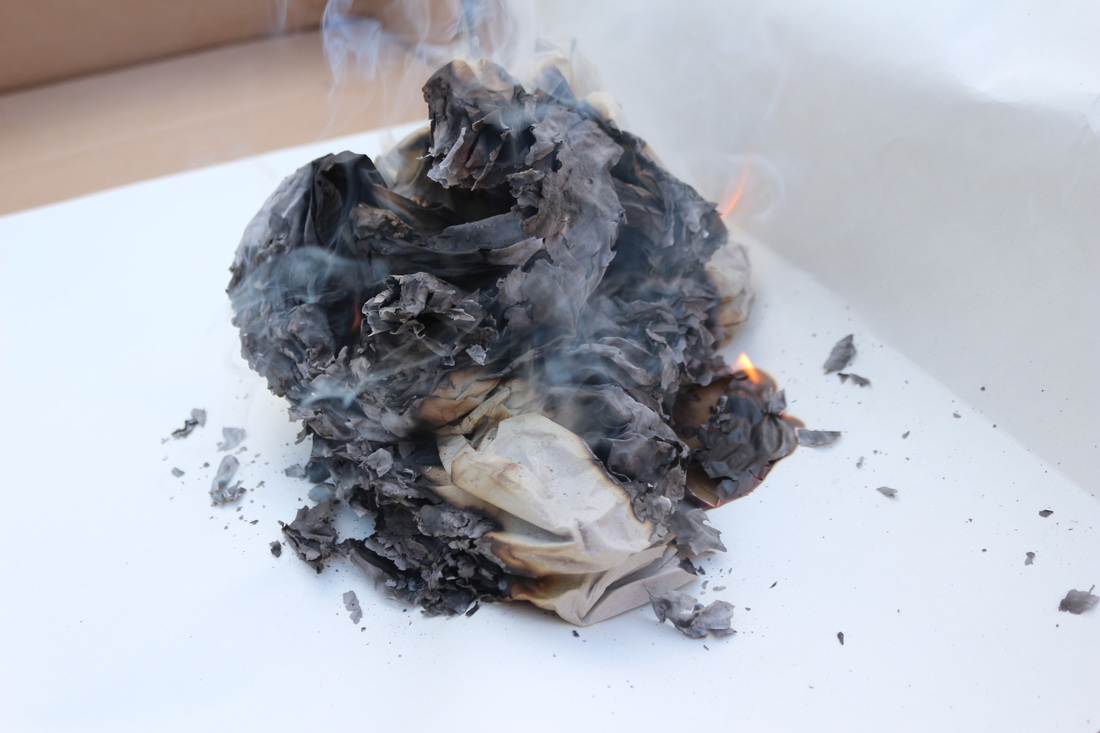
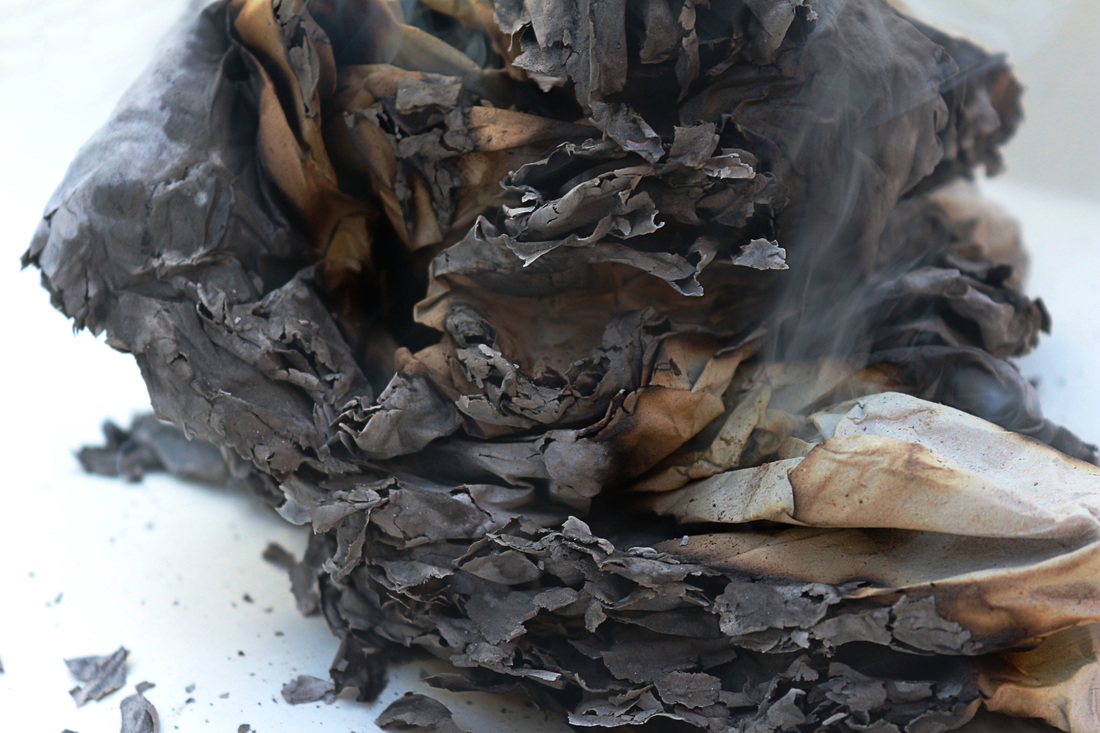
Photoshoot 3
In this photoshoot I used a scrunched up lot of paper with a lot of creases in it so when I put it on fire the fire would make the edges a black or a nice brown colour on the edges and leave the big and flat sides the normal colour. This photoshoot did go good at start because I was able to get pictures fast and in focus most of the time but the paper was still on fire and it set the background on fire.
Three Strongest Photos
|
|
|
These three images are the strongest because of that they are all in focus compared to the rest of the images and because I was able to capture all the different colours of the object and because of the object still on the white background it will make it easier for me to edit because of when getting rid of the background there is enough room from the object to the background. Also because I was able to capture the smoking still coming out of the object.
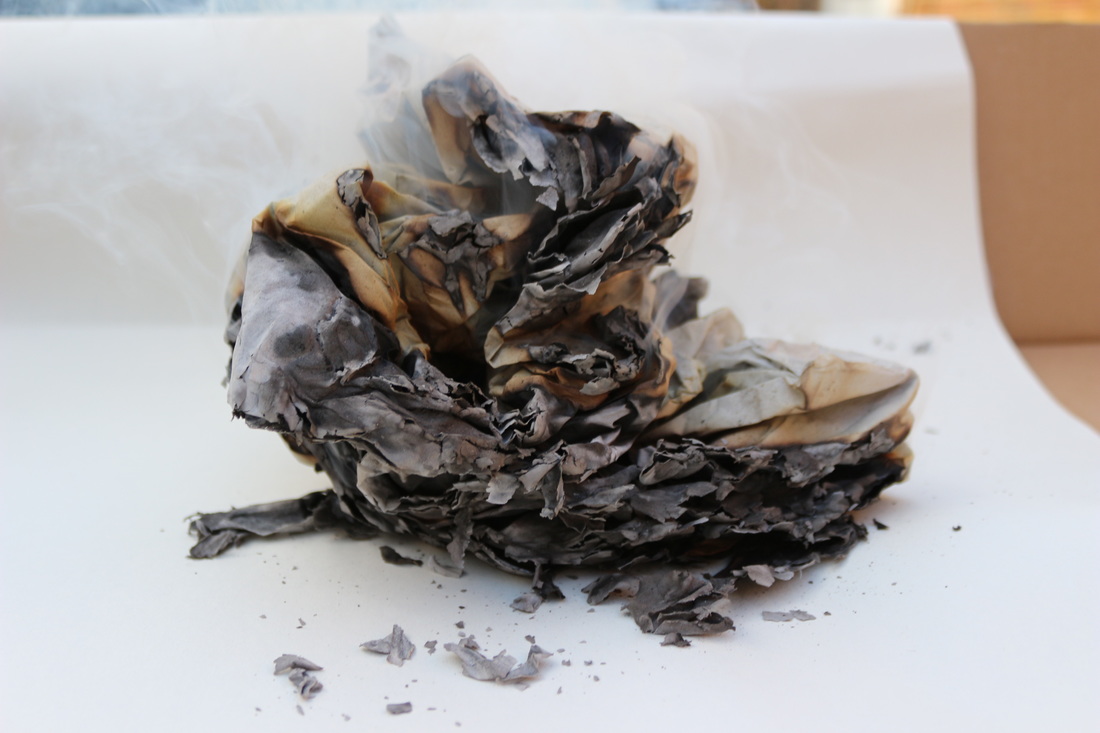
Edited
This edited image is good because i was able to use the "Burn" tool to show more of the brown parts or the paper so it can stand out more. I was also able to use the "Clone Stamp" tool to make some parts of the image white and so that you are not able to see the background which wasn't white. I did also use the "Dodge" tool to make the background more white and no as dark as it was so that the viewer focuses more on the burnt piece of paper. You are able to see the smoke that is coming out of the paper because I took the picture as soon as I toke out the fire.
This edited image is good because I was able to capture the whole burnt paper and I was able to capture the smoke still coming out of the paper and you can see some ashes on the floor which I think gives a good effect in photoshop I was able to use the "Burn" tool so that you are able to see the brown parts of the burnt paper and I used the "Clone Stamp" tool to make some parts of the image what by using cloning other white parts of the image.
Photoshoot 4
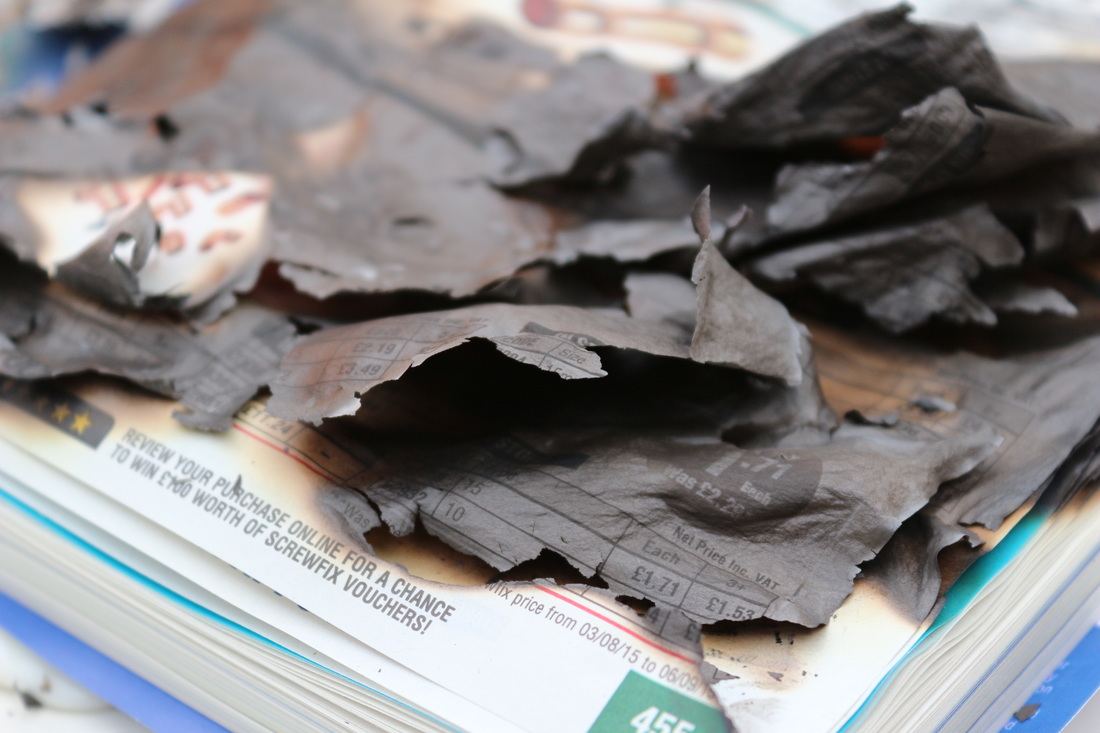
For this photoshoot I burnt the corners of the catalog so I could capture half of the book burnt and ashy and then the other half to be fine and in colour so I didn't burn the whole catalog. I also did this photoshoot during the day but the problem was that my flash on my camera would keep coming up and with over expose the photo so I had to use the "No Flash" setting so that the flash wouldn't come up and it made the photoshoot harder because I would have to hold the camera extra still so it wouldn't be blurry.
Three Strongest Photos
|

|
|
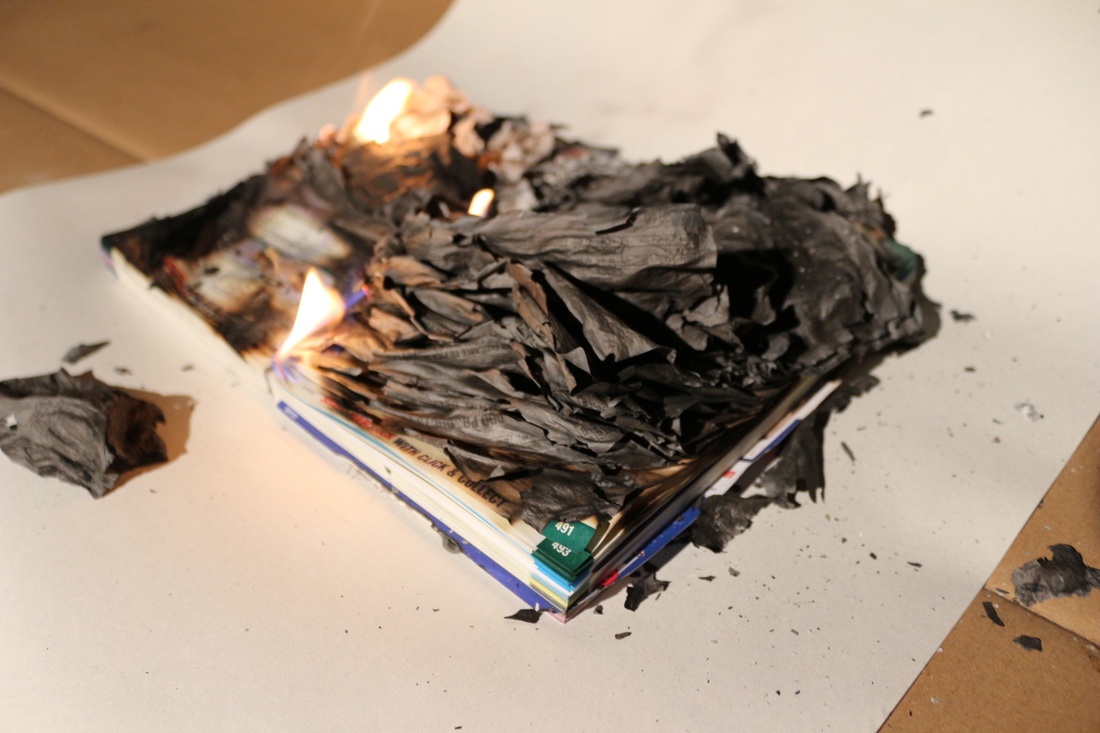
These three images are the strongest out of the photoshoot because of I was able to capture the parts of the book that were half burnt and half that is still normal so that the viewer is able to see how the book used to look like and how it now looks like, Also I was able to capture the fire still on the book without it making the rest of the image still burry. Also because of the parts of the book that are burnt you are able to see what was written on the book still and the corner of the book it had different colours for different parts of the book and you can see what the fire did to the book and how it changed the colour of the book.
Photoshoot 5
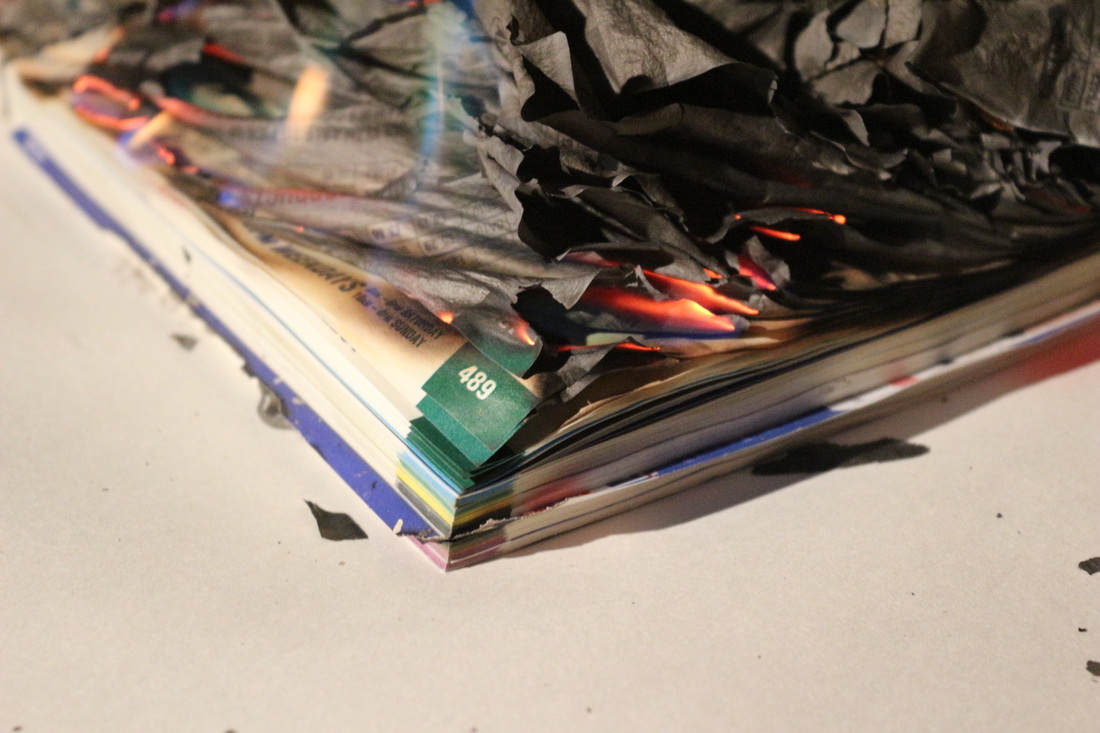
For this photoshoot I burnt a thick catalog at night so I could capture the flame coming off the book and it was successful because I was able to capture a green and normal flame that was coming off the catalog. I was able to use the "Close Up" setting on my camera without the flash coming on. Also this photoshoot was good because of the different colour flames that were showing in the dark and how that it changed the colour of the background.
Three Strongest Photos
|
|
|
These three images are the strongest in the photoshoot because of the way I was bale to capture the fire still burning parts of the book and how that effects the book whilst some parts of the book haven't been touched. Also because of how in one of the pictures the fire is giving its own lighting so so that the colour of the background has changed and gave it a darker orange look. Also I was able to capture the parts of the book that had not fire but were still burning and was giving the paper a orange look to the inside of the paper.
Edited

This edited image is good because I was able to capture everything in one is was able to capture the catalog burning and the normal and green flame still going on and the catalog is ashy and the other half of the catalog is not on fire so you are able to see how the catalog looked like before it was burnt.
Photoshoot 5
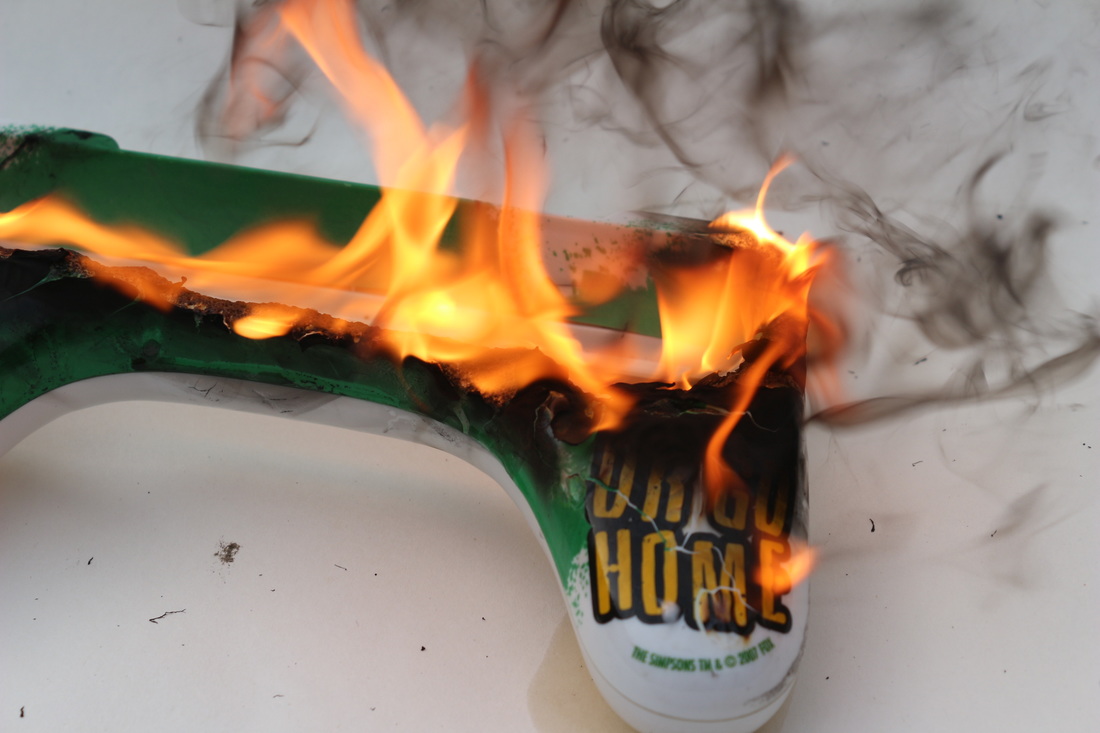
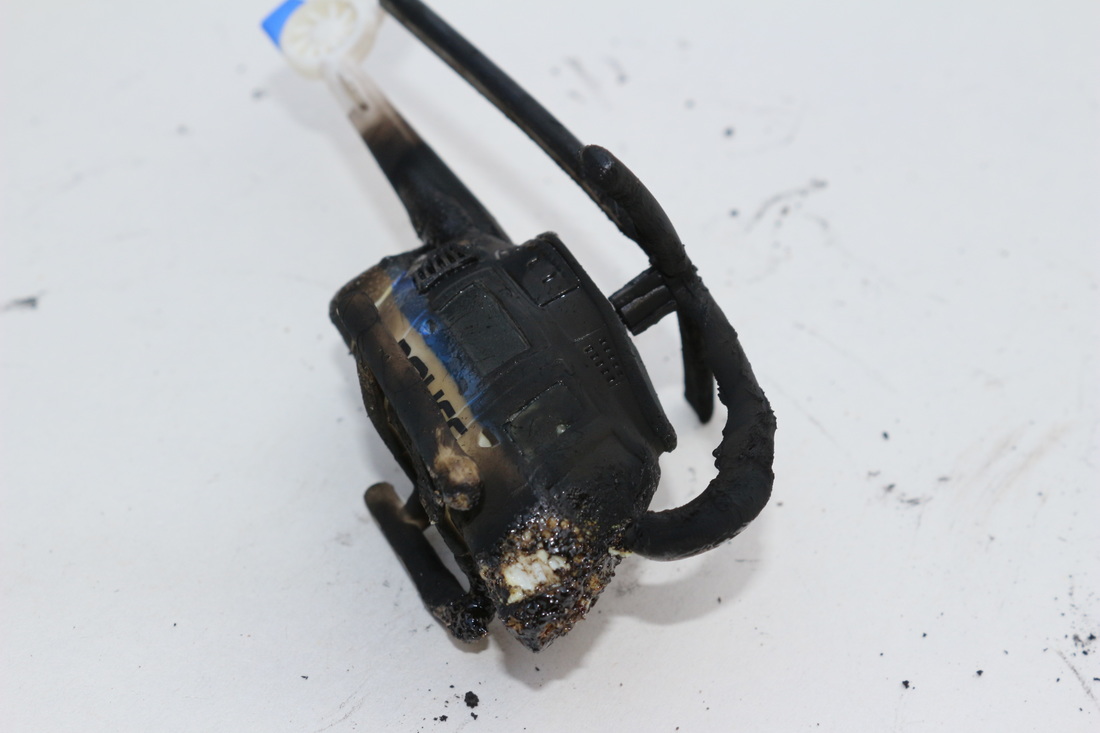
For this photoshoot I set on fire a Plastic controller and I was able to capture it whilst it was still burning and I was able to capture the smoke that was coming out of the controller but when the fire went out only some parts of the controller are burnt and it didn't change the shape of the object expect from the fire burning the image on the object and only little flakes coming of it.
Three Strongest Photos
|
|
|
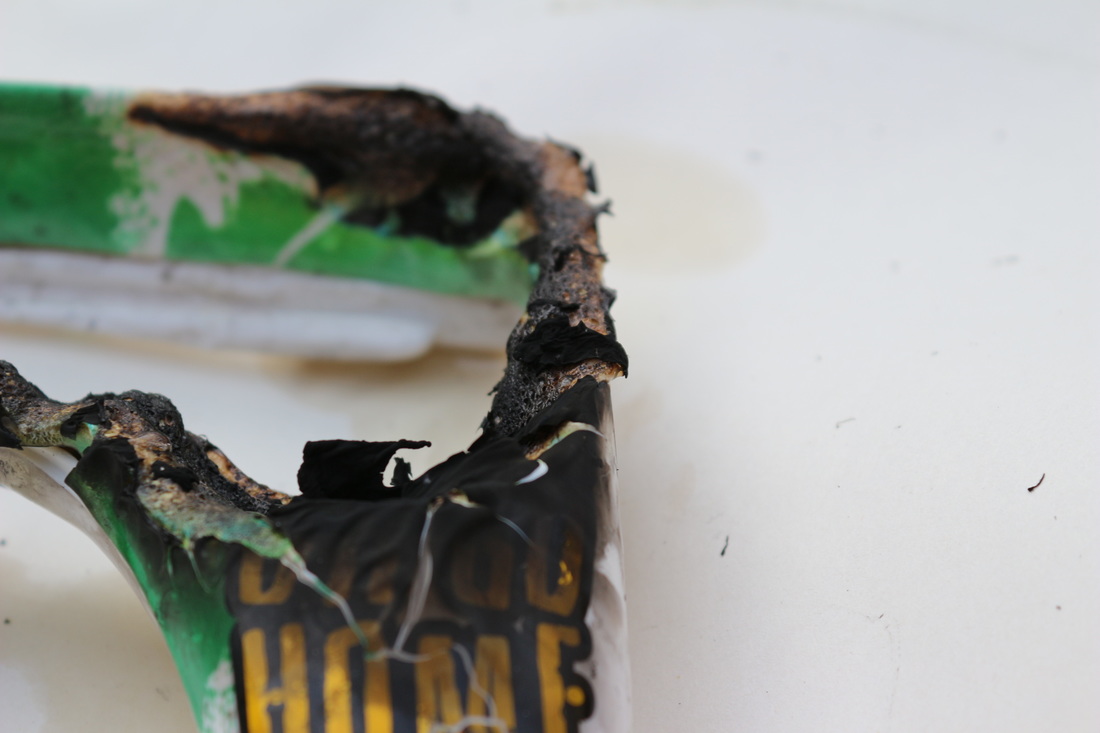
These three images are strongest because of they the effect of the fire on the controller and how that it got rid of the colour on the controller and the different kind of smoke that was coming out of it and how the controller looks like it was just rotting away somewhere and how the colour of the burnt part isn't just black but how the fire gave it a brown colour. Also that in the pictures you can see the original image how the fire has effect the image.
Photoshoot 6
For this photoshoot I burnt a children's throwing toy and I was able capture the toy whilst it was on fire but what the problem was that it caught on fire really quick and I was able to capture that but also the back part of the toy just melted and the fire spread to the background and caught the background on fire so I wasn't able to capture some parts of the toy whilst it was still on fire against a background because it caught on fire but after I put the fire out I was able to capture the image when it was finished being on fire. The toy was mostly burnt and you are able to see the burnt part of the toy and how it reacted to being on fire and how it just melted.
Three Strongest Photos
|
|
|
These three images show the effect that the fire gave to the toy ball and how in some of the image you can see the original colour and the viewer can guess the original shape of the image and how the fire effect the toy ball a lot and how the ball looks all melted and black and how the holes in the ball and smooth and some parts of the object are flaking off bit by bit.
Photoshoot 7
For this photoshoot I burnt a toy bear I started to take pictures of the object as soon as I lit it on fire so I was able to capture the whole process of the object melting and burning because the object would not stop burning I had to water it down so when I put the object back on the background the background soaked up the water causing the background to change colour. The photoshoot did go successful because of how the toy bear burnt and how the colour of the fake fur changed and half of the face was burnt and some parts of it showed the inside of the toy and it was filled with red stuffing witch made it look like it was bleeding and the eye of the toy was also burnt and kinda melted giving the toy the effect that I wanted it to be.
Three Strongest Photos
|
|
|
These three images are the strongest because of how the fire effect the boy a lot and how in these picture you can see some parts of the inside of the toy and how it looks like blood and looks a bit gory for a toy, also that there is no fire or smoke in these images and how they are all to do with the shape, texture and overall look of the toy and the massive effect it had on it.
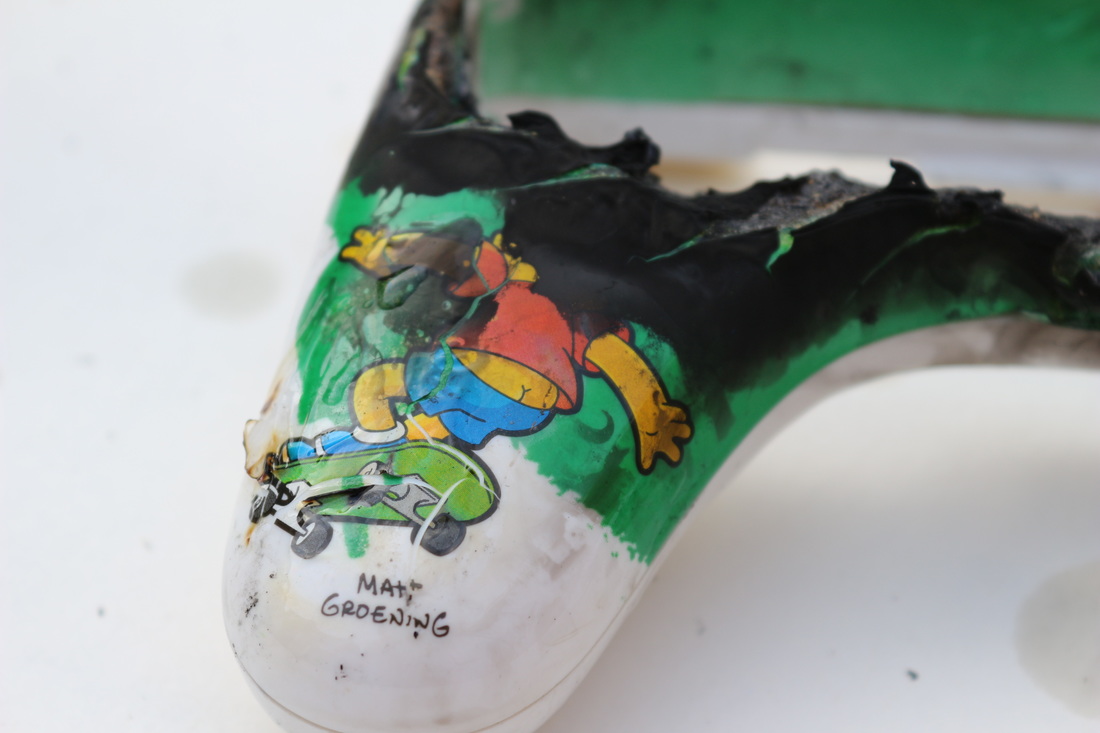
Photoshoot 8
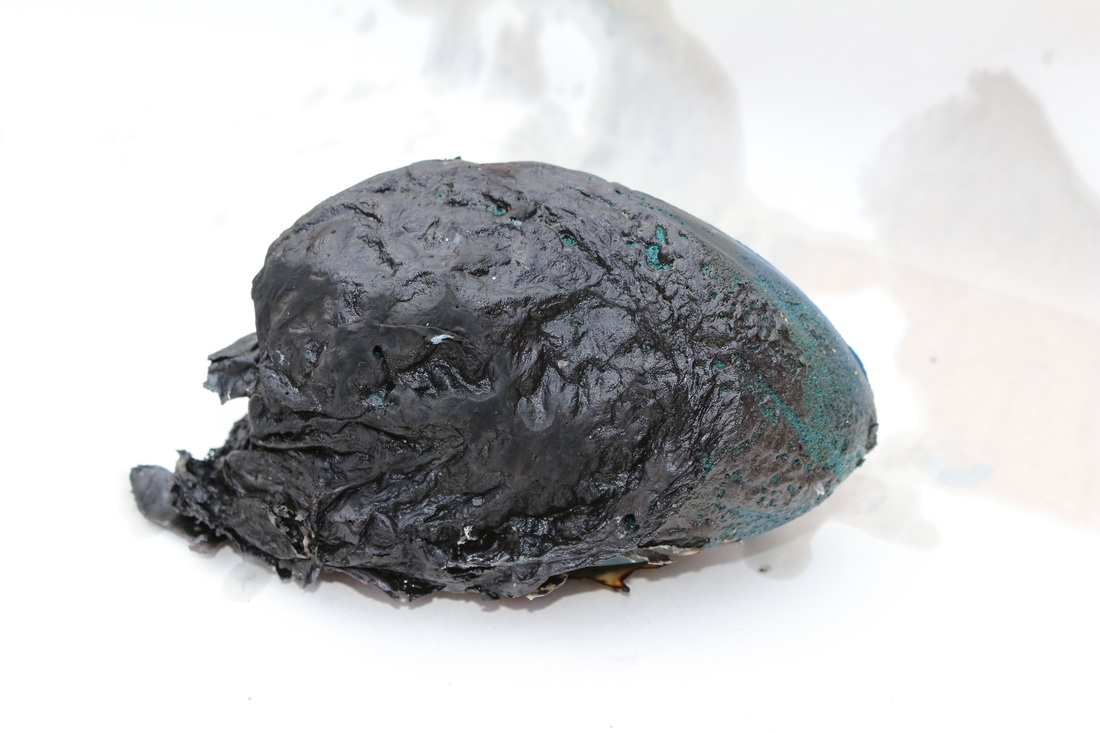
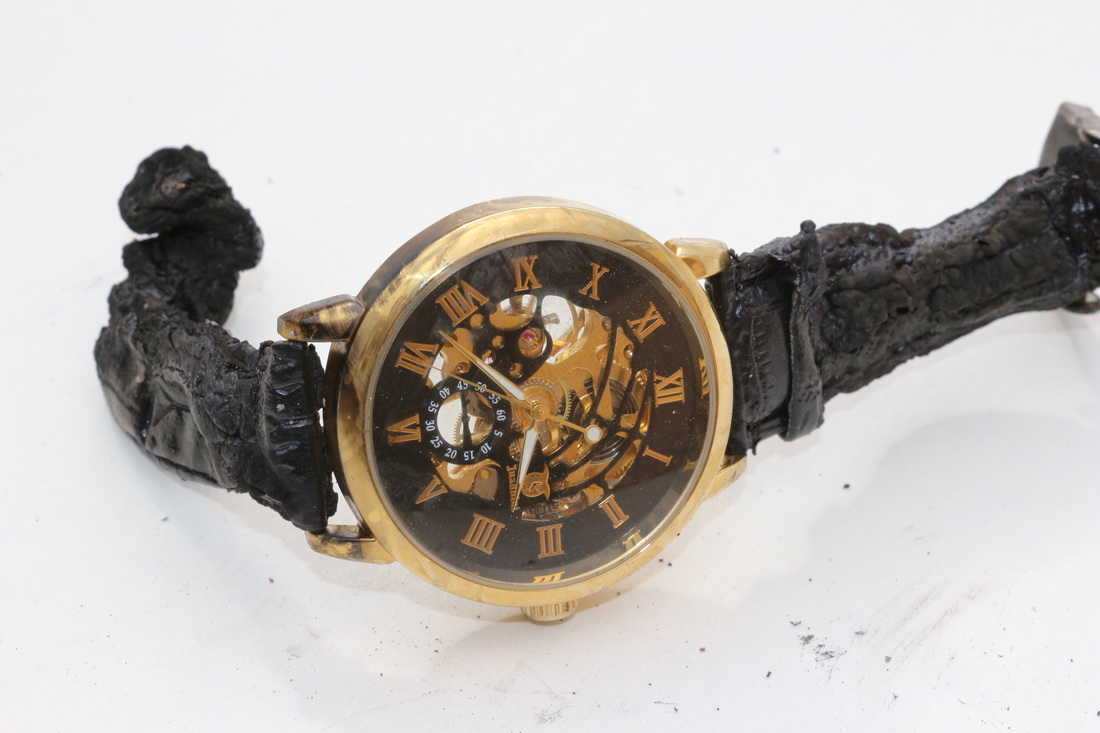
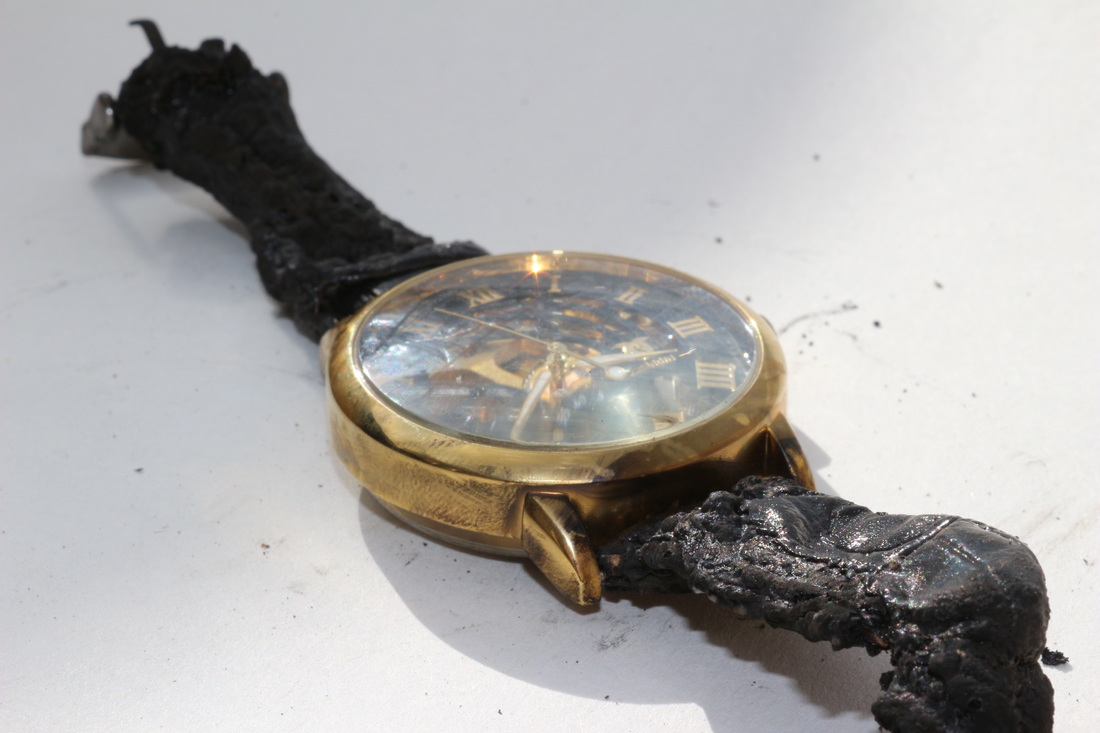
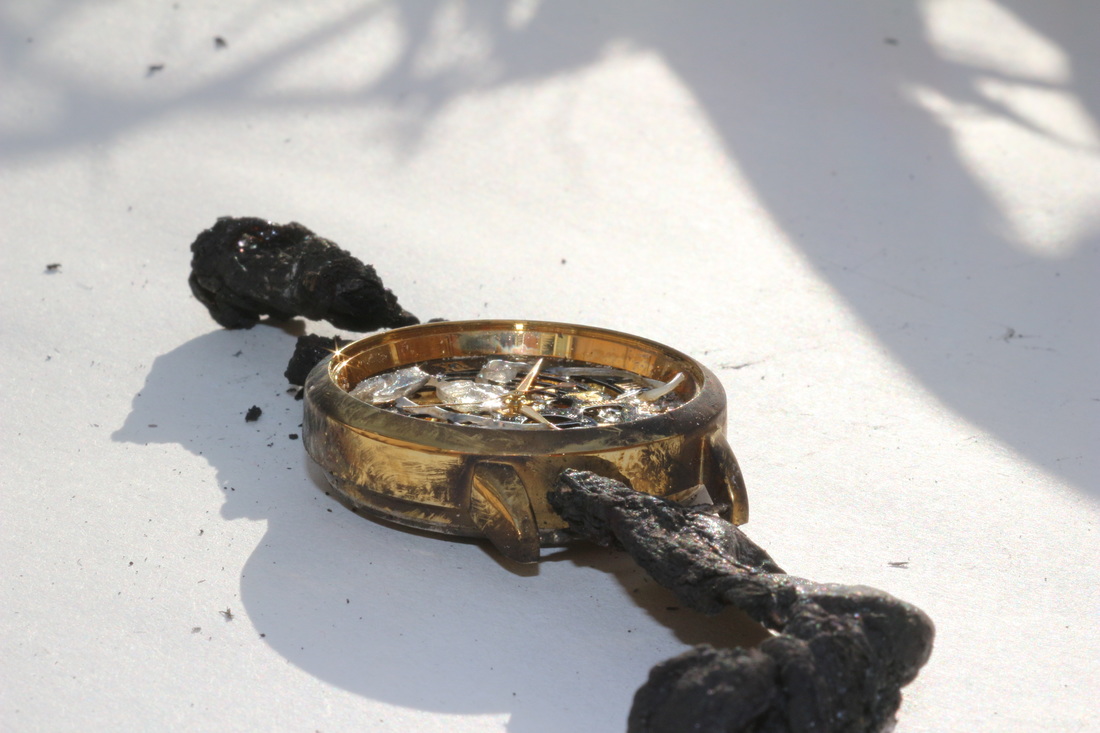
For this photoshoot I burnt a watch, I started to take pictures of the object after the fire was put out and I was able to capture the burnt leather straps and how they went wrinkly and a little curly this photoshoot was successful because I was able to capture the burnt straps and the burnt face of the watch which went a bit black because of the fire trying to burn it but what could of gone better is if I could capture the burnt straps a bit more because other than the straps you are not able to tell that the watch is burnt. In some photos I have captured the burnt parts of the watch with the face of the watch. I will try this photoshoot again but will crack the glass of the watch and try and burn the inside of the watch to see if the colours will change on the inside and to see if the hands of the watch will melt.
Three Strongest Photos
|
|
|
These images are the strongest because of detail they show in the watch and how they are focused on the face of the watch and on the straps of the watch which are the most burnt part of the watch. Also the little black dots on the floor of the background say more that the watch has been though something that has caused it to crumble. Also the black smudges on the gold part of the watch show it has been burnt.
Photoshoot 9
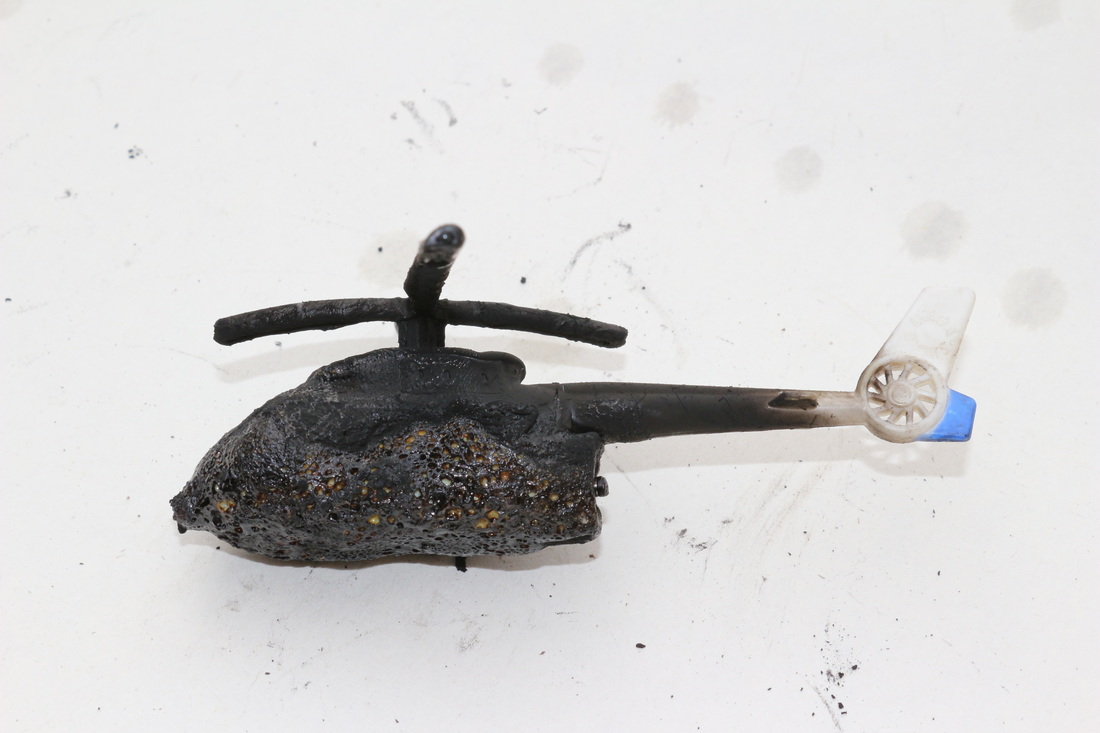
For this photoshoot I burnt a toy helicopter, I was able to capture the object after the fire was put out because I had to burnt this object bit by bit because of it not catching on fire so only some parts of the object are more burnt than others and I think this photoshoot went well but could of gone better because of the object not fully catching on fire you are able to see the original colour of the toy and how it looks when it is burnt the front of the toy was burnt more than the other parts and this made the toy melt and leaving holes in the toy and the toy looks old and it looks like it is either a bee hive or looks like it has rotten away for a long period of time.
Three Strongest Photos
|

|
|
These three images are the strongest because they all show something different in the pictures they all have a different angle and show a different part of the object. They all show a different stage of the burning process and how each step showed a different result in the process. Also you can see the front burnt end of the helicopter and the other end where its still pretty normal.
Photoshoot 10
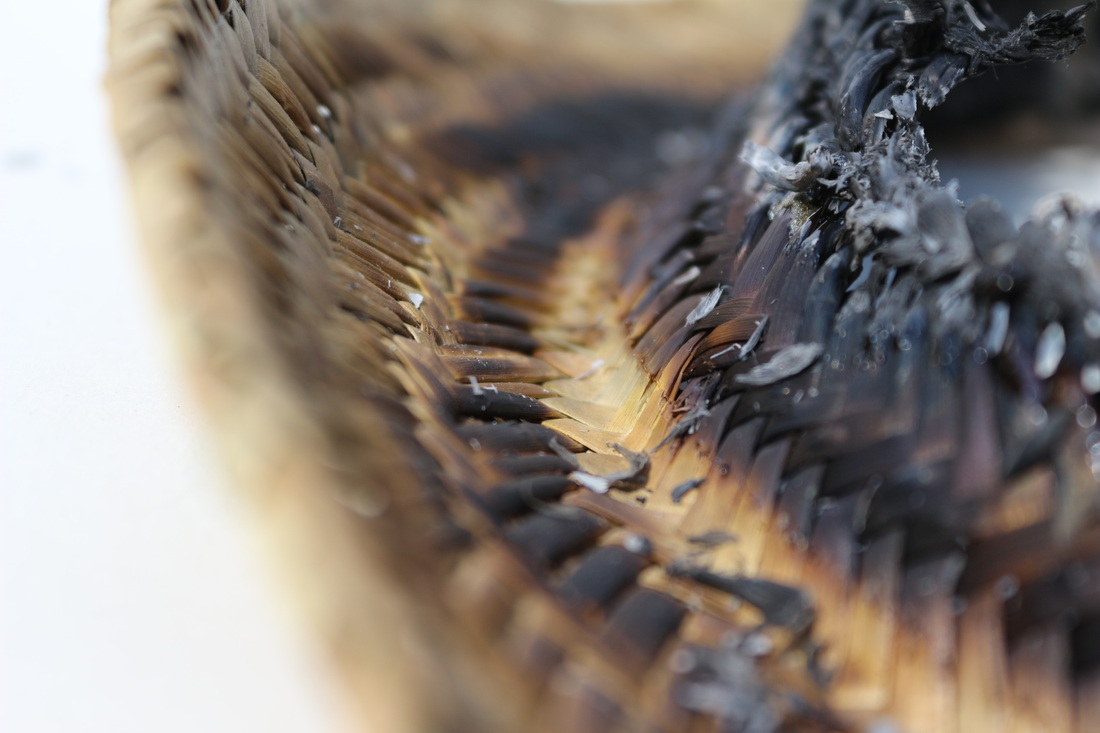
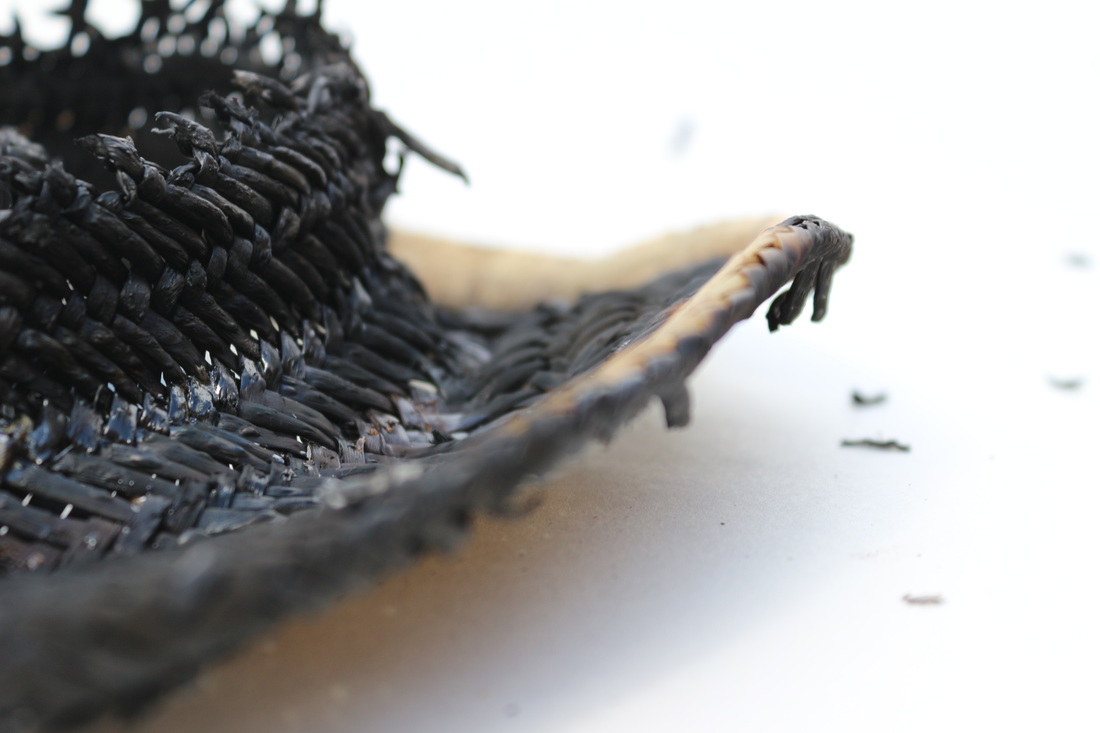
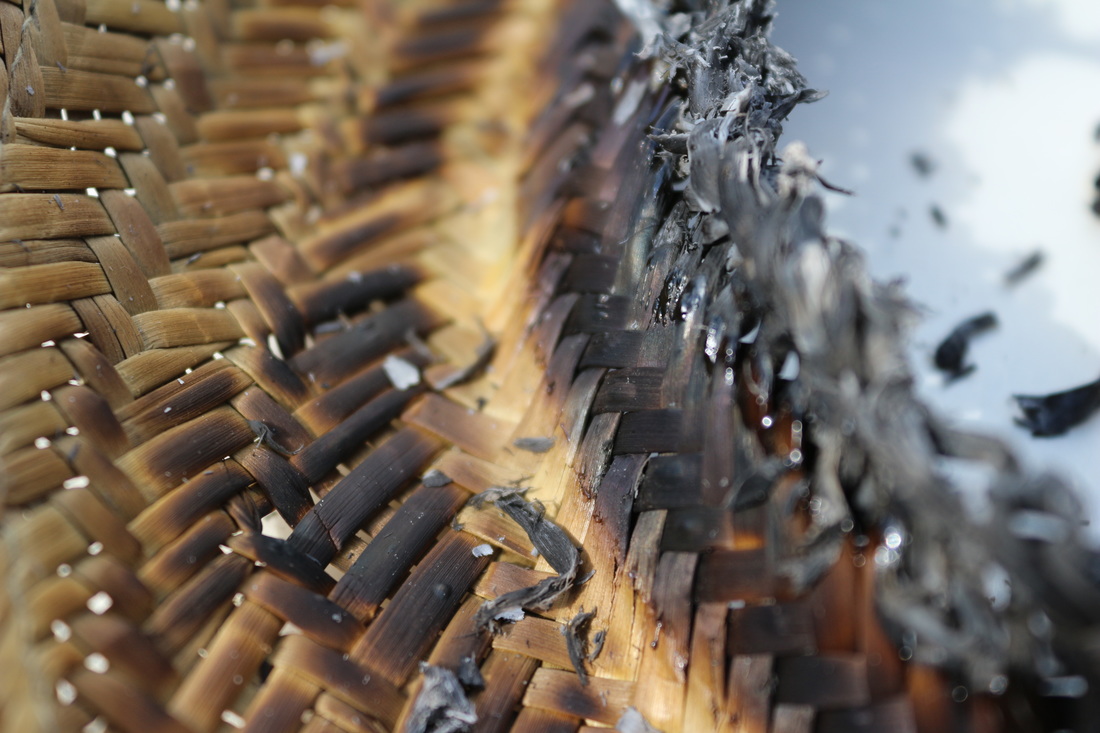
For this photoshoot I burnt a straw hat this was a good photoshoot because I was able to capture the ash part of the hat and I was able to capture the normal side of the hat together in some photos I was also able to capture the texture of the hat as well and up close it looks like snake skin, in some photos you are able to see the original colour of the hat mixed in with some of the burnt parts of the hat. I wasn't able to get a whole photo of the hat because it crumbling apart but I was able to capture the close ups of the object and how some photos have part of the hat falling off and some burnt and some parts not even touched.
Three Strongest Photos
|
|
|
These three images are the strongest from the photoshoot because of they all show a different part of the hat and in each picture the hat isn't completely burnt to the point where there are no other colours from the hat. Also they are all close ups of the hat so that they show the detail of the hat and the effect that the fire had on it and what colour it changed to and how that some parts of the hat are falling apart and in the middle of the hat you can see the ash from the other parts of the hat.
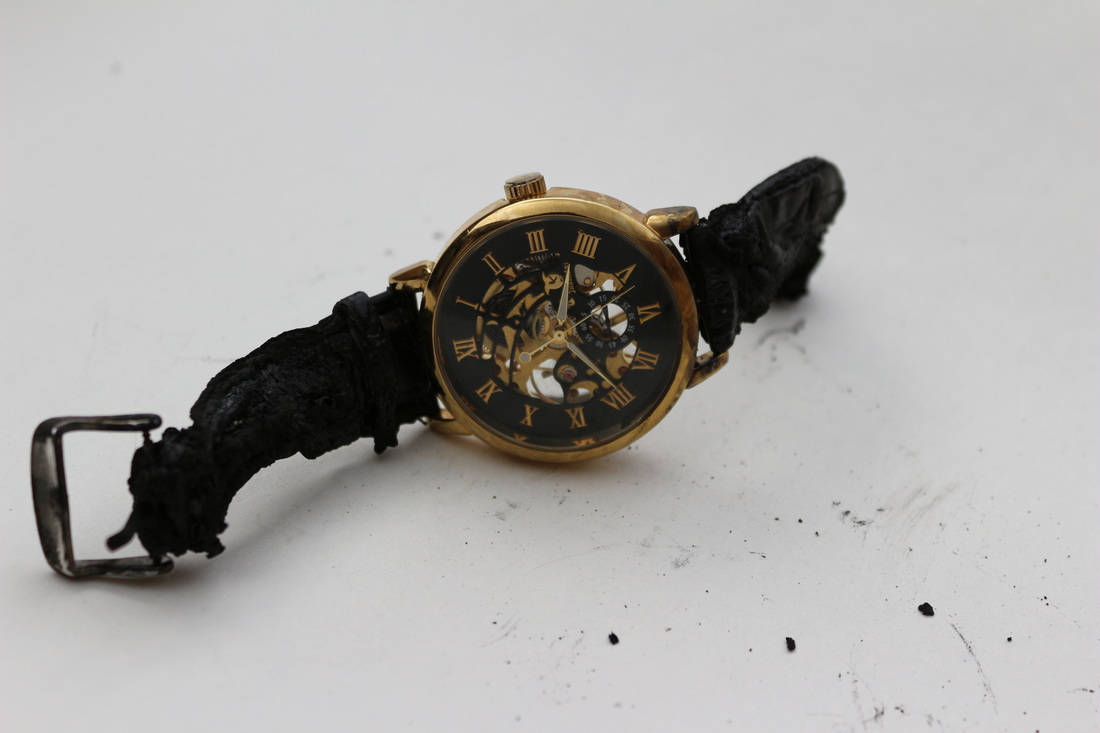
Photoshoot 11
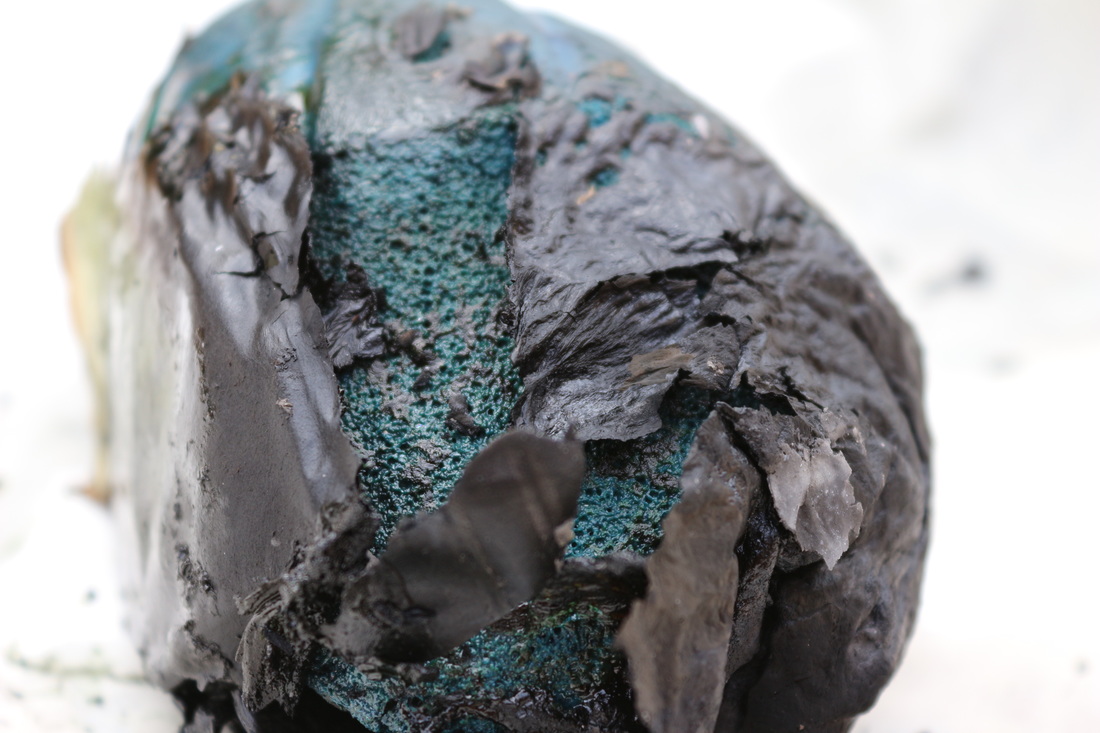
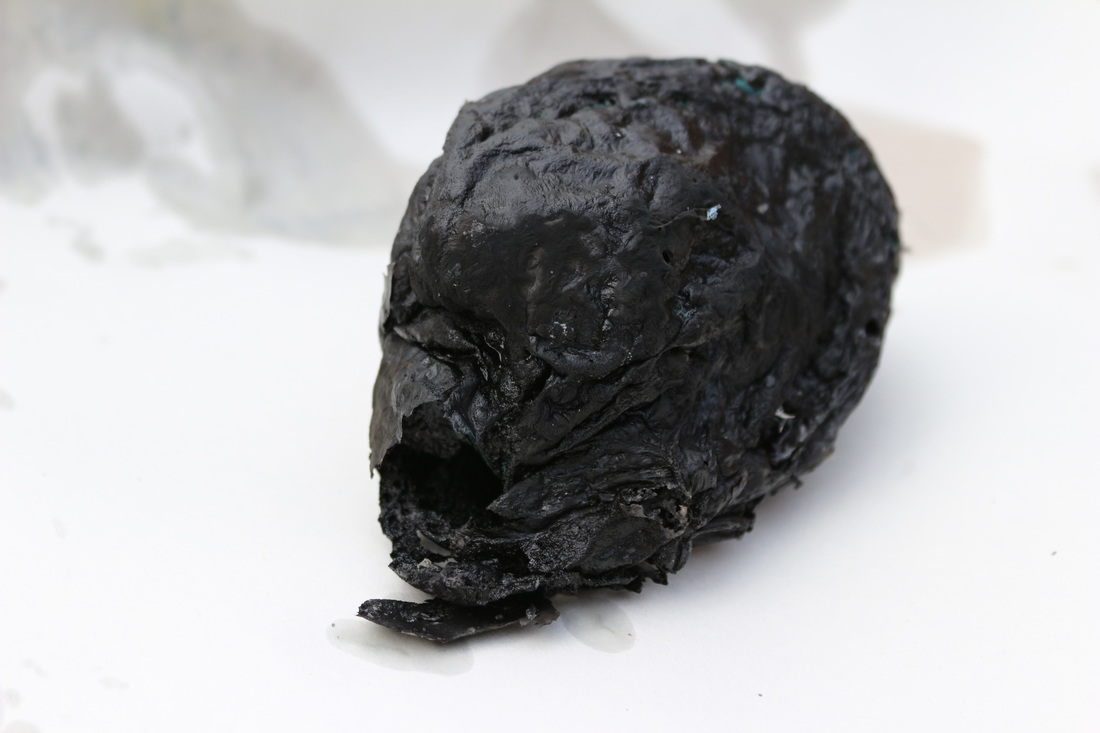
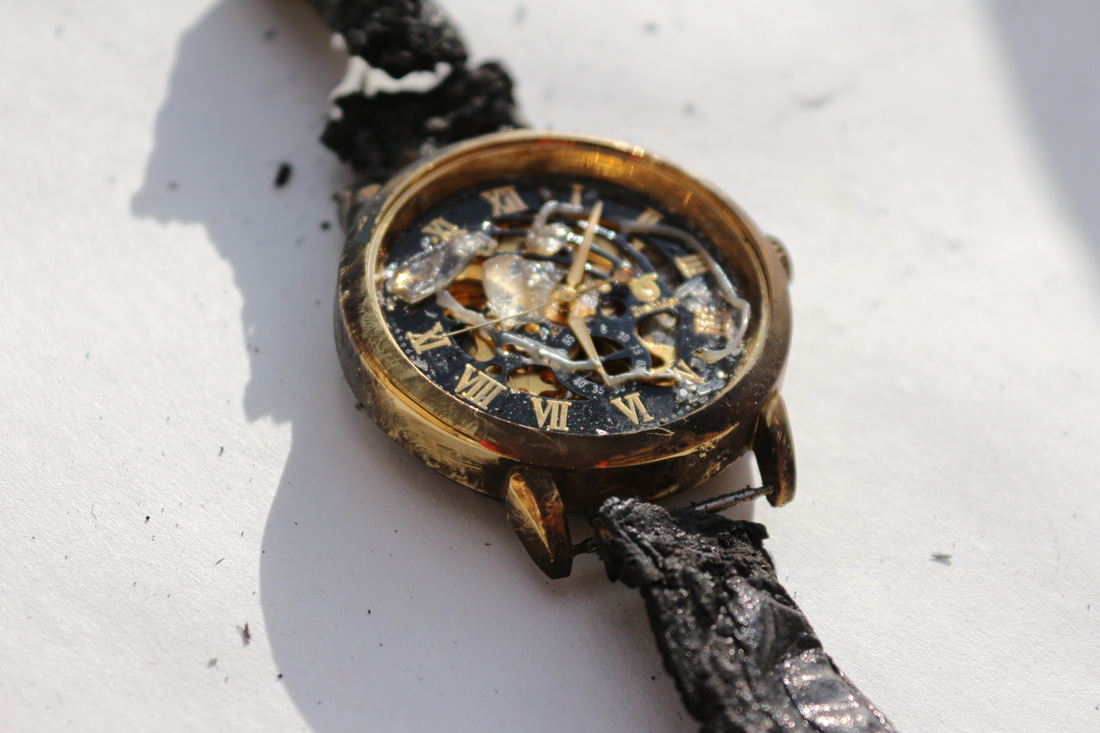
For this photoshoot I cracked the glass of the watch that I did a photoshoot before and tried to burn the inside of the watch to see what effect it will give the watch or to see if it even did anything. The straps of the watch did fall off and for some of the photos in the photoshoot I toke some close up pictures of just the face of the watch and I was able to capture some parts of glass inside of the watch plus the black ash on the on the gold part of the watch. Overall I think this photoshoot was a lot better than the first photoshoot that I did with the watch because the watch does look burnt now and you are able to see that its not just dirty but the glass is smashed and the straps are burnt and that there is more texture on the watch now.

|
|
|
These three images are the strongest from the photoshoot because of they all show the cracked/ no glass face of the watch and how that cracking and trying to burn the inside of the watch was a better choice from the first photoshoot of the watch because in these pictures you are able to tell that they have been burnt and the watch doesn't look like it has a little dirt on it.
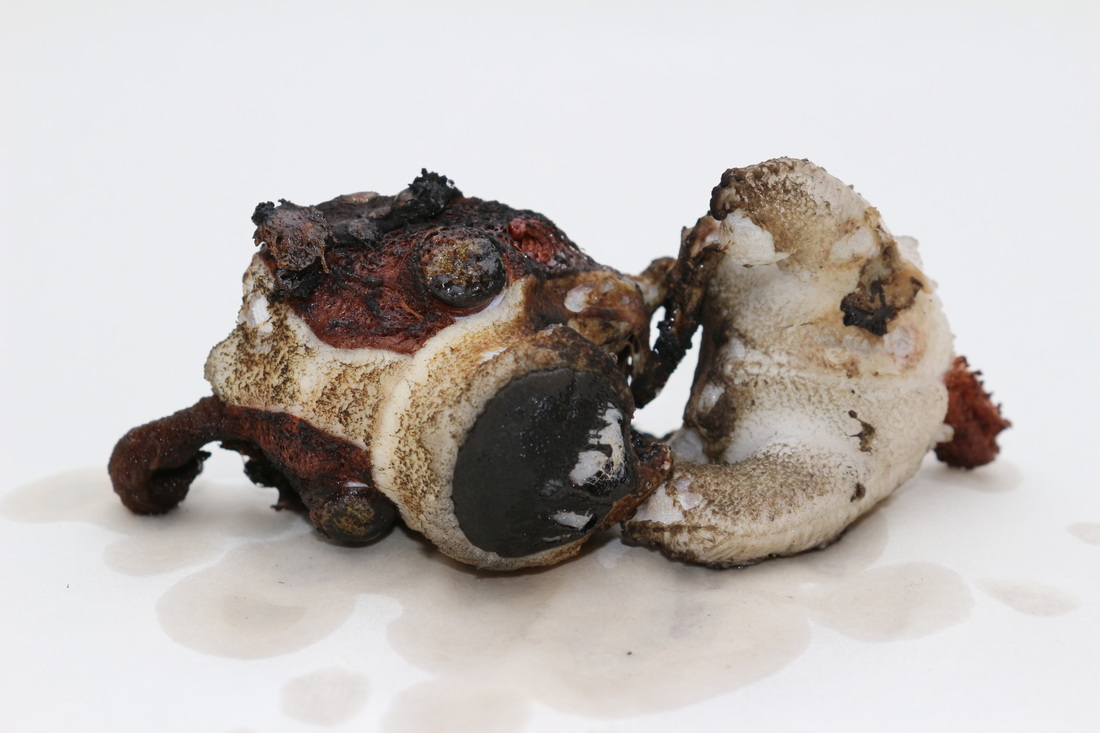
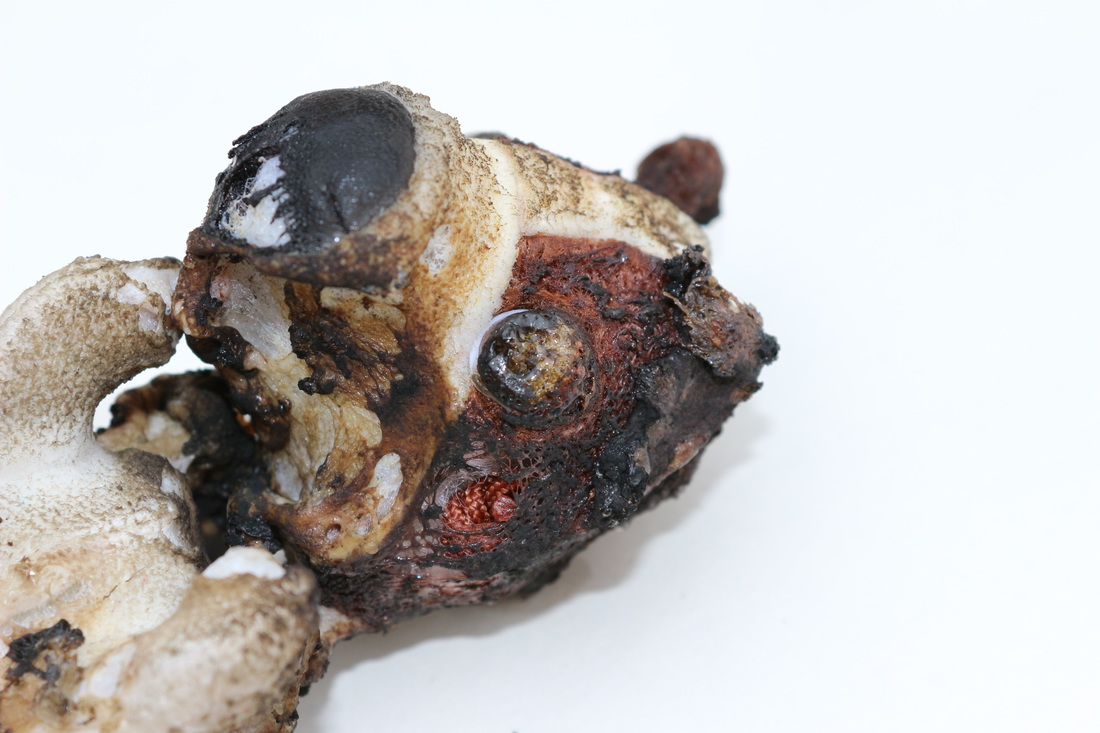
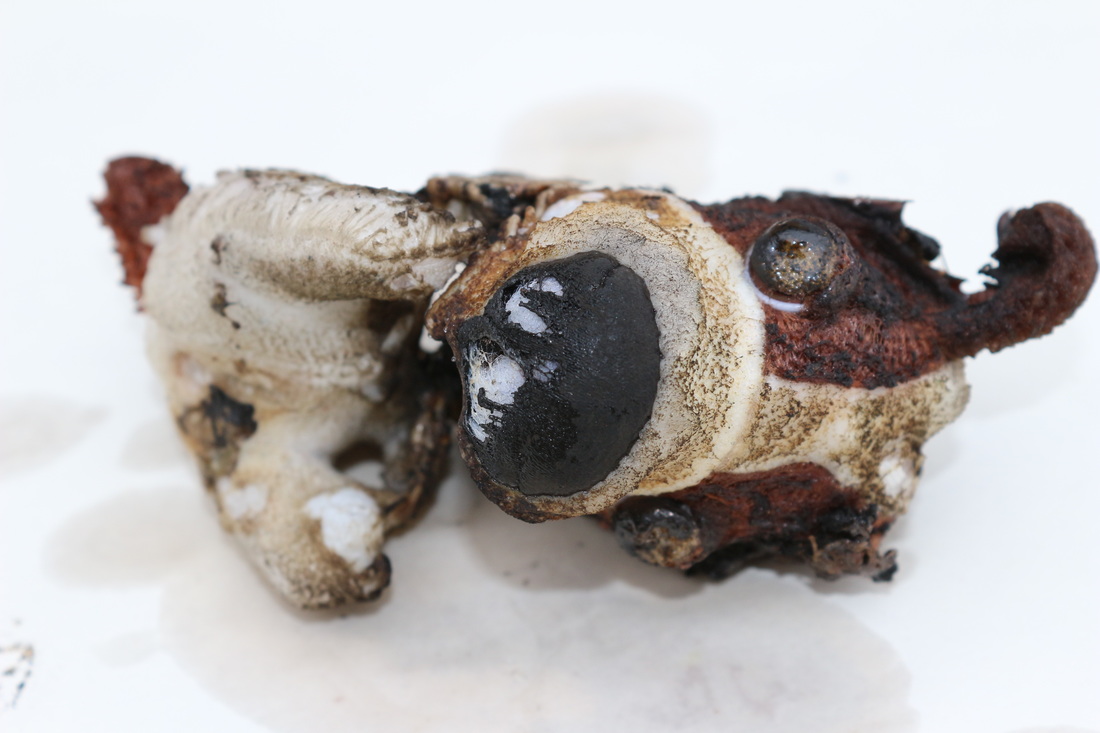
Photoshoot 12
For this photoshoot I took pictures of old chicken bones and I also burnt them though out the photoshoot I think that this photoshoot went well because of the bones being old there are different shades of brown showing on the bones and when the bones are burnt. What was difficult in this photoshoot was getting whole frame in focus because of how close I had to get to the bones the focus kept on getting lost and the camera would auto focus on parts of the bones and when manual focusing it was hard to keep the camera still because of being outside and the heavy winds. Overall I think that this photoshoot went well because of I was able to capture the different colours of the chicken bones.
