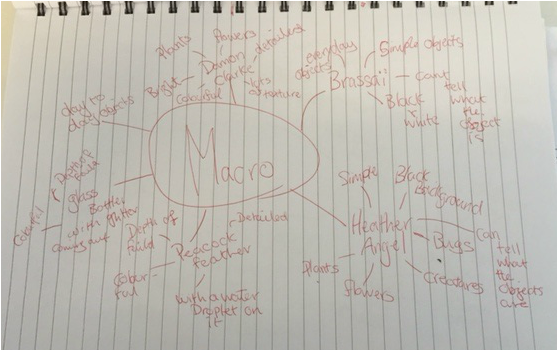
Brainstorm/Draft Sketch
|

|
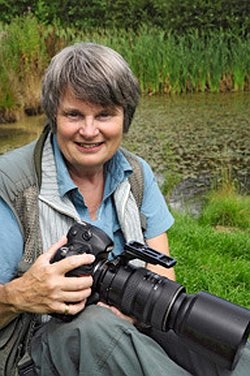
Heather Angel
|
Heather Angel is a British nature photographer that takes macro pictures of insects that have a lot of detail in them and she also takes pictures of landscapes but with her macro photography the pictures are of incests and of plants that have a lot of colour and loads of different patterns and with some of the images the background is black and the main focus of the image is in colour and has nothing around it to distract the viewer from the photo.
|
|
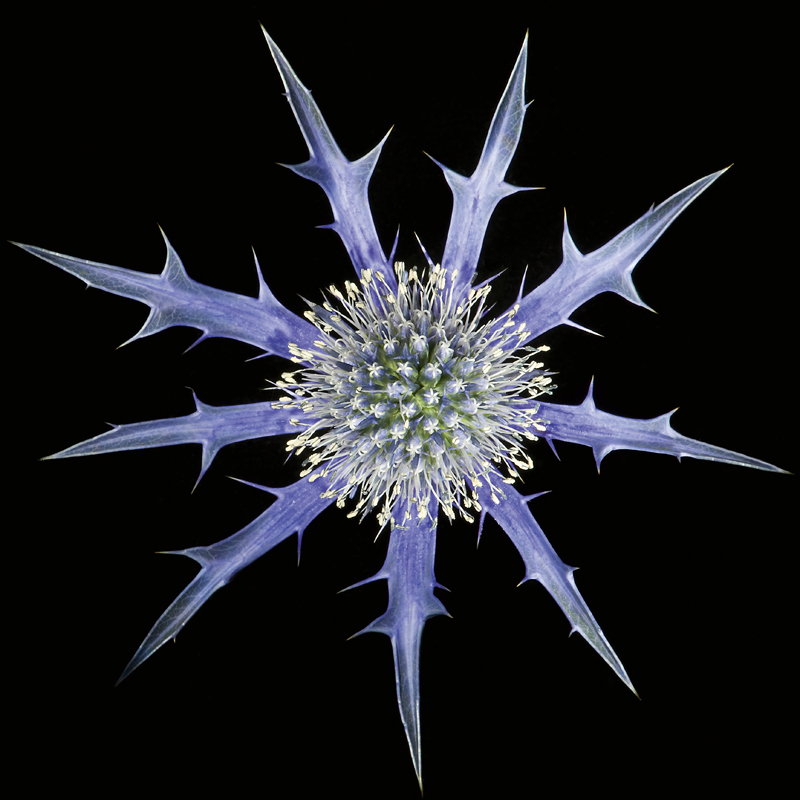
This image is good because of the way the photographer has taken a picture of a flower that has a lot of detail also the way the photographer has edited the picture they have made the background black so that the viewer keeps all of their attention to the flower.
|
|
|
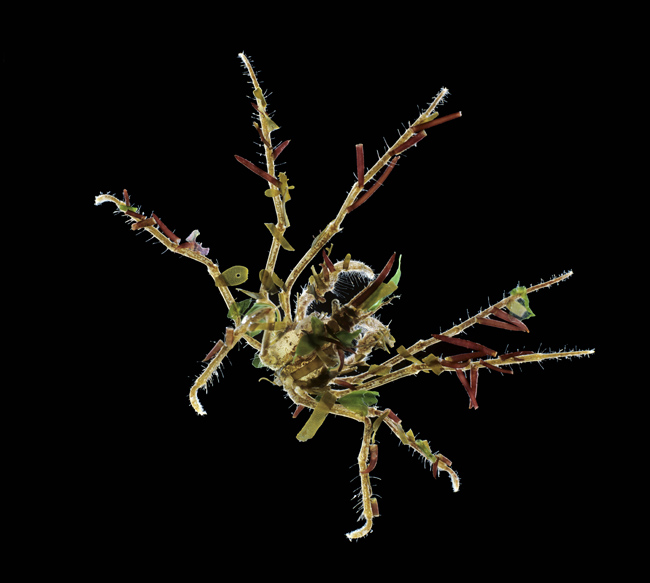
This photo is also good because of the way Heather Angel has captured the spider crab and has also made the background of the image black again so that the viewer is keeping all of their attention to the spider crab and the viewer is able to see all the detail on the spider crab with no blurry edges or any blurriness at all.
|

I like this photo from Heather Angel because of the way she has captured the lizards eye and how it is looking right into the lens and how the image is not taken from the side so that we are not able to see right into the eye but because the image is taken from a straight view the viewer is able to see all the detail in the lizard also this image doesn't have a black out line and the whole canvas is filled with colour and makes the viewer spend more time looking at the photo because there is more to look at and it catches the viewers eye because of how bright the image is.
Brassaï
|
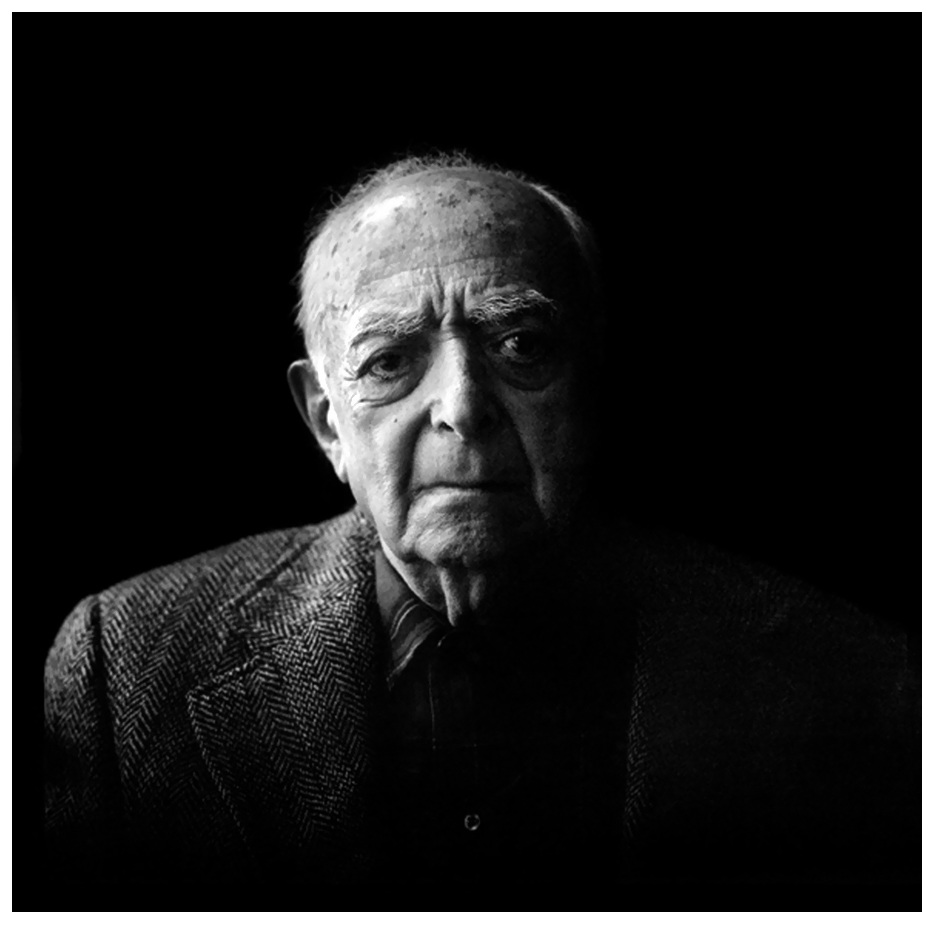
Brassaï was a Hungarian photographer that took pictures in black and white but with his macro photography most of his pictures you would have to stare at them for a while to understand what the original image is and what I like about his photos is that the photos have a lot of detail in them and what he takes pictures of are things everyone use day to day.
|
|
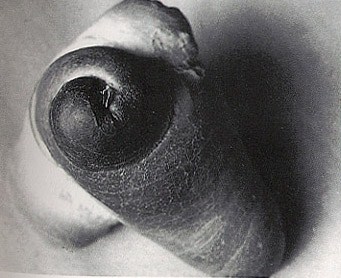
This image is good from Brassaï because of the way he makes the viewer think what the object in the image is and when the viewer finds out what it is they are able to see all the detail in the image. Also what makes it harder to understand what the object is is because it is in black and white so it makes it harder to define what the object it.
|

|
|
This image form Brassaï is also in black and white so it makes it harder for the viewer to define what the object is but in the object has a lot of different shades of black and the viewer is able to look at the image from different angles and it doesn't make it easier for the viewer to understand what the image is.
|

In this image Brassaï was able to capture all the detail in the image and in like all the other images it is in black and white so the viewer finds it hard to see what the object is. The background of this image makes it harder for the viewer to see that the object is in the image and to people who don't know that it is macro photography and the photo has been taken up close the viewer will find it even harder to see what the image is.
Damon Clarke
|
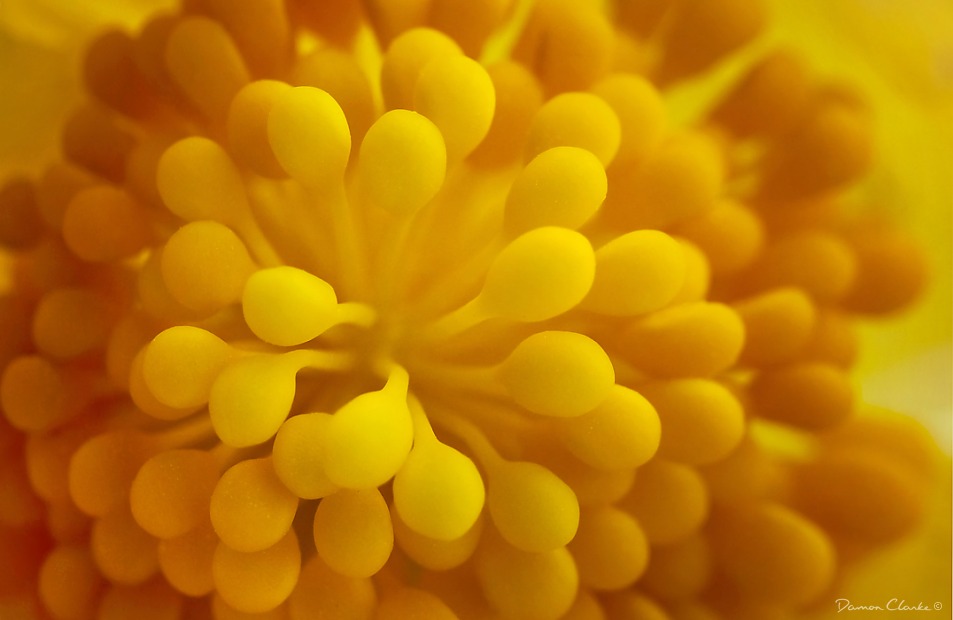
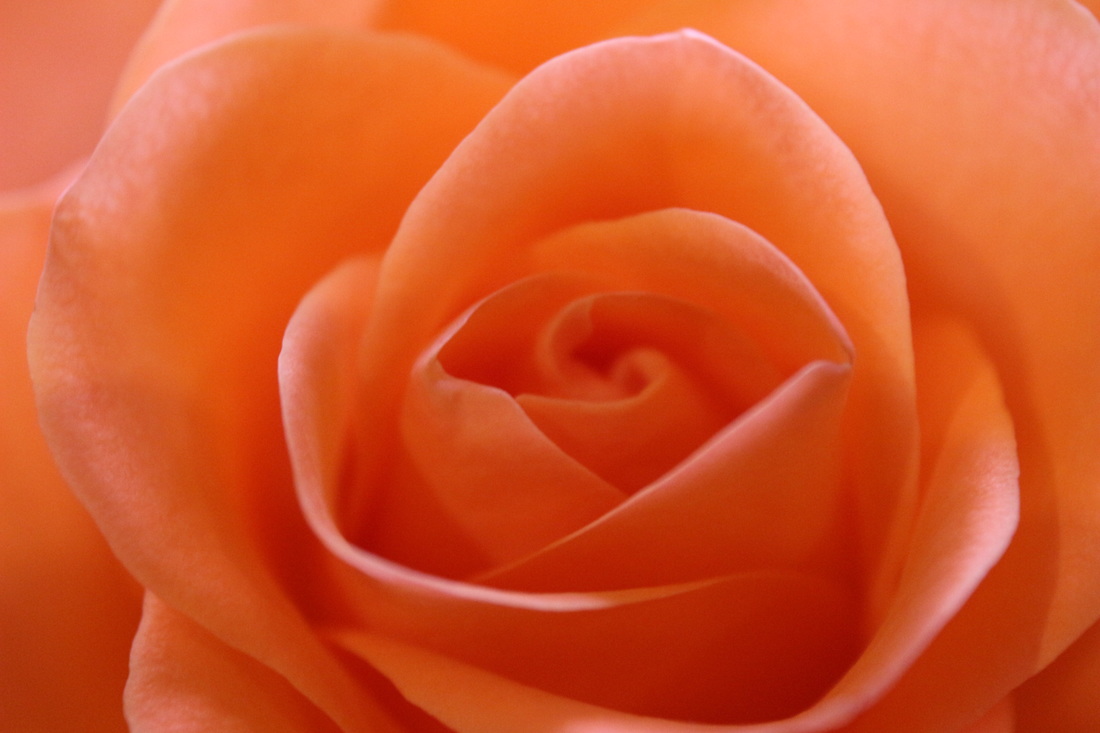
Damon Clarke is a photographer that does macro photography and takes pictures of flowers and day to day things that everyone sees but really close and in detail because in macro photography the photographer earthier captures the colour of the object or the detail of the object but Damon Clarke captures the detail and the colour in the object.
|
|
This is a good image from Damon Clarke because of how bright, colourful and in detail it is, the object is part of a flower that has a lot of water droplets on it and what Damon Clarke was able to do with this image is keep all the attention to the flower and that isn't anything in the background to distract the viewer.
|
|
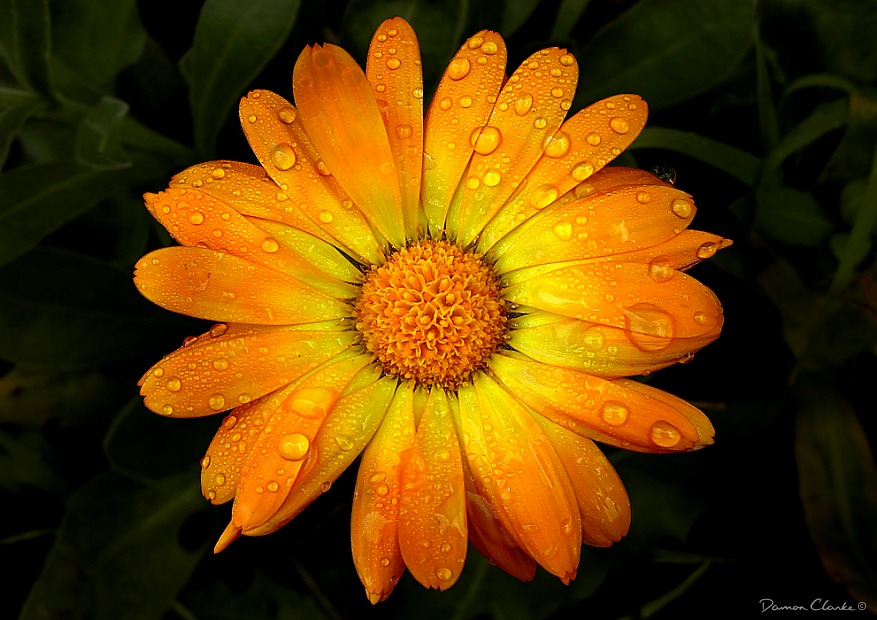
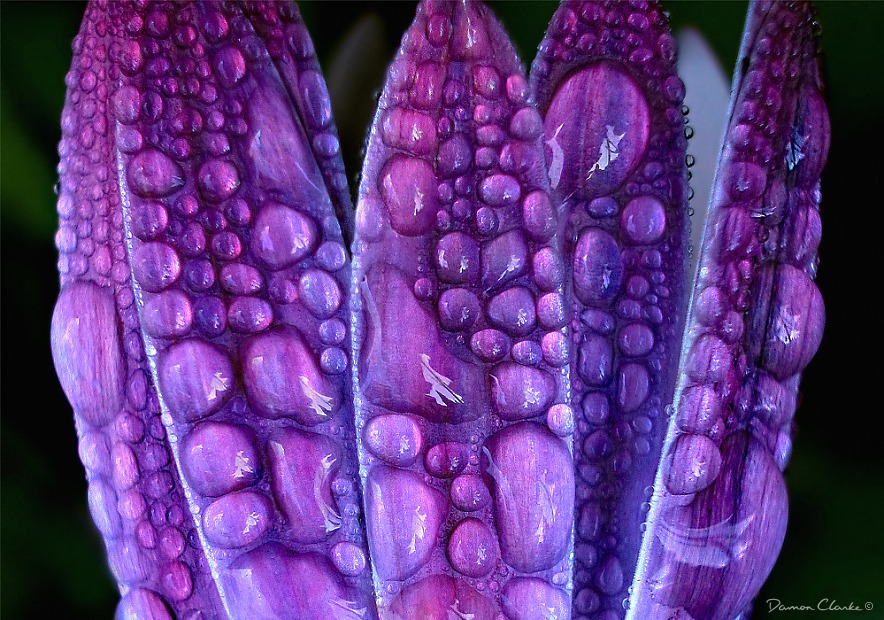
I like this image from Damon Clarke because of how he was able to capture all the detail in the flower and the water droplets on it. He was also able to keep all of the attention on the flower because the background of the image isn't completely black like what other macro photographers do but Damon Clarke kept the background but made it dark so the viewer is still able to see the surroundings of the image.
Images from Google

|
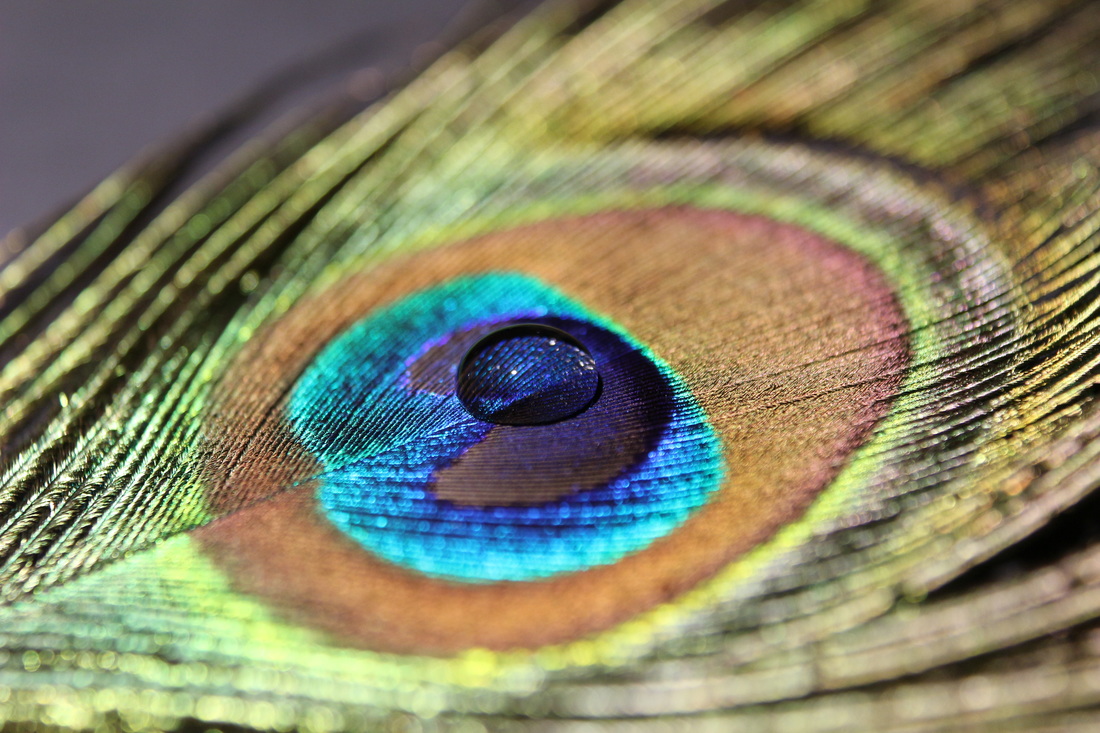
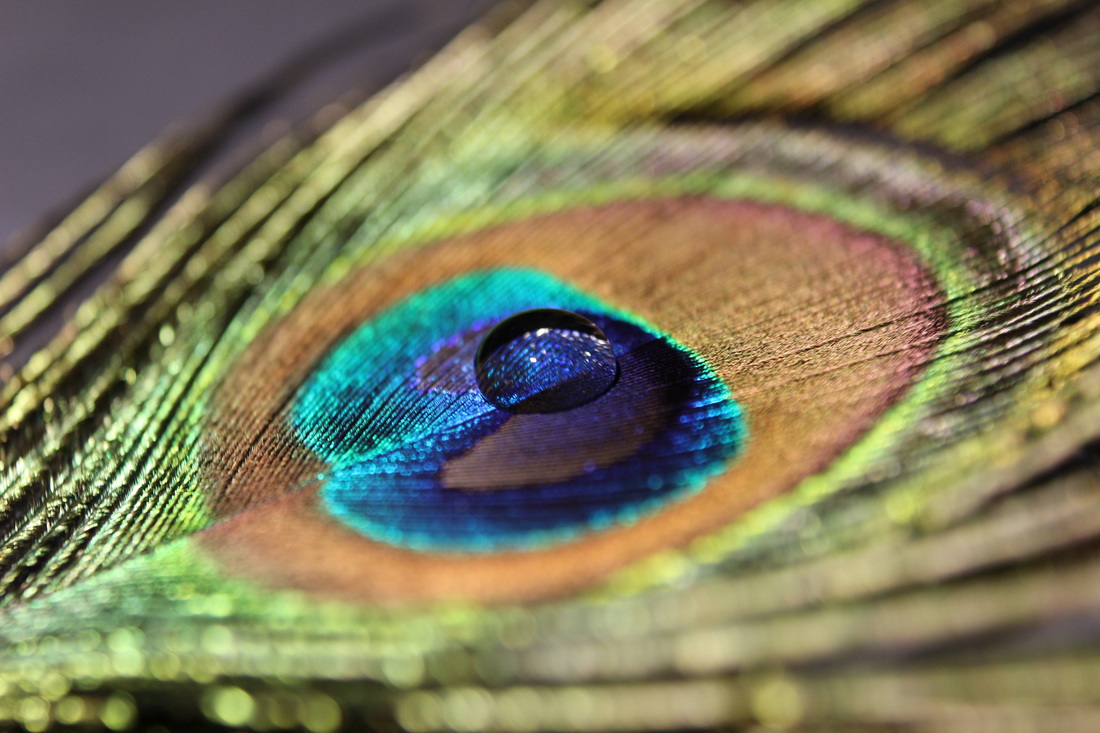
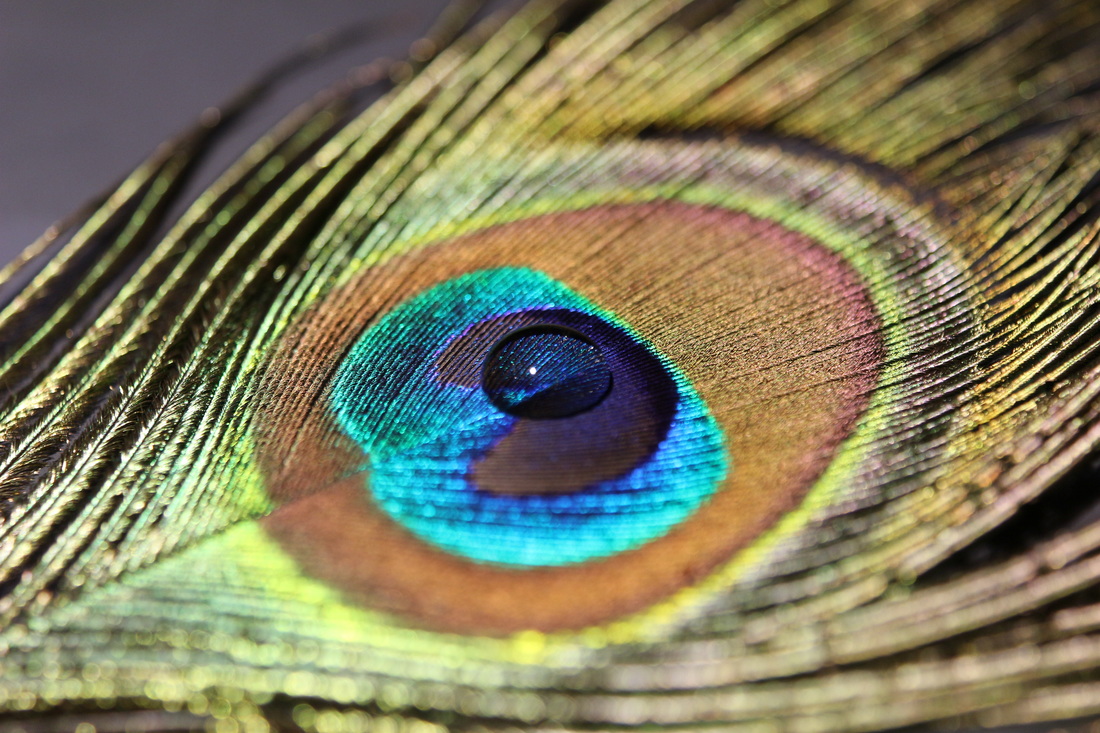
I like this image because of the basic objects in the image and how the peacock feather is half in focus and the other half is blurred I also like how the water droplet is in focus and it is enlarging the peacock feather and is still showing a lot of detail.
|
|
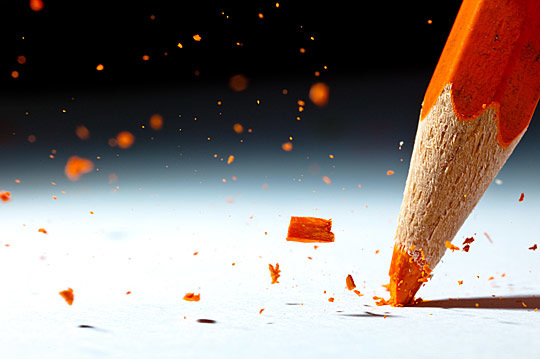
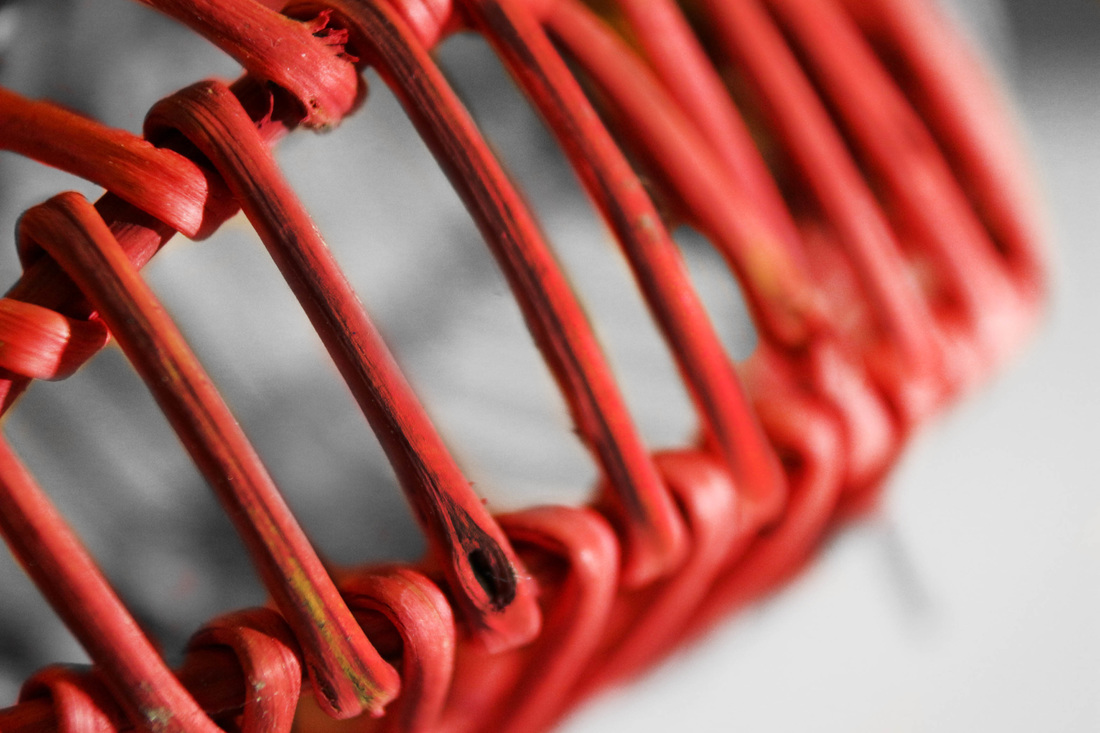
This image is good because of how the photographer was able to capture the expect point when the colour pencil broke you are able to see all the detail in the pencil and some of the big pieces of the lead of the pencil and how the background is black and the bottom is white so that the viewer is able to keep their focus to the pencil.
|
|
|
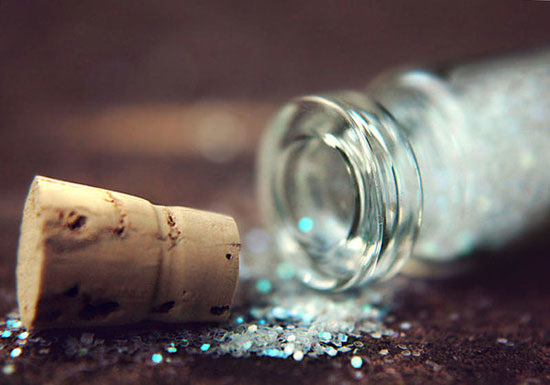
This image is good because of how the photographer was able to capture the bottle cap, glass bottle and the glitter that came out of the bottle and I also like how the image makes the viewer think what is in the bottle and makes it look like it belongs in a fairytale.
|
Photoshop Tutorial
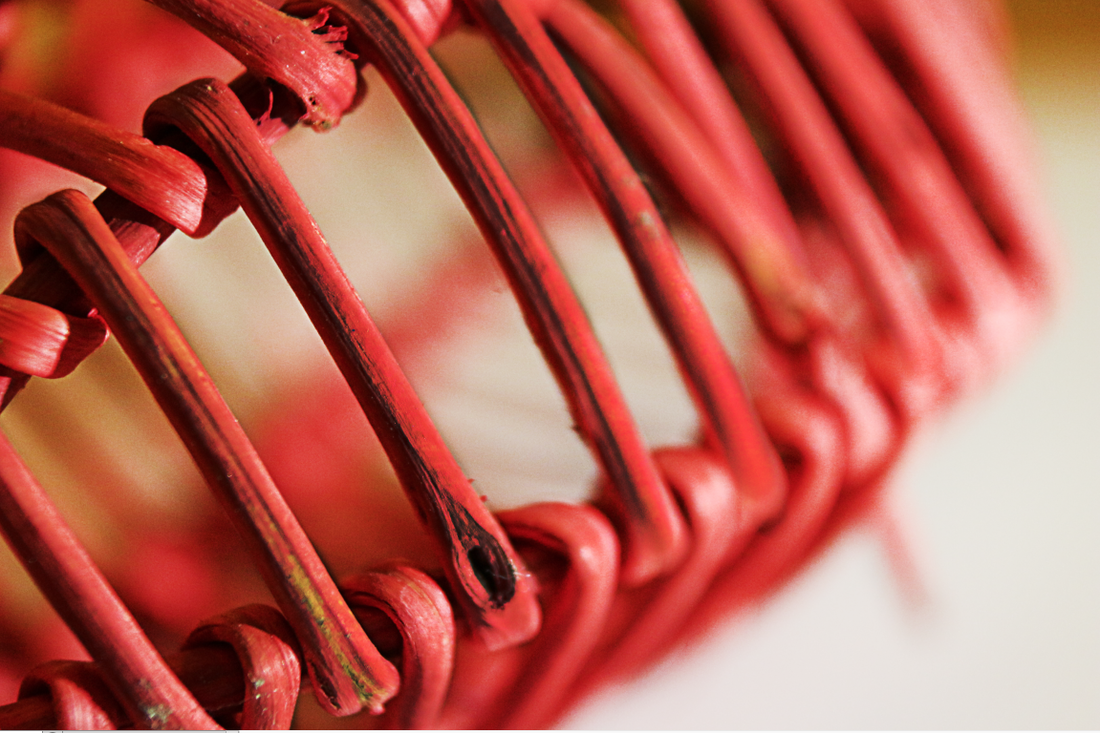
This is the original image that I will start to edit to bring out more detail in the image.
|
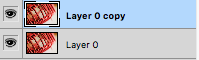
First I will duplicate the layer so I can use the "High Pass" filter.
|

To get the "High Pass" filter you have to go to the "Filter" tab and go down to "Other" and then click on "High Pass" to get the filter.
|
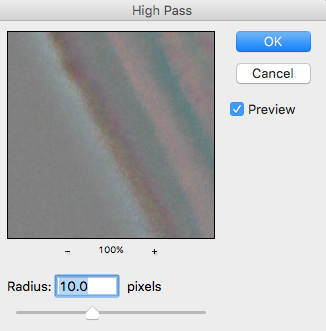
Then you have to choose how much detail you want to see in your image by choosing the "Radius" the more "Radius" you chose the more detail you will see in the image.
|
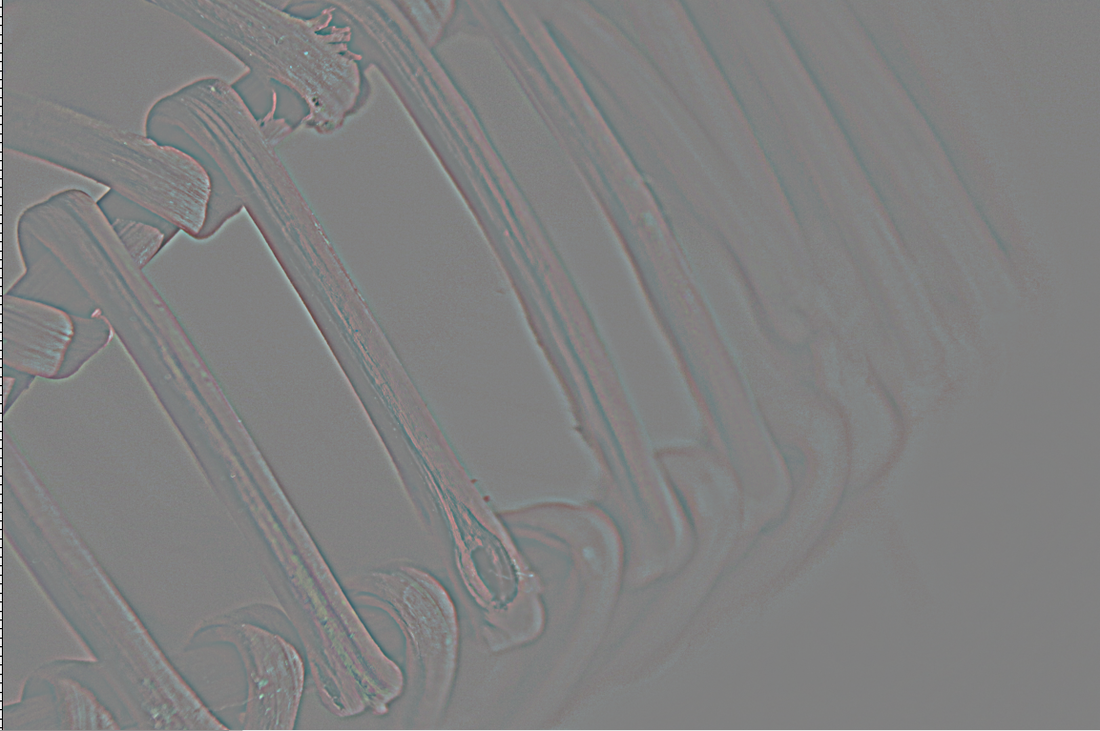
This is what one of the two layers will look like after applying the "High Pass" filter to the layer and this shows which parts of the image have more detail in them and the view will be able to see.
|
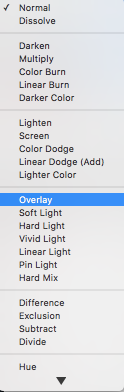
To be able to see the detail in the image in the original colours you have to go to layers and change it from "Normal" to "Overlay" to be able to see the image in its original colours but will more detail.
|

This is what the image will look like after making the layer to "Overlay" so most of the image you will be able to see more of the details of the image come out more than before.
|
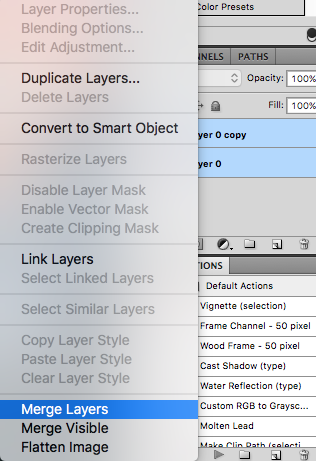
Before making the image black and white you have to merge the two layers together so that you are able to do more to the image because if you edit on layer it will not show because of the other layer has nothing done to it.
|

You have to click on the "Hue and Saturation" icon to get to change the colours of the image and to be able the brightness of the image as well.
|

I turn the "Saturation" to -99 so there is no colour in the image and so that the image is fully black and white.
|

I use the "Burn" tool to make more of the image darker and it brings out more detail in the image.
|

I used the "Burn" tool on the sticks of the image so that it brings out more detail in those parts of the image.
|

I used the "Dodge" tool on the other parts of the image to make them brighter so that the viewer will be able to see the detail and texture the other parts of the image that I have used the "Burn" tool on.
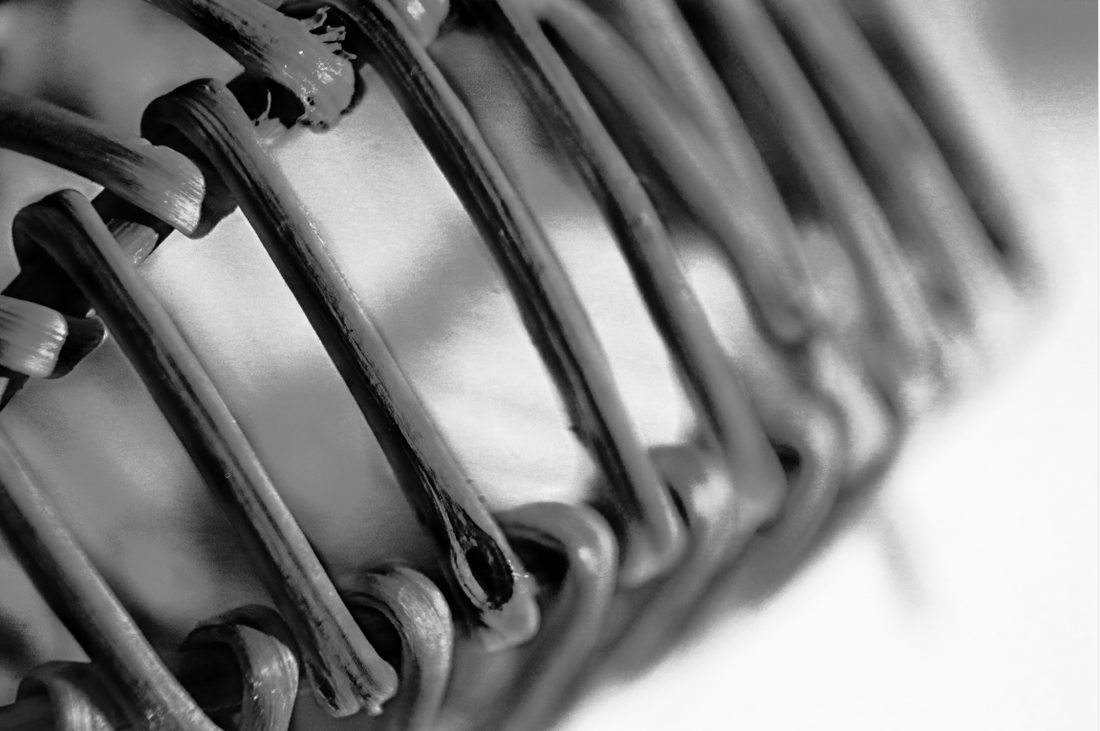
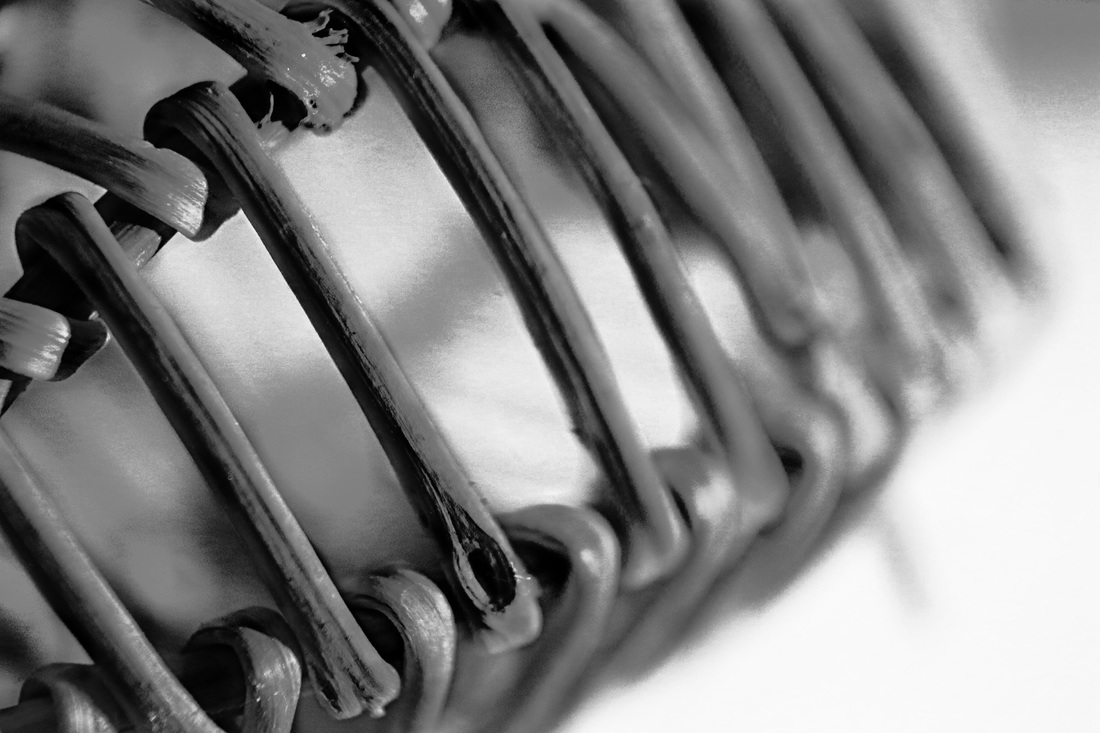
This is what the final product will look like and you are able to see the detail more in the sticks of the image and the whites are whiter because of the "Dodge" tool and the "Burn" tool shows the detail and made those parts of the image darker and makes them show more because he other parts of the image are brighter.
Photoshoot 1
In this photoshoot I was trying to replicate the image that i found from google but without the water droplet and I was also testing out the lens that I brought so that I could get this close to the peacock feather and so that it would be in focus what I found hard about this photoshoot was that I had to keep the camera still and get the focus in the right place otherwise the image would be in focus in the wrong place.
Strongest Images
|
|
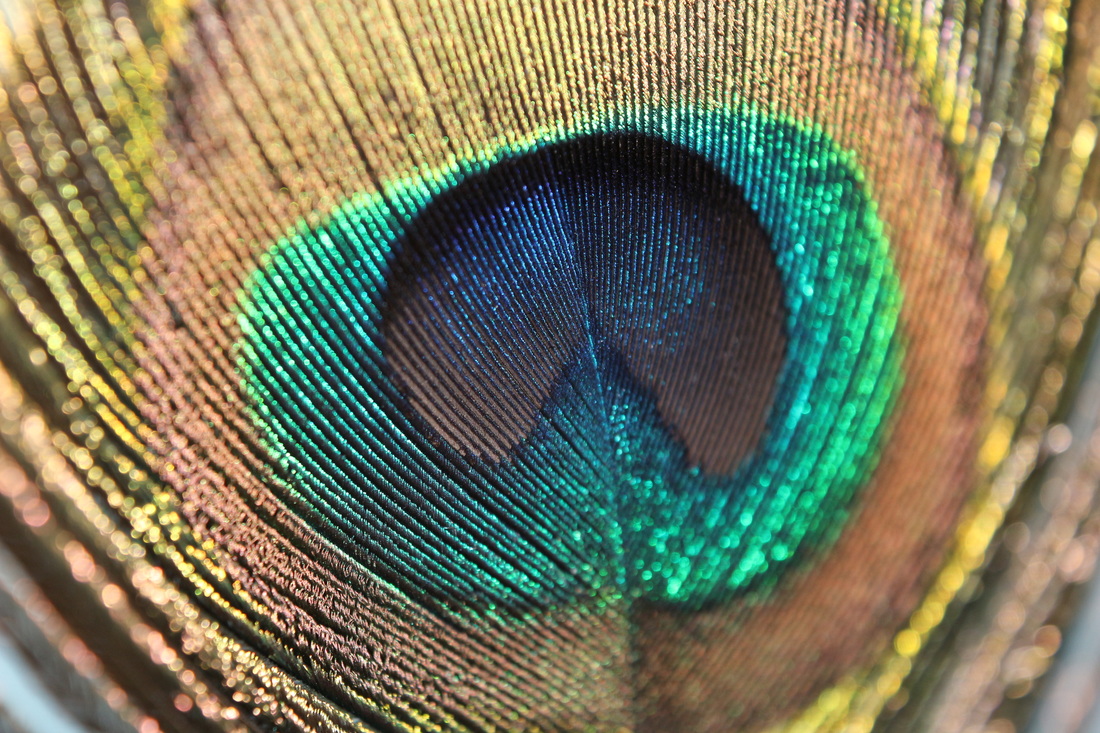
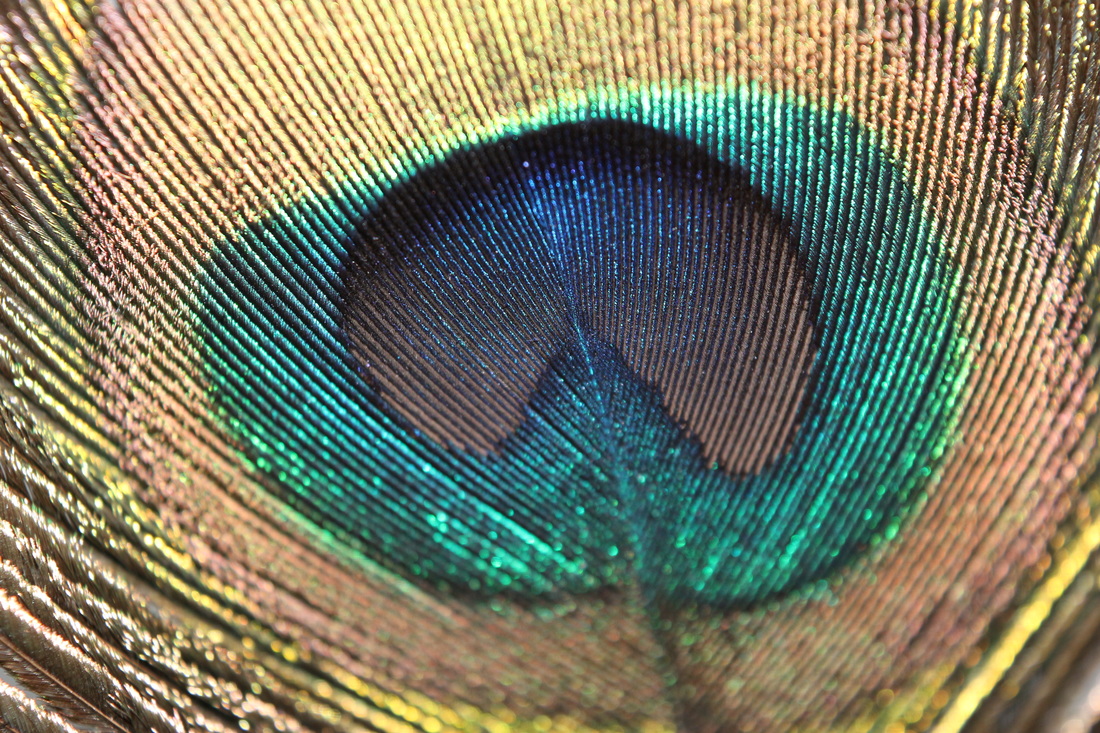
These two images are the strongest from the photoshoot because of I was able to get most of the feather in focus and the middle of the feather has the most detail in it and I was able to capture that in these two photos.

For this edited photoshoot I used the "Burn" tool so that I could darken some of the colours so that they would stand out more than they were and i made half of the image black and white so that the viewer could see what the colours of the peacock feather were and what it would look like when it is in black and white.
Photoshoot 2
For this photoshoot I took pictures of this object so that I could see how the textures and the patterns turned out with the macro lens attachment and this object has a lot of texture and scratches on it so I thought that the macro lens attachment would pick up the scratches and textures on it but some of the pictures are blurry because I was still getting used to using the focus and how close I have to get up to get the image in focus.
Strongest images
|
|
These two images are the strongest from the photoshoot because of how both images capture the detail in the face of the object and how you are able to see the scratches on the object.

For this edited image I tried to use the same editing style as the peacock feather edited picture so I could see what the image would look like and I also used the "Burn" tool so that I could see the scratches and some of the texture on the object. I also used the "Clone Stamp" tool so that I could get rid of something in the background that was different to the background to the right side of the image.
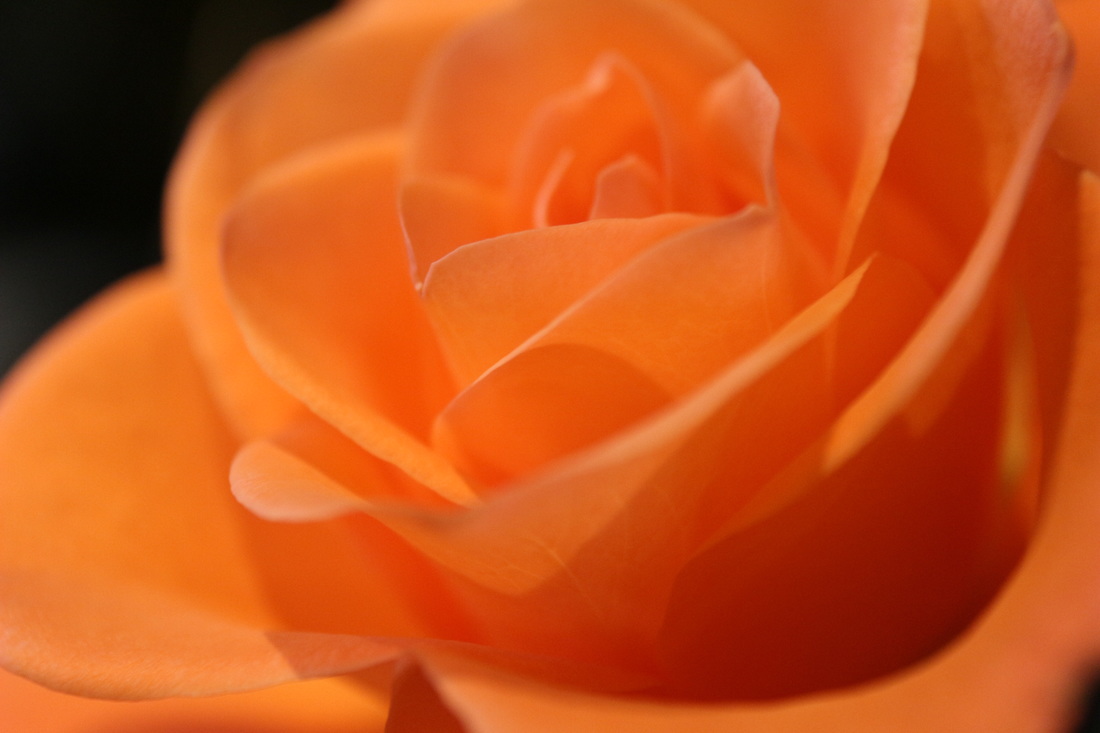
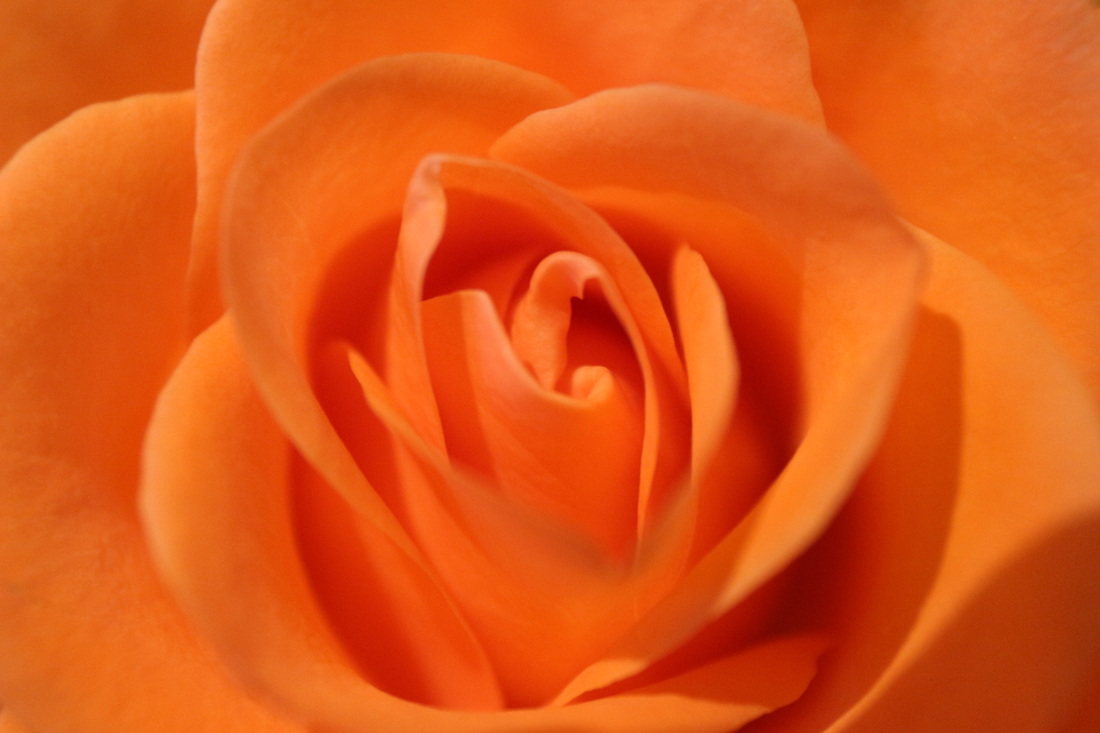
Photoshoot 3
For this photoshoot I took pictures of a flower with the macro lens attachment so I could see what the image would look like close up but what I could of done to make this photoshoot better was to use less light so that the images don't look over exposed and I could of used a better flower that has a lot of detail and texture with it.
Strongest images
|
|
|
These images are the strongest from the photoshoot because of the way I was able to capture the detail of the flower from different angels and more of the image is in focus compared to the other photos and that I was able to get the whole of the inside of the flower.
Photoshoot 4
For this photoshoot I took pictures of this object because it has a lot of texture with it and I was able to adjust the focus better in this photoshoot so i was able to make the lens focus on the front of the object at first and i was able to make it the lens focus on the back of the image and make the front of the image out of focus. I also had to use my own light source instead of using the flash that comes with the camera and I learnt from my last photoshoot with the flower to check the image as I go along and I was able to adjust the light as I went along.
|
|
|
These images are the strongest from the photoshoot because of I was able to get close in two of the images and I took a full image of the object to see how I would look on the macro lens attachment and in the other two images I was able to get close to the object without the flash going off and leaving a shadow in the image.
Experimentation
For this photo I tried a different editing style where I still used black and white but I didn't make half of the image black and white but I made the background black and white and kept the object in colour and I used the "Burn" tool again so that you are able to see more texture in the object.
For this image I made the whole image black and white and I used the "Burn" tool on the sticks so it made it darker and so that you are able to see more detail of the object, the "Dodge" tool was used on the white parts of the image so that the viewer can focus more on the image and the detail of the image and less on the background and the "Sponge" tool was used to show more detail of the image and I used this tool on the sticks of the image so that you are able to see more detail of the image without it going darker by using the "Burn" tool.
Photoshoot 5
For this photoshoot I took pictures of a berry because a berry has a lot of texture and I tried to capture all the texture I could with the macro lens attachment but what was hard to do was to make the flash not come up because it would make a shadow of the berry also it was hard to get the camera to focus because the camera wouldn't auto focus and it was harder to use manual focus because of the focus would be lost quick and it was hard to keep my hand still to get the focus right.
Photoshoot 6
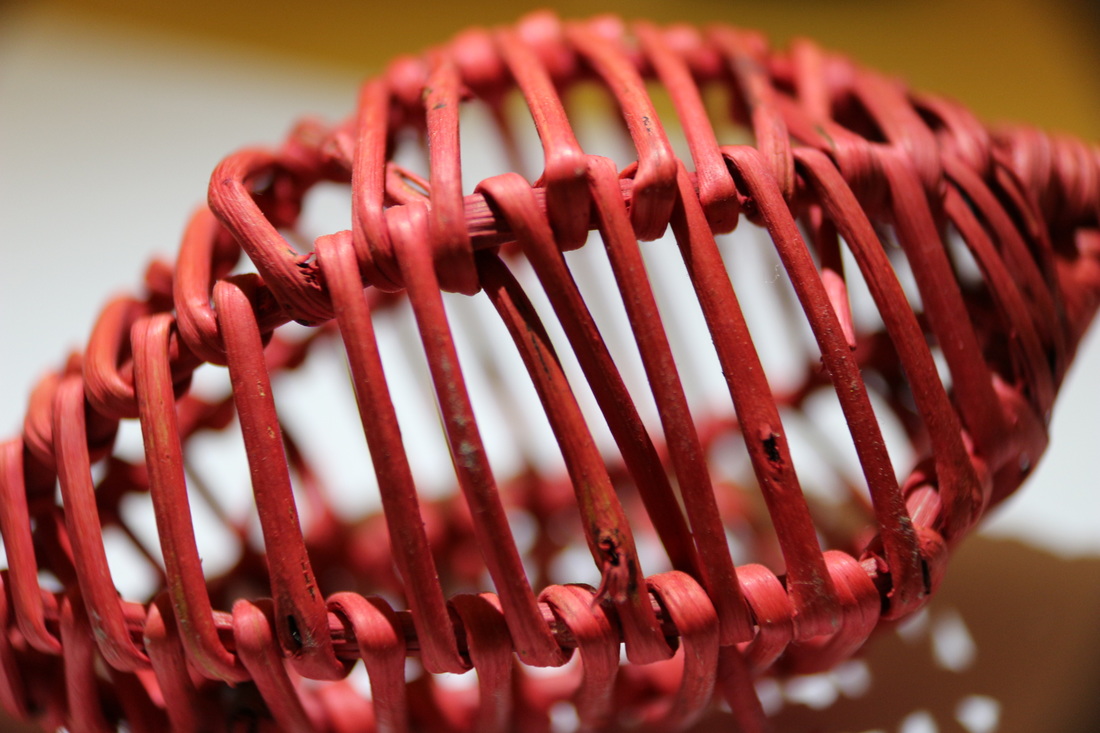
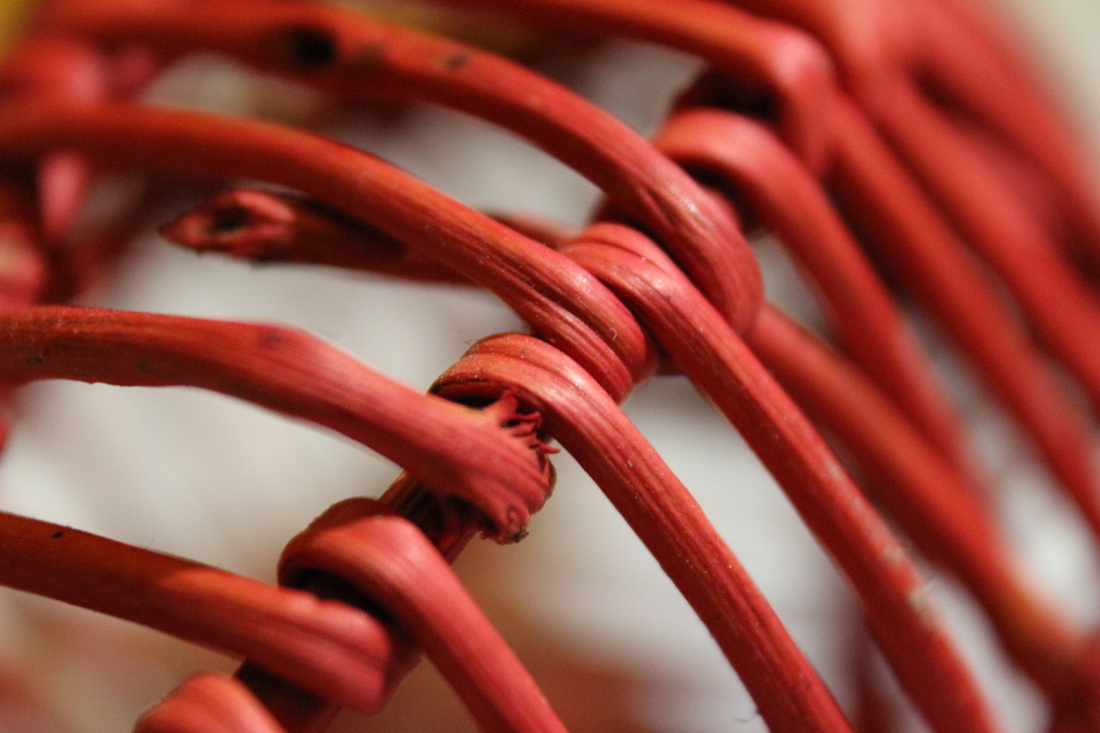
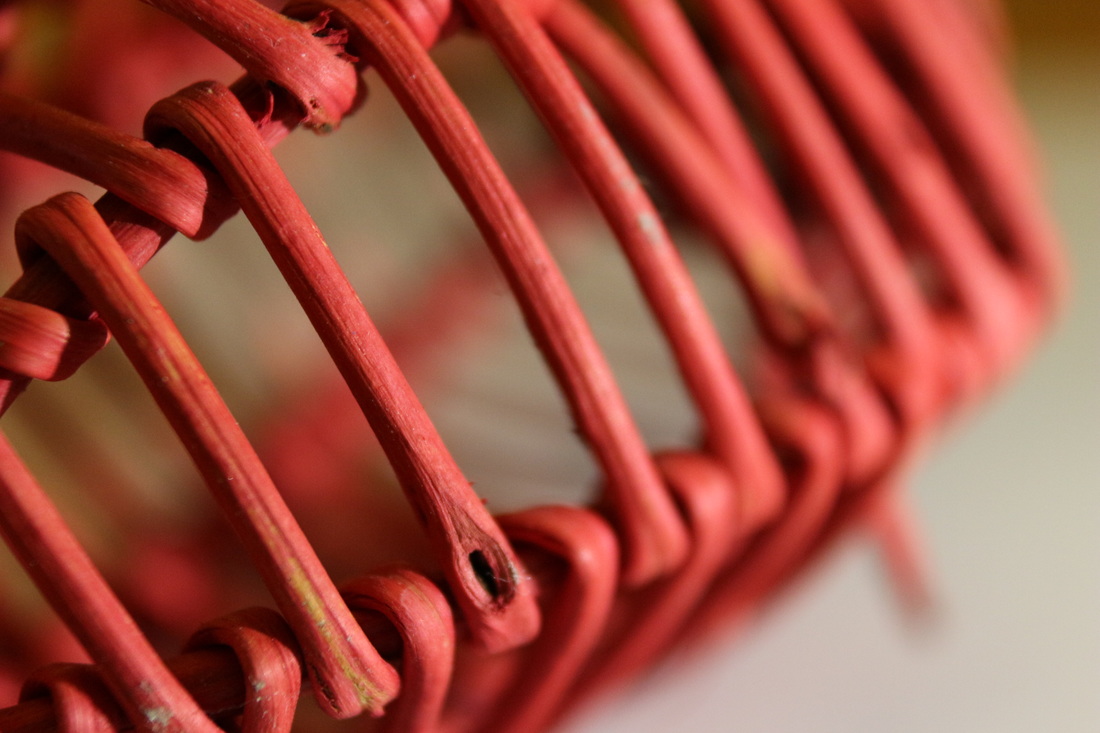
For this photoshoot I took pictures of three different objects and the first object is a mango I took pictures of a mango because I wanted to capture the different colours the second object I took pictures of because of the sticks in the object are going in different directions and has smaller sticks inside of it and I tried to capture all the detail in the objects and the third object I also tried to practice more with the camera attachment and tried with the object to capture all the black dots but the cameras flash kept going off and would make a shadow because the macro attachment is long and would get in the way.
Photoshoot 7
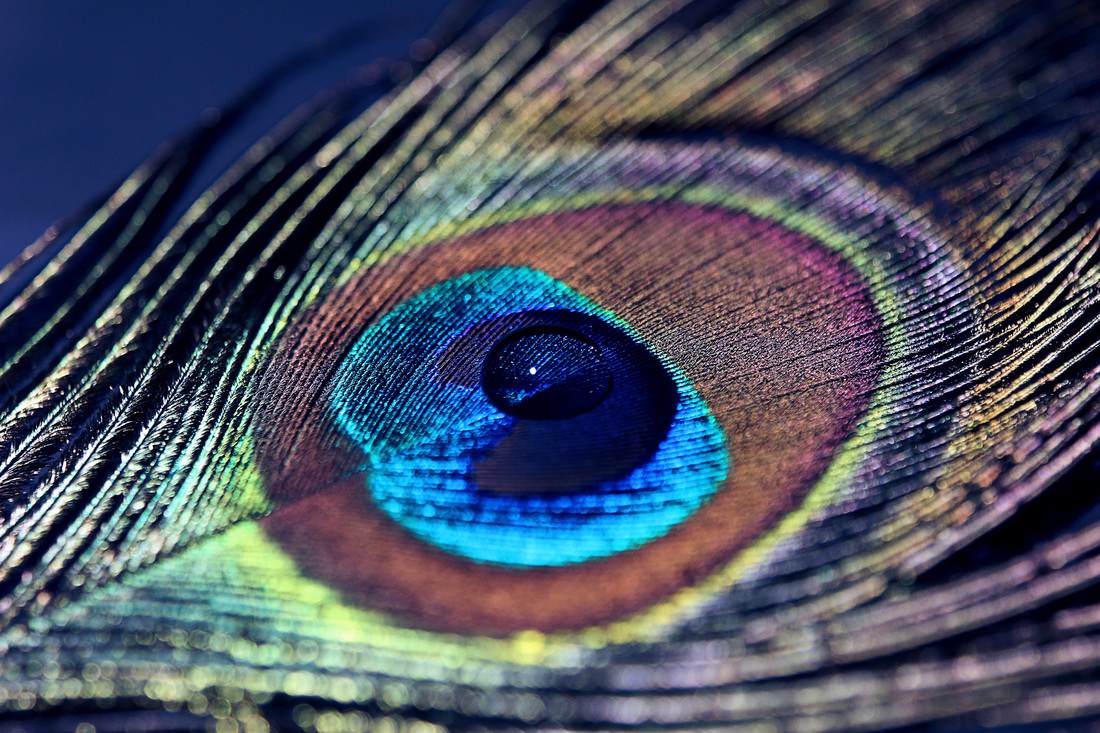
For this photoshoot I took pictures of a feather with a water droplet on it and tried to get both the feather and the droplet in focus with each other because of the macro lens attachment it was hard to get both in focus and I had to use a manual focus because of the auto focus wasn't picking up the droplet and the feather together and I use a external light source for the lighting because of the flash on the camera would over expose the image and there would also be a shadow on the top of the image.
|
|
|
These images are the strongest from the photoshoot because of how I was able to get close to the feather and have the droplet and the middle of the feather in focus and in all three of the images they are at a different angle so it gave me a choice of what image to choose to edit.
Edited
Photoshoot 8
For this photoshoot I took pictures of the inside of a flower and my goal was to get the middle part of the flower in focus and the leaf of the flower and try and make the main focus of the image the dots in the middle but still have the sides of the flower still in focus and it looks like the veins of the flower are showing blood and it looks like a "Blood Flower".

|
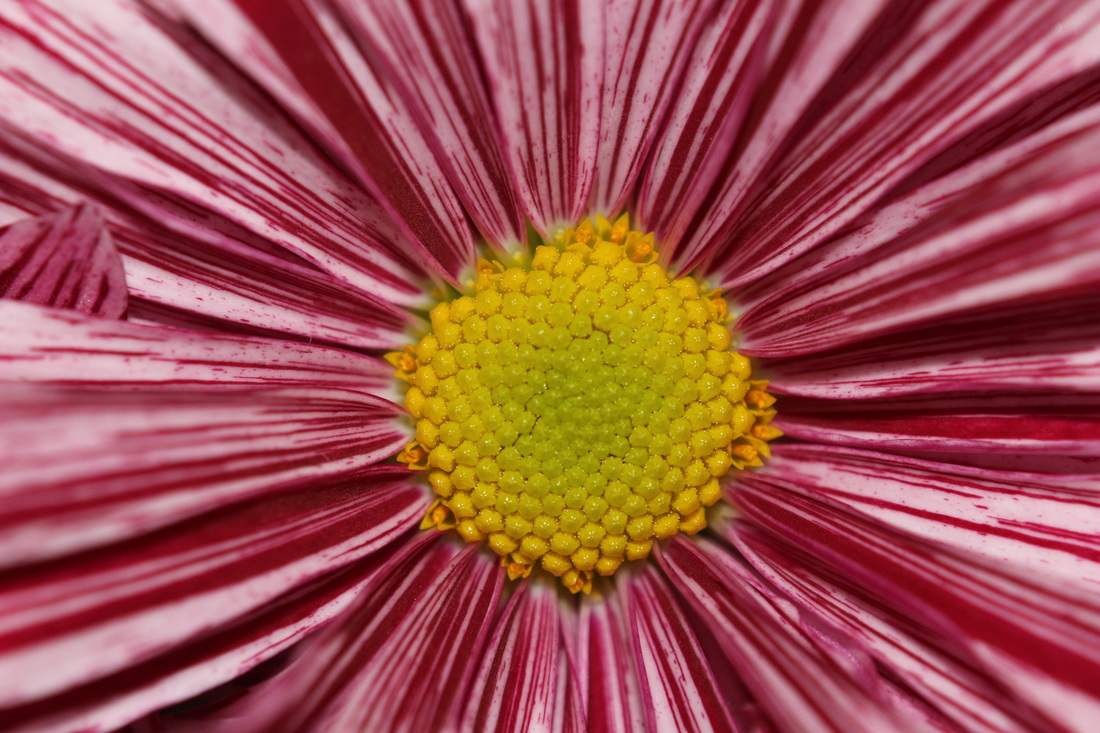
|
These two images are the strongest from the photoshoot because I was able to achieve my goal and get the middle of the flower in focus and was able to keep the camera still and was also able to capture the rest of the inside of the flower.
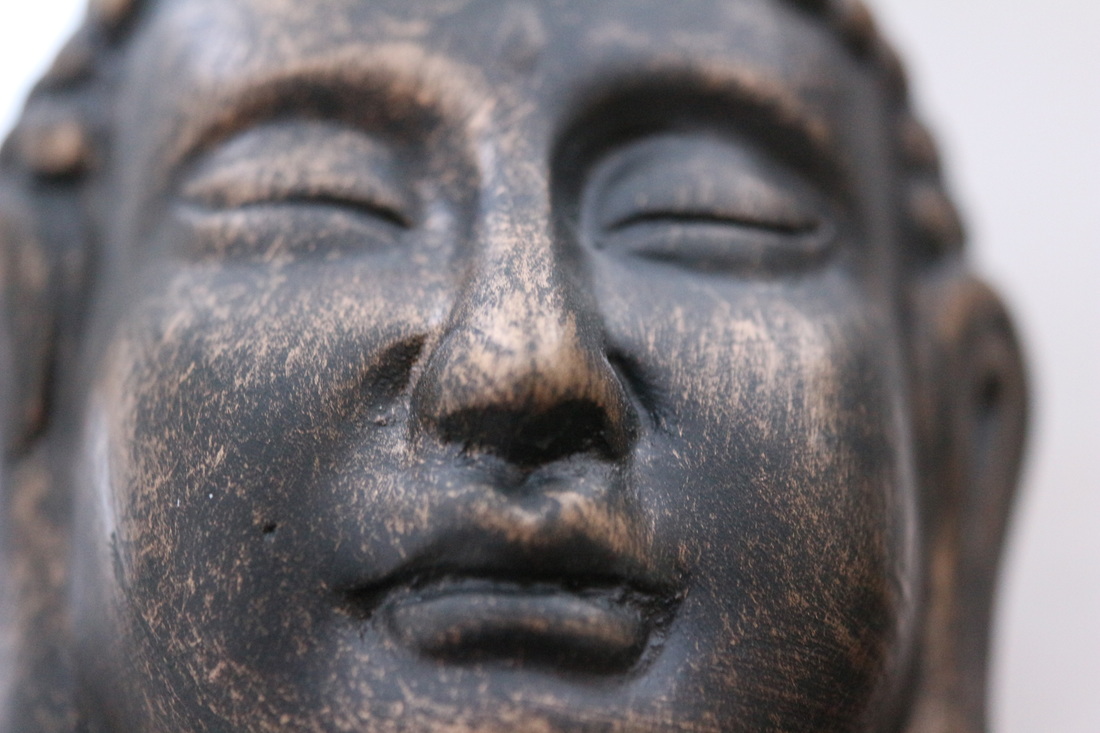
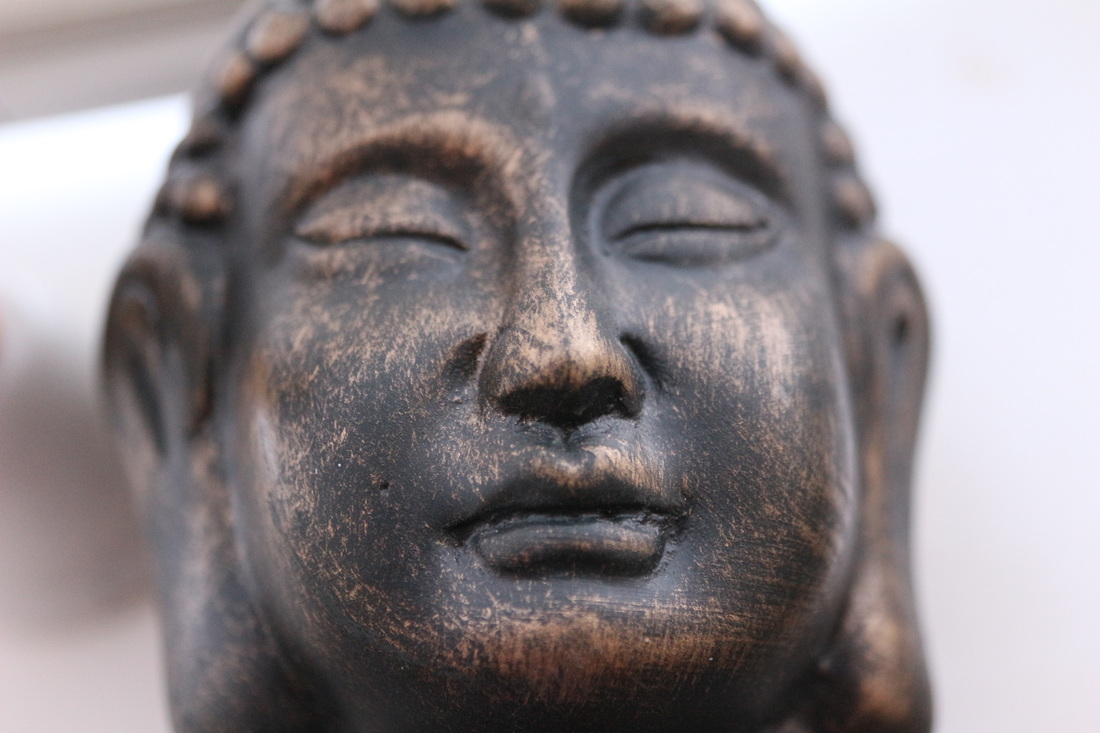
Photoshoot 9
For this photoshoot I took pictures of a angel statue and my goal for this photoshoot was to get the face of the angle to be in focus and also try and get the ball that the angel is holding to also be in focus but this was hard to achieve because of the macro lens attachment wasn't able to get both parts of the statue in focus. But what did go well is that when the camera's flash goes off the angle statue would have shadows and the ball that is being held would sparkle. Also what went well is that the background of the image is fully blurred out without having to use photoshop.
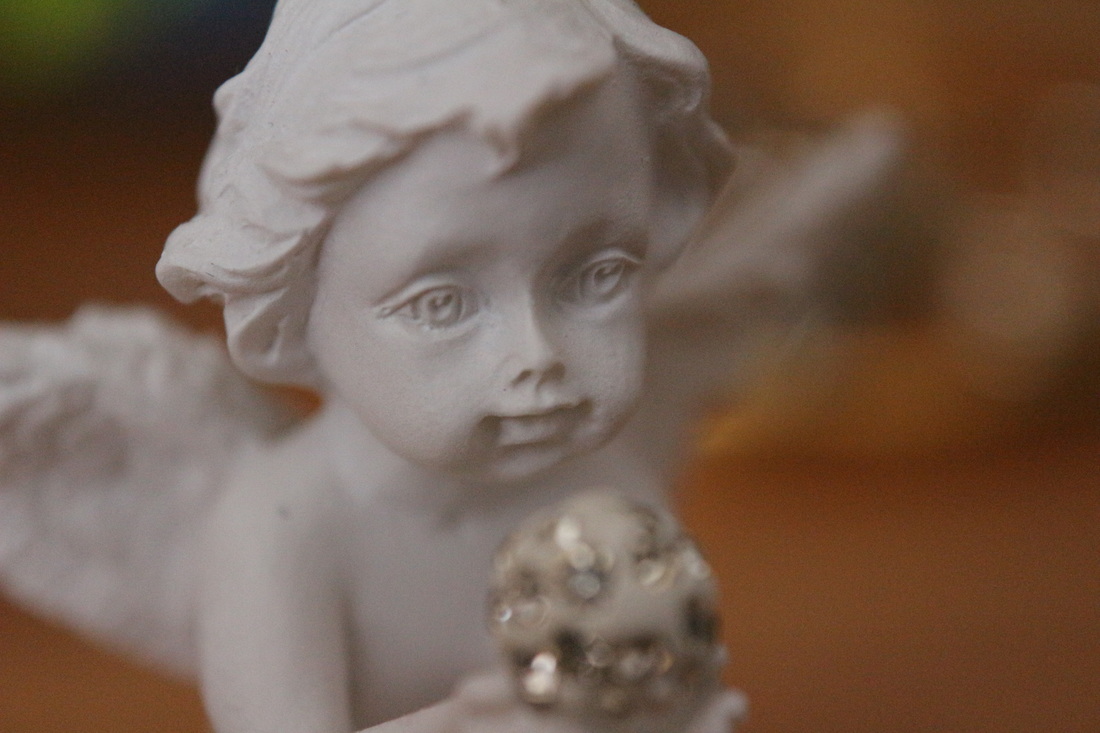
|
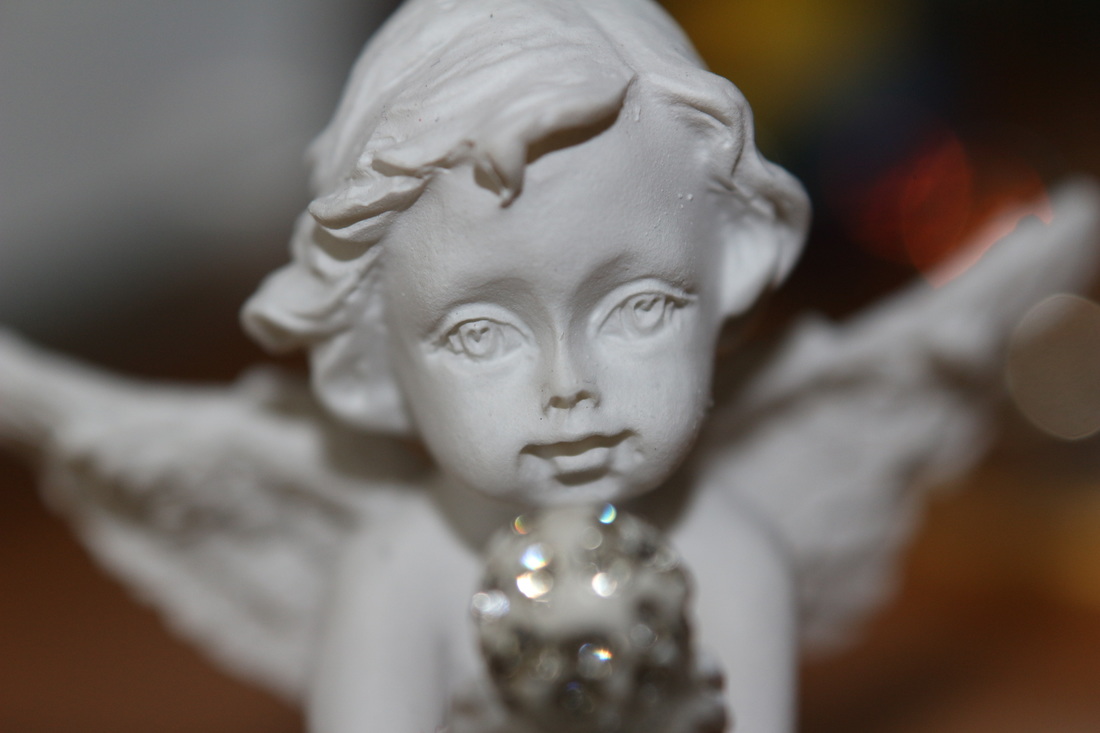
|
These two images are the strongest from the photoshoot because of in the first image it was taken from a side angel and with no flash but you can see the object and the background is still blurred. In the second image you can see the object from a front view and with the flash on the object stands out more from the background and you can see coloured circles in the background.
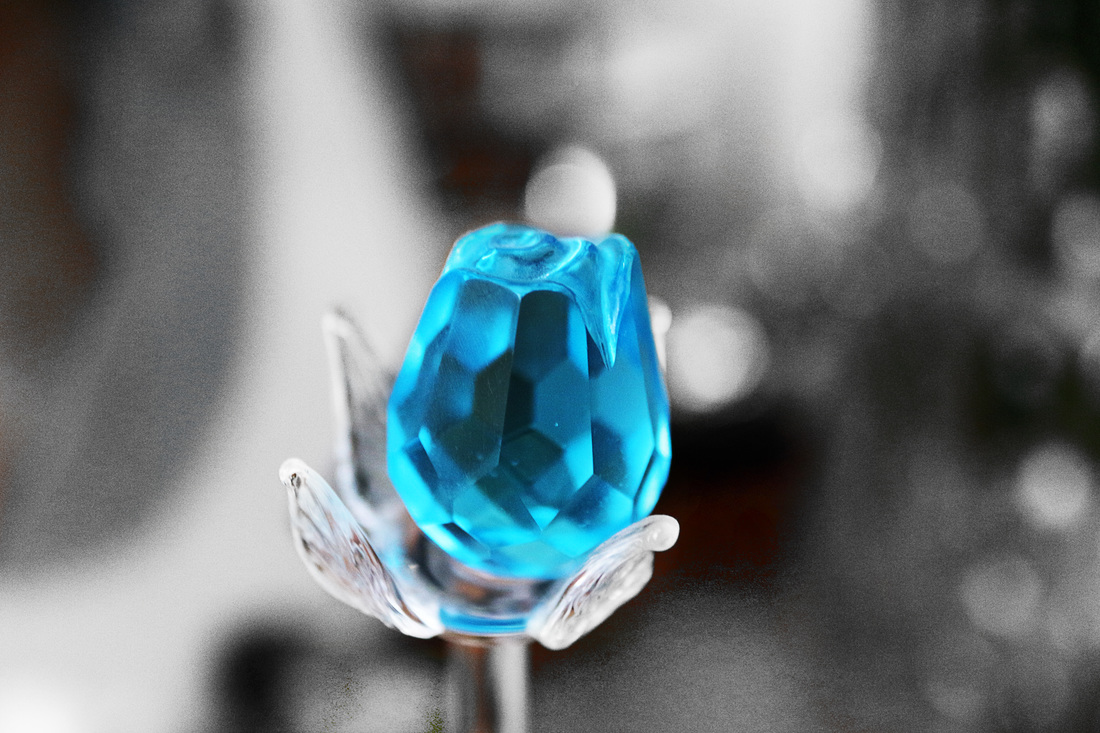
Photoshoot 10
For this photoshoot my goal was to get the blue part of the glass rose in focus and have the main attention to the rose and not the background and this was good because of the background is a plain colour but the background is completely blurred out without having to use photoshop. But it was hard to get the rose and the glass part of it in focus because of I had to keep the camera as still as I could. Because of the object being thin and small it was hard to keep the camera still and the be able to manual focus as well.

|
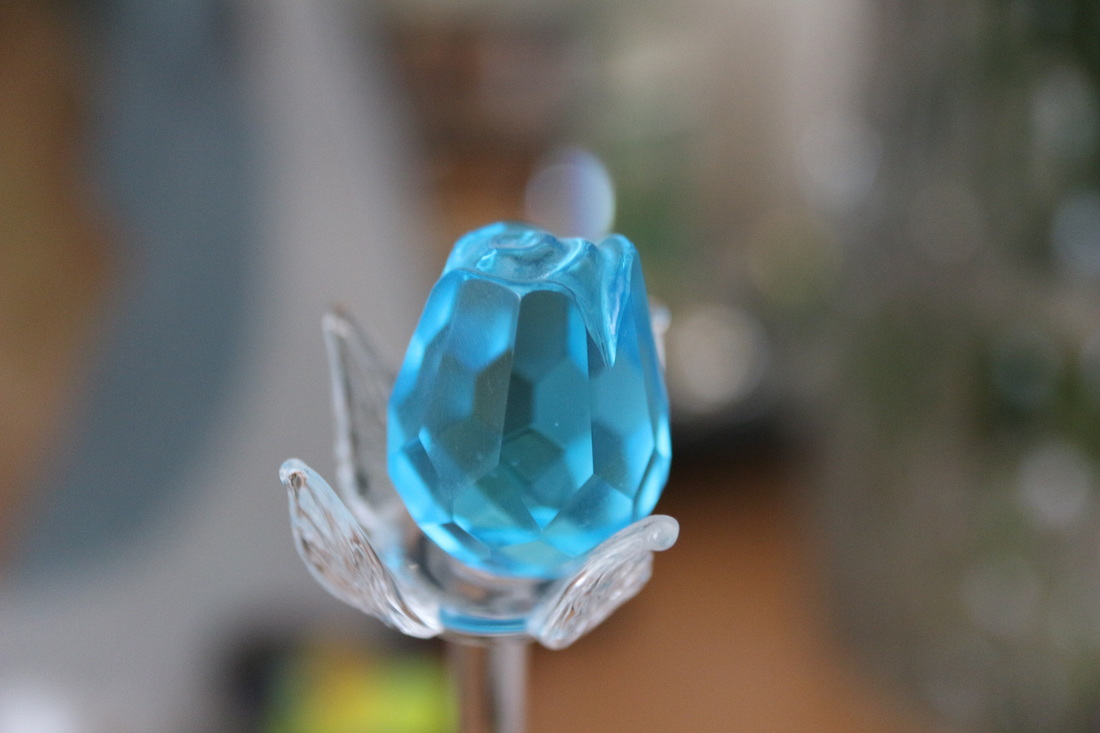
|
These two images are the strongest because of how the blue rose was captured from the same distance kind of but how changing the angle of the rose changes the rose a lot and you can see the difference.
Photoshoot 11
For this photoshoot I took pictures of a dogs paw and I think that this photoshoot went well because of I was able to capture the paw in detail and I was bale to get really close to it and you are able to see some particles of dirt in the paw but I was only able a limited amount of pictures of the dog paw because of the dog getting irritated of me taking pictures of their paw.
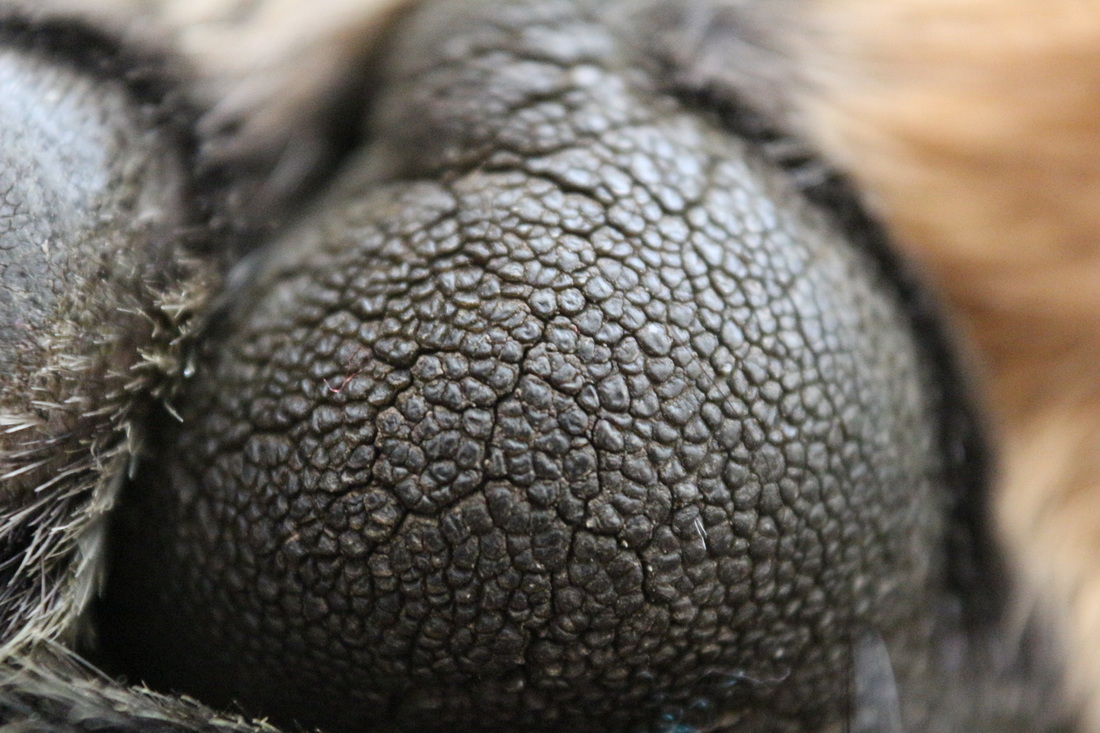
|
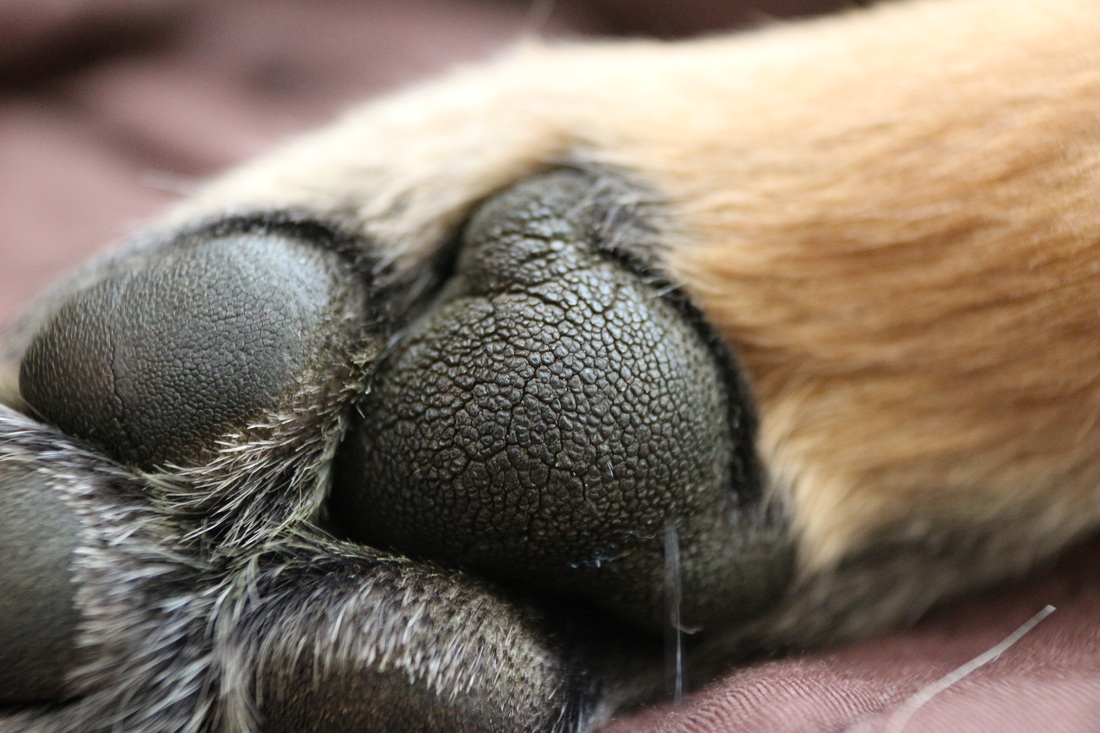
|
I think that these two images from the photoshoot are the strongest because of I was able to get the middle of the paws in focus and the outside of the paw slowly gets blurry and out of focus also that in both of the photos you are able to see the dirt in-between the paws. Also in both photos you are able to see the cracks in the paws and you can see the little hairs coming out of the edges of the paws.
