http://www.photosincolor.com/10-minute-tutorial-world-in-your-hands/
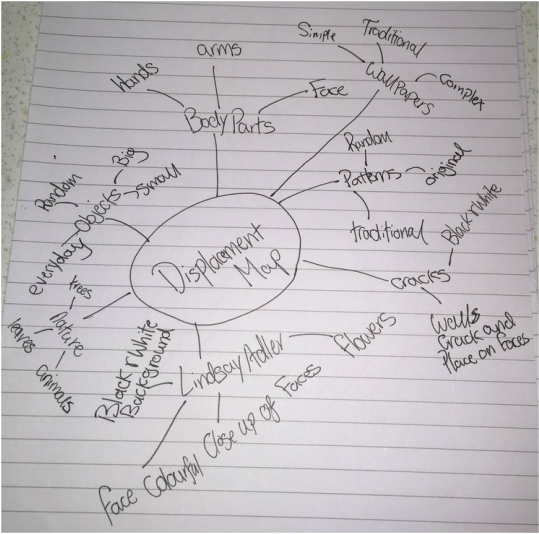
Brainstorm/Draft Sketch
|

|
Lindsay Adler
|
Lindsay Adler is a fashion photographer that is in New York and takes very fascinating photos of people dressed up or photoshopped most of Lindsay Adler's photos have a lot of colour and surreal things going on in her photos. Lindsay Adler has a few displacement map photos that she has taken and on the photos they have different flowers on them and have different patterns and the photos have a lot of colour in them.
|
|

|
|
|
I like this image because of how the image is placed over the models face and is also in the models eye's also what is good about this photo is that how the photographer didn't take this photo on a plain background and how they just blurred the background.
|
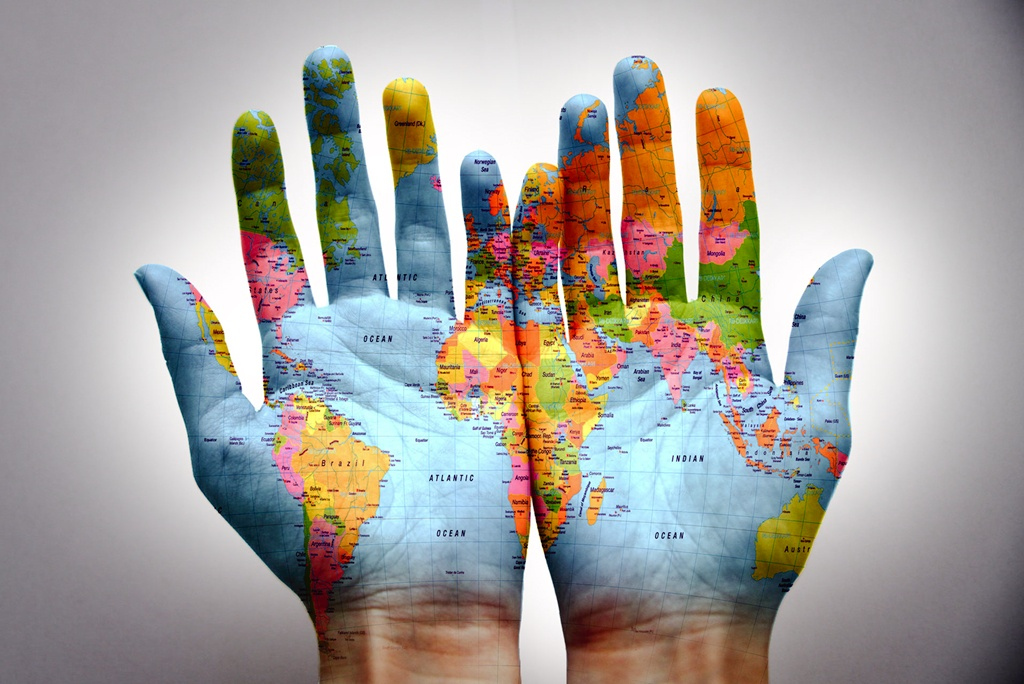
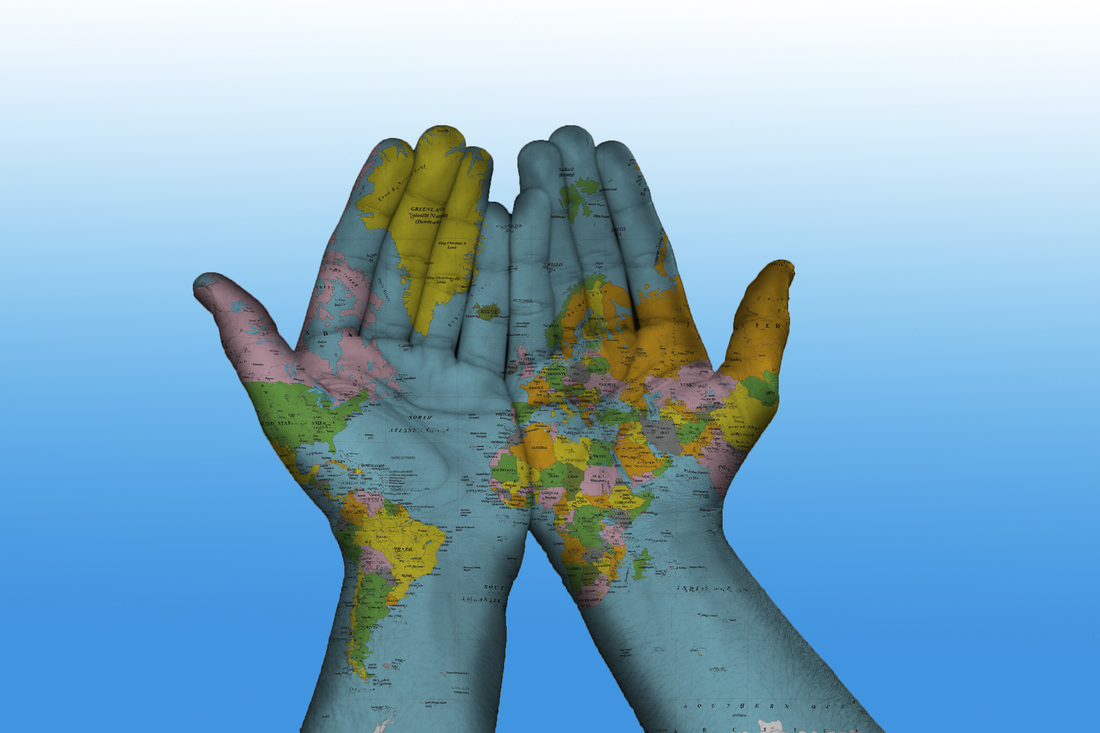
I like this image because of how the map is in the models hands and makes the viewer think that the whole world is inside your hands a also what else i like is that how colorful the image is and how you are still able to see the models wrinkles and how the map is adjusted to the models hands.
|

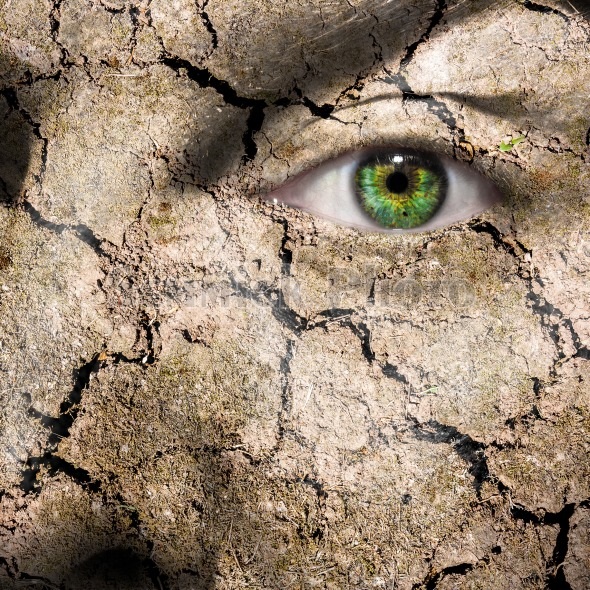
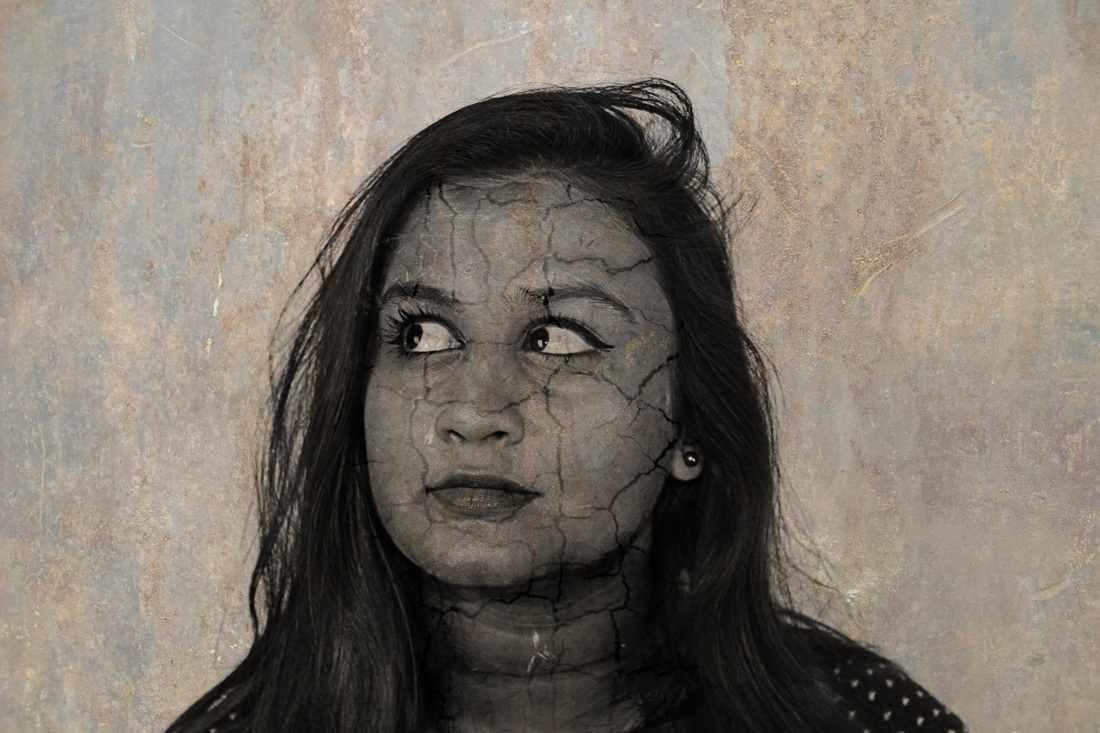
I like this image because of the way the photographer has taken a close up image and has put cracks from a wall on to the models face so it looks like the models face is falling off and the photographer has made the image black and white to give it a more dramatic effect and to make the image more serious.
|

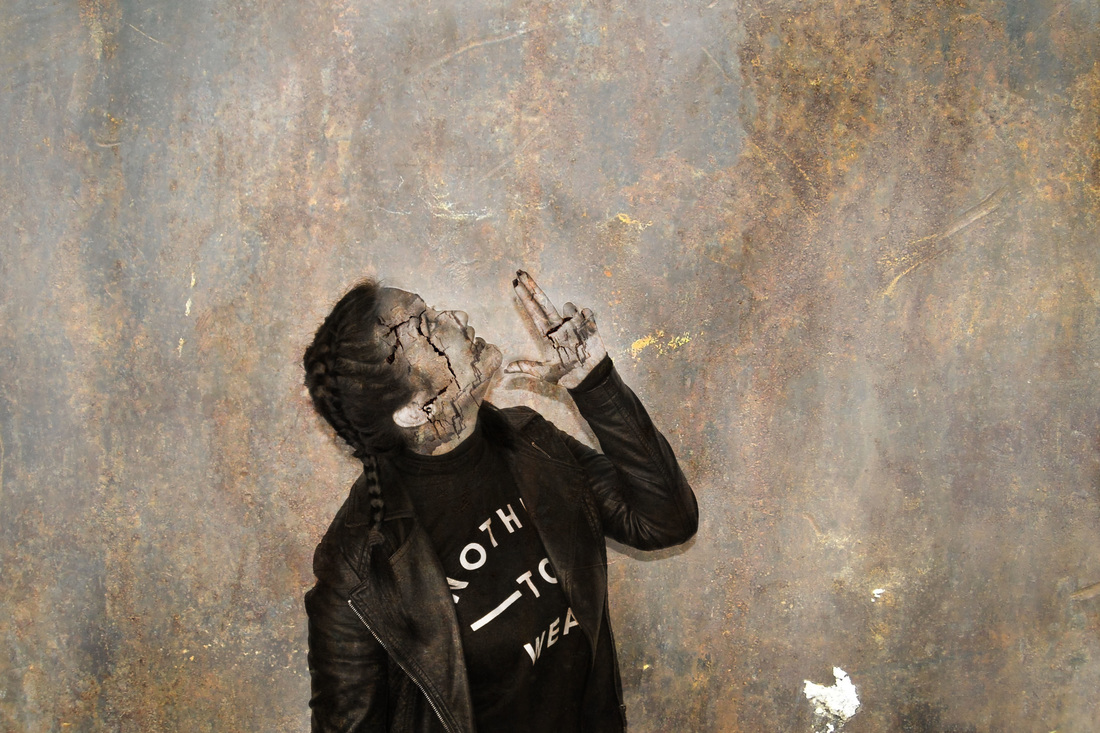
This image is the same as the image on the right but the difference of the two images are that this image has pieces of the models face already fallen off and that this image is in colour so the viewer can tell that pieces has fallen off and what is under the models skin.
|
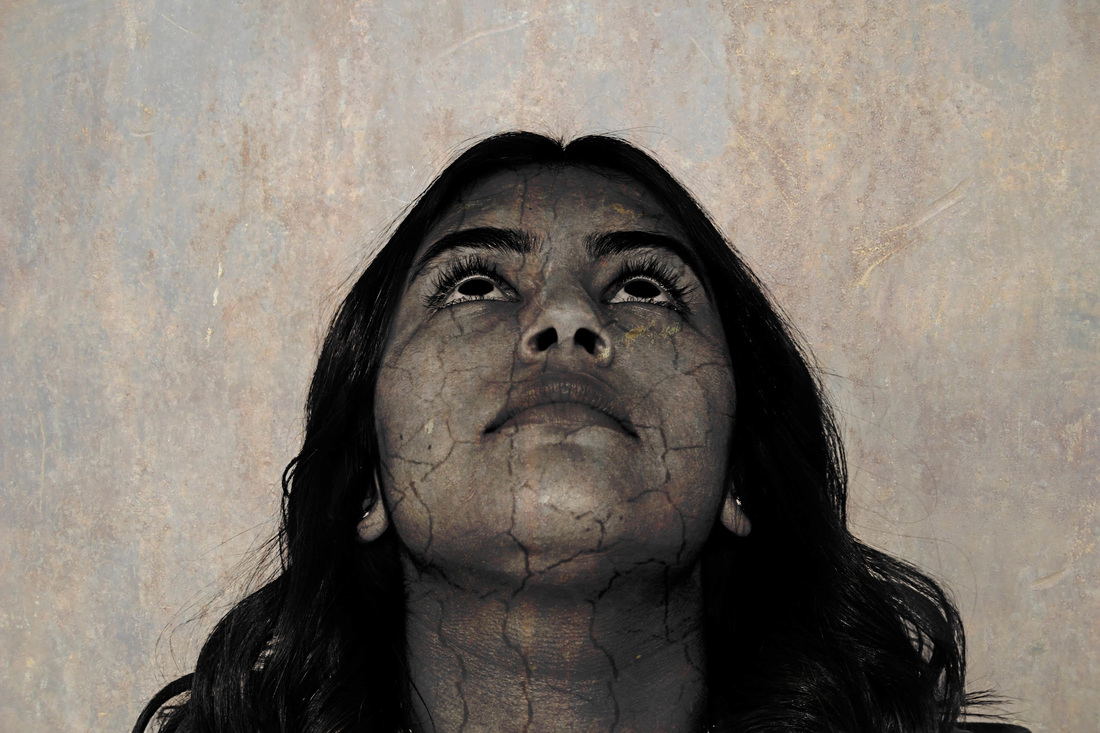
This image is good because of the way the editor has left the eye the way it is and how the model has a bright eye that has two different colours and the face of the model has been edited so that it has cracks on their face and the cracks are not blurry nor is the eye so everything is in focus.
Photoshop Tutorial
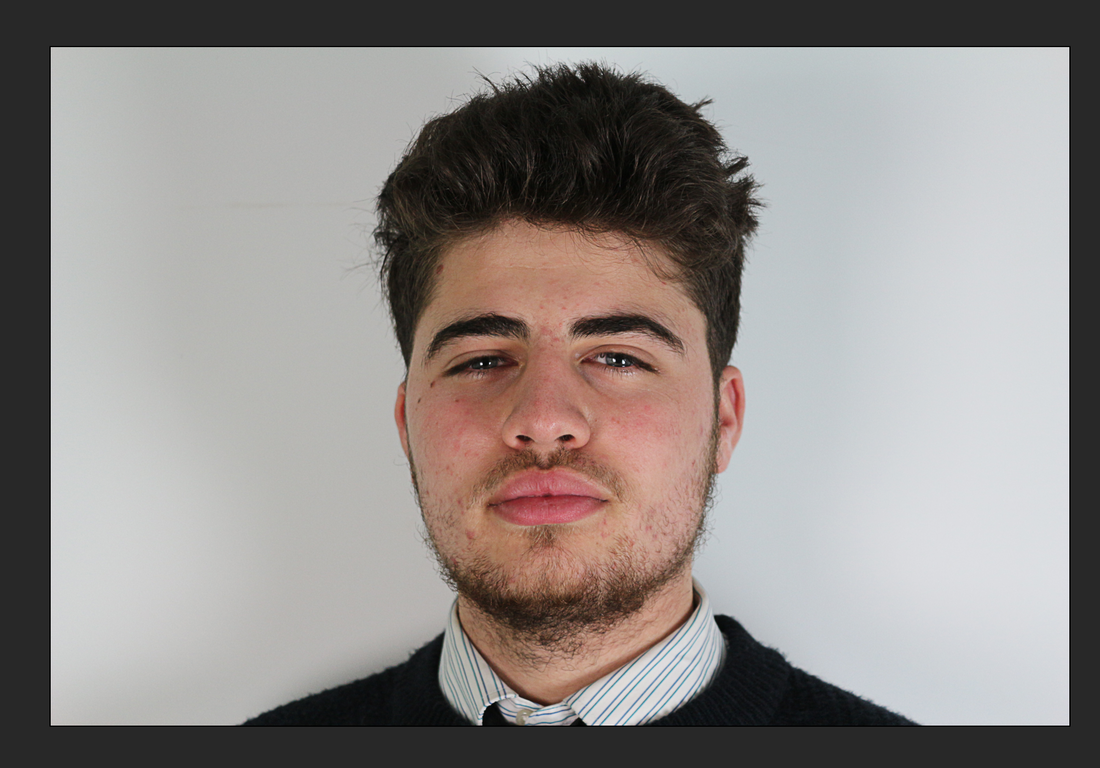
For the first step i'm going to use the high pass filter on my models face so that parts of his face stand out more and look more sharp and not as smooth.
|
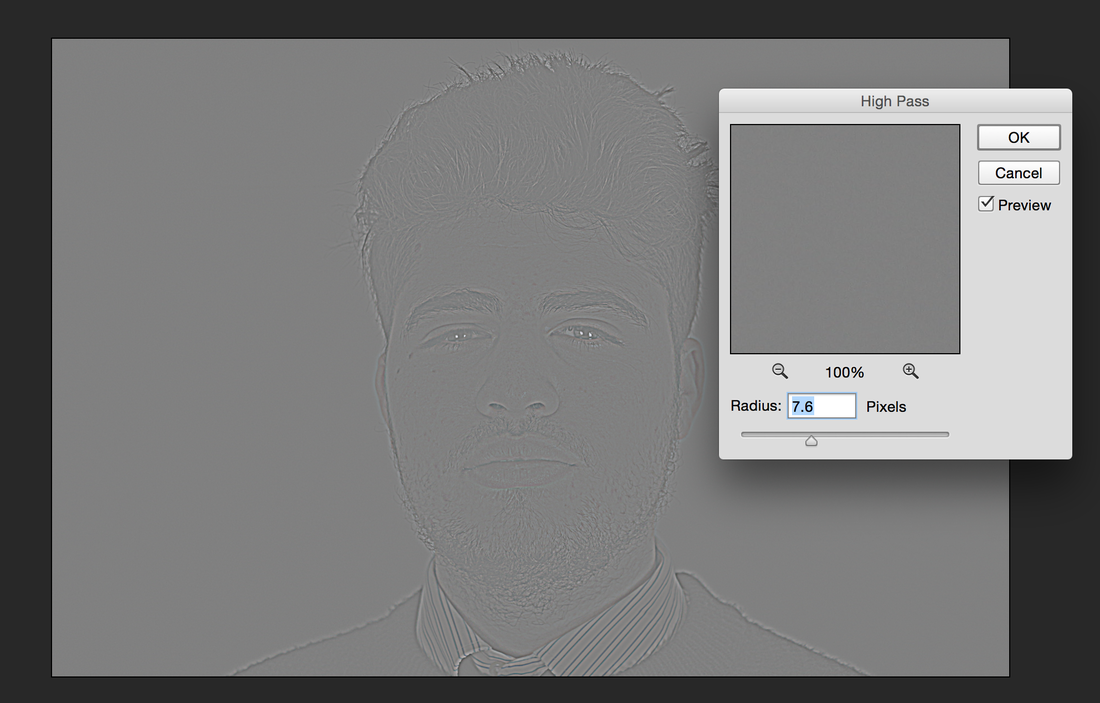
After I have duplicated the layer and choose the high pass filter option this screen shows me how sharp I want the image to be.
|

I choose the "overlay" layer option so that the image isn't all grey and that you can see the sharper image of the models face then I merge the two layers together so that there isn't too many layers on the screen.
|
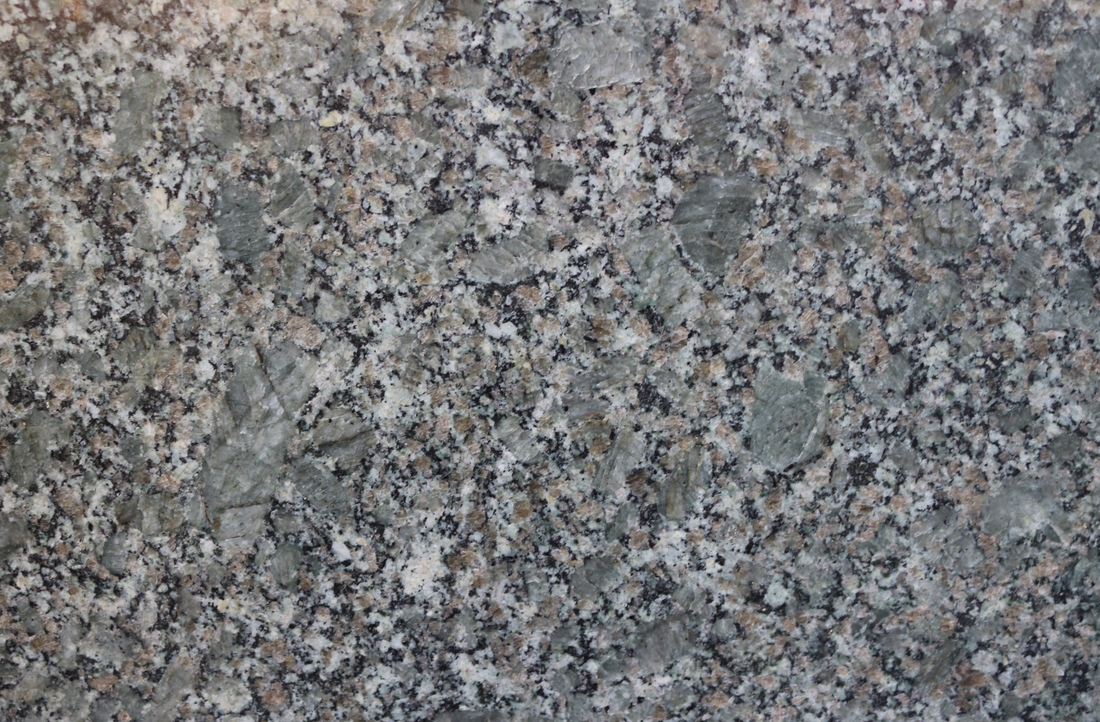
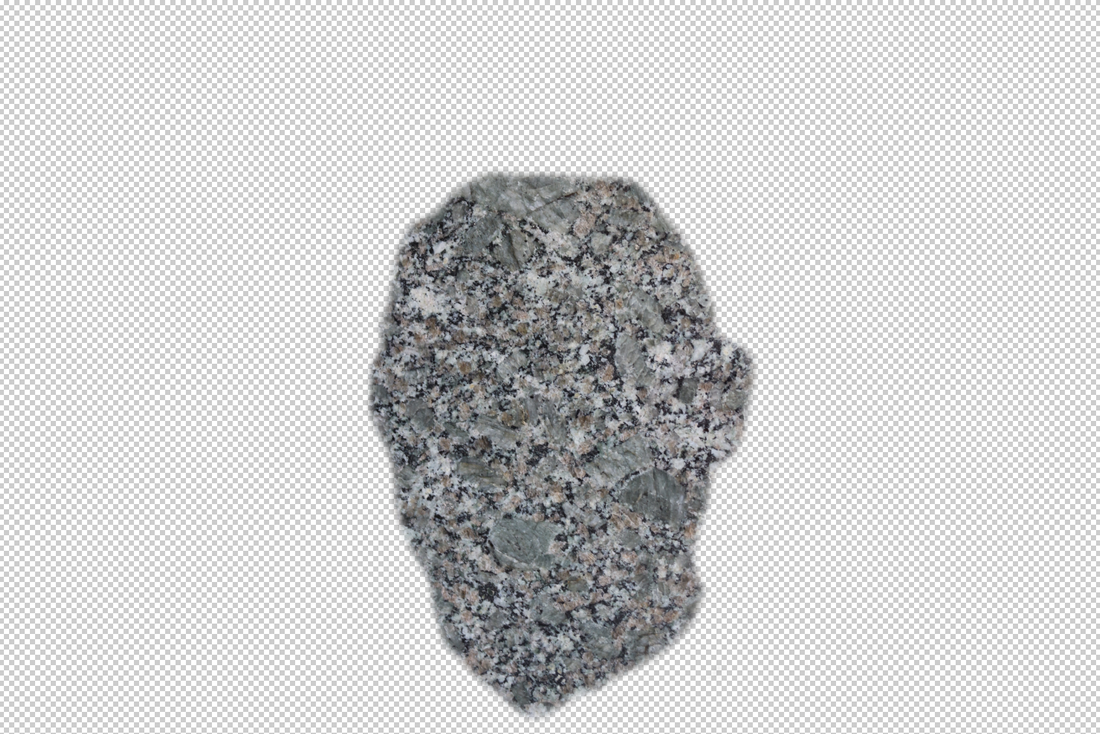
Then I get the patterned image that I want to displace on to the models face.
|
Then I place the image directly on to the models face.
|

Then I choose the "Overlay" option on the patterned image so that you are able to see the models face through the patterned image.
|
This is what the models face should look like when the "Overlay" option is choose
|
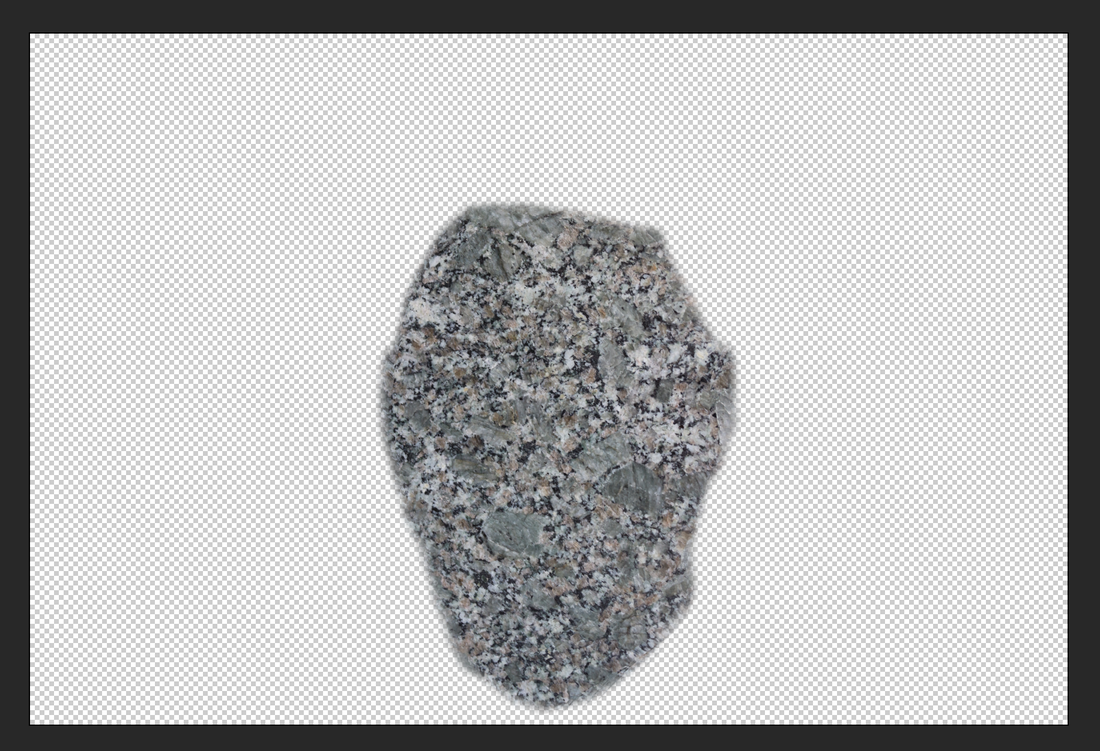
Then I use the eraser tool to outline the models face so that the pattern is just on the models face.
|
After outlining the models face with the pattern I save the models face as a .psd file so that when using the "Displace" filter I am able to choose the models face.
|

Then I choose the "Displace" filter so that the pattern shapes to the models face and so that the pattern doesn't look pasted on.
|
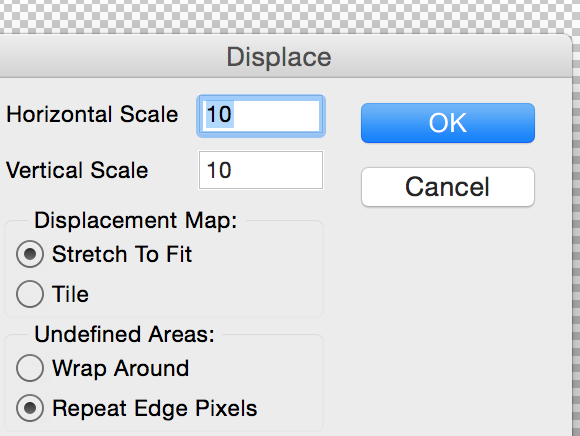
This screen shows how much you want the pattern to shape to the models face.
|
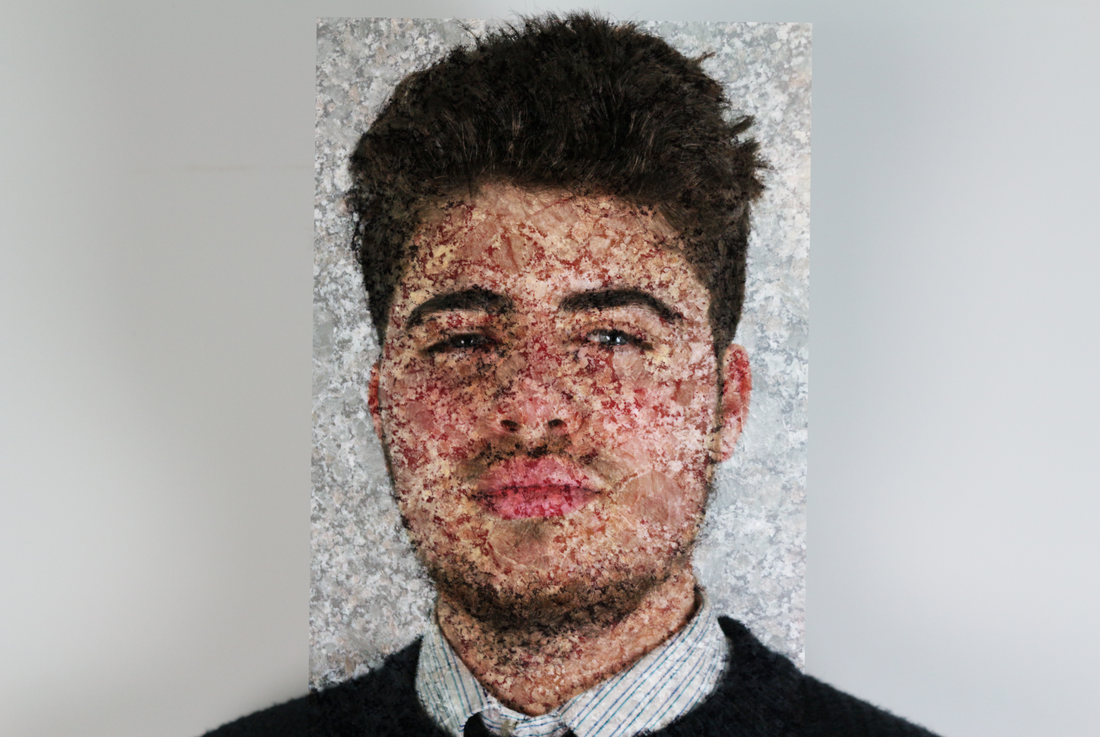
This is what the pattern looks like after the "Displace" filter has taken effect to the pattern and the models face.
|

This is what the pattern looks like on the models face after the pattern has been displaced.
|

Then I dodge the background of the model so that the grey background is brighter and looks whiter.
|

Then I use the clone stamp tool to remove the shirt and jumper off the model so that only the head is showing.
|

Photoshoot 1
With this photoshoot i took pictures of their hands so i could experiment with putting other images on their hands and so i could see what images work best. What i could of done to make this photoshoot better is that i could of taken the photos in front of a black or white background so it would of made it easier to edit on photoshop.
Edited
This edited photo i think went well because i was able to place the map over the models hands and was able to make the map look like it is part of the models hands but what made the hands look out of place is that i had to cut the background out and i tried to see what i could put behind the hands and what i decided to do is put a blue background behind the hands.
Photoshoot 2
For this photoshoot i got my model to stand against a white background and got them to make different pose's each time so i had more to work with when i got to edit them in photoshop i got them to stand against a white background instead of the black background is because i wanted to see if it was easier to edit their hair because usually it is harder to edit when they have black hair and they are standing against a white background but when i was editing on a black background it would be harder to see where their hair ends. What went good with this photoshoot is that all of the pictures are in focus and that i placed the lighting on both sides so the whole face can be seen.
Photoshoot 3
For this photoshoot I got my model to make a lot of different poses so I had more than just one stance to edit and some of the photos the model is smiling and some of them the model has a serious face so that I could choose from a happy stance if the image that was going on top of the model was bright and colourful i could choose a happy stance and if the colours are dark and gloomy I could choose a serious stance.
For this edited photo I choose a happy stance to see what the final product would look like and i didn't choose a close up picture so that also see how the cracks looked when they were on the model i used the "Displace" effect to make the cracks look like they were from the models face and I used the burn tool to make the background darker because when I first used the "Overlay" function it made the background too bright. I also used the clone stamp tool to make some more cracks on the hand of the model.
Photoshoot 4
For this photoshoot I did close-up pictures of my model so that when I edited the cracks on the face of the model they would look bigger and so that the viewer can see more detail in the cracks and I got my model to look to the side so when I edit the cracks onto the models face I could also put it on their eyes.
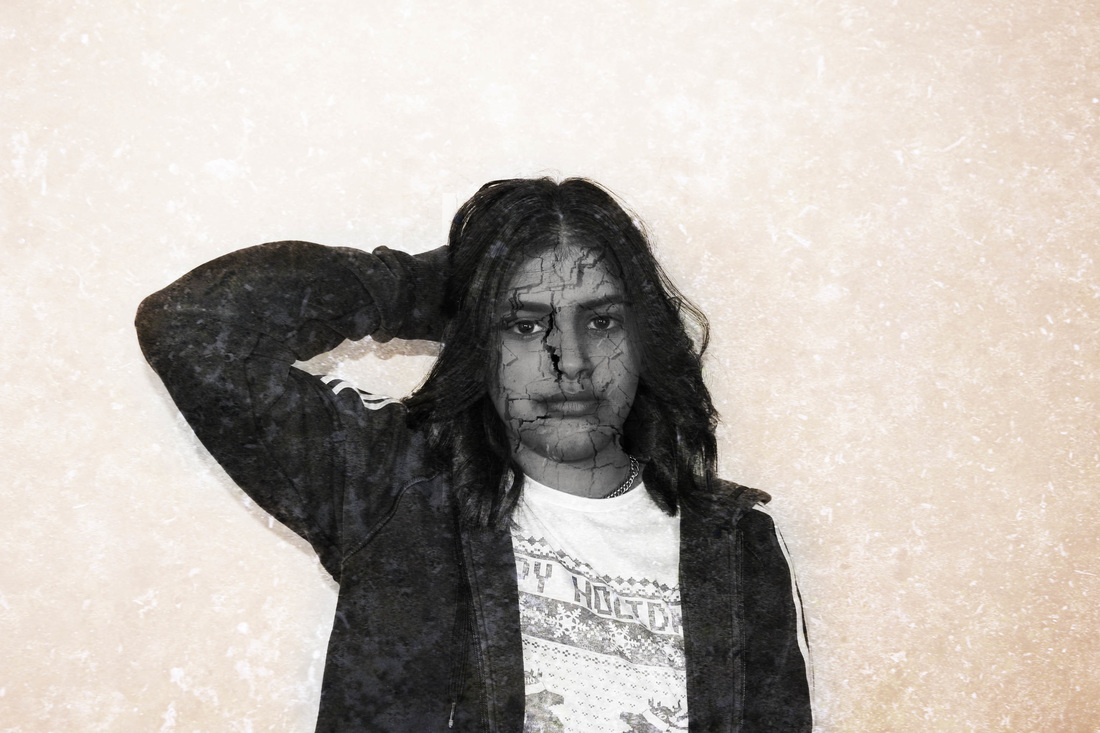
This edited image was good because I was able to test with another cracks picture so i could see what it would look like on the models face and I used the "Displace" effect to make the cracks look like they belong on their face. I also used the clone stamp tool to make more cracks and place them on different places of their face I also make the face black and white so that the cracks had more detail on them.
Photoshoot 5
For this photoshoot I got my model to do different facial expressions so that when I edit the photos in Adobe Photoshop I have a lot of photos to work with and so that i'm not left to edit a few images. So I got my model so smile and to make a serious face with a lot of different poses so that I could see what it looks like.
This edit went well because i was able to place a map over my models face and make it look like it is part of his face and i was also successful of keeping the map over the models face and i was able to make my picture look like the picture that is on my website but what i did different was that instead of placing the map on the models hands i was able to place the map on the models face and make it look more realistic and surreal to the viewer. This edited photo looks a bit more professional because of the way i got my model to stand and i made the background a bit grey so it looks like my model is supposed to be there.
